Adding, Editing, Deleting, Releasing, Reverting & Printing Transfer Out (TO) in Ginesys Web
TO (Transfer Out) is raised by the seller in Consignment mode after packing the goods to be delivered to the customer. The Invoice bears all the details of the transaction with the total amount to be debited to the Supplier. If Transfer Out is not created, then the Customer account will not reflect the sale amount in its ledger. This article describes the process of manage Transfer Out in Ginesys Web module.
Prerequisites
- The users' role must have access to the Add app operation in the Transfer Out feature in Sales & Distribution - Operation - Transfer through Roles in Ginesys Web - Admin - Security.
- Document Numbering Scheme must be present for the module.
- The masters must be present - Item, Customer, Term etc.
Step-by-step guide
Go to Ginesys Web > Sales and Distribution > Operations > Transfer > Transfer Out.
Transfer Out module will open.
All the previously created Transfer Out will be listed here.
Click on Add button.
Transfer Out window will open.
- You will get group of icons at the top right corner of the window.

The icons name from left to right are - Expand All, Collapse All, Print Document Report, Attachments, Clear Form and Open Side Panel.Expand All: Clicking on this icon, all the sections will be Expand if they are collapsed.
Collapse All: Clicking on this icon, all the sections will be Closed if they are expanded.
- Print Document Report: Clicking on the Down Arrow beside this icon, you will get Print Preference option with already created Report File Template. This option is used to print document.
- Attachments: You can Upload some required documents from this option.
- Clear Form: Clicking on this icon, you can Clear all the data already entered.
- Open Side Panel: Clicking on this, you will get the details of the current Transfer Out as follows:
- Document Summary: In this section you will get the details of Selected Items, Sale Type, Owner Site, Modified byetc.
- Customer Details: You will get the Selected Customer Details like Address, Contact Details, Tax Region, Credit Limit, Overdue Amount etc.
- Customer Statistic: This section describes the Delivered not Invoiced amount, Outstanding Amount, Last Invoice Date etc.
- You will get five sections - General, Additional, Quick San, Item Information, Logistic and Others.
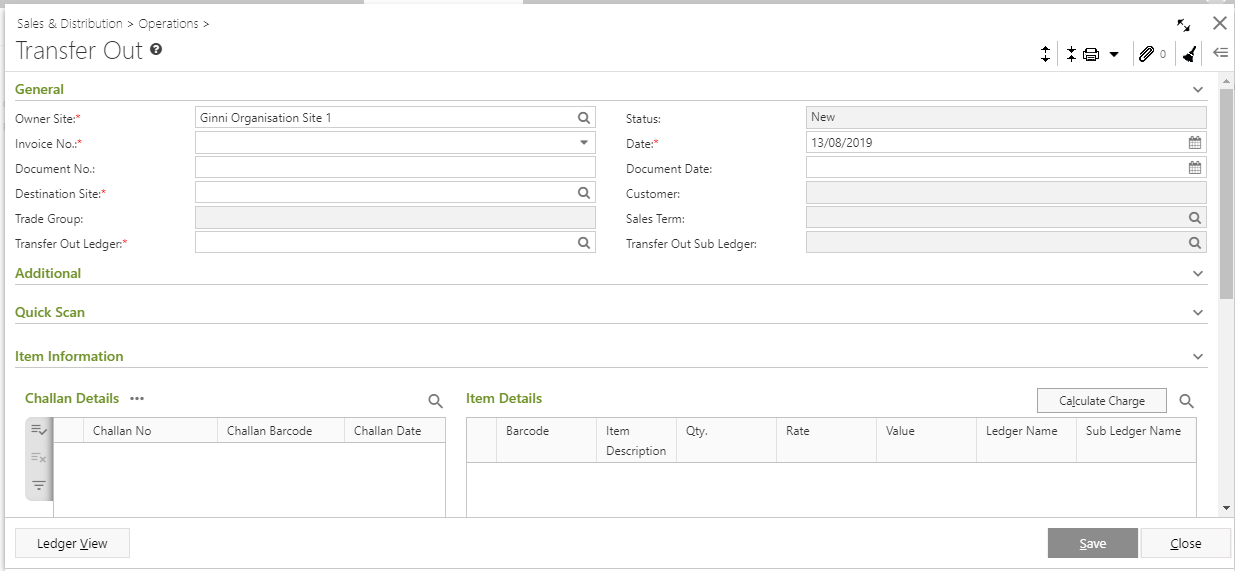
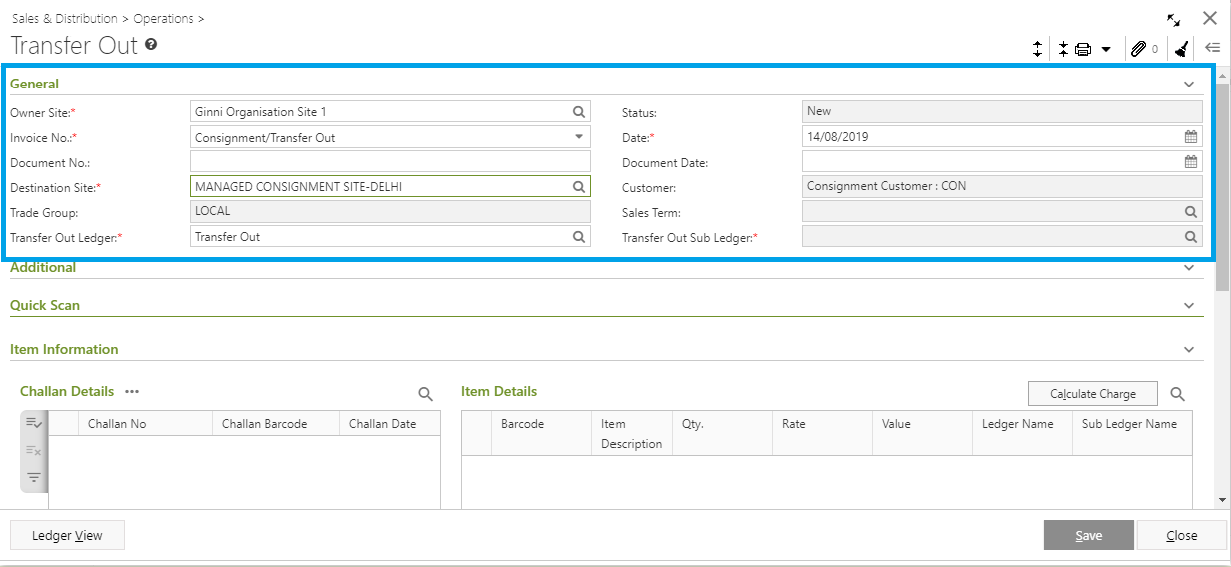
- General:
- Select the Owner Site (Mandatory Field) for which you want to create the Transfer Out.
- Select Invoice No. from the drop down list (Mandatory Field).
Select the Destination Site (Mandatory Field) from the Destination Site drop-down list.
Important - Information population on site selection
Trade Group, Sales Ledger, Status, Customer etc will be populated as per Destination Site selection. You can change the Transfer Out Ledger, Sales Term and Transfer Out Sub Ledger.
- System date will be populated in the Date field (Mandatory Field). You can change the date as per your requirement. You can only select the past date from the system date but not any future date.
- Additional:
All the fields like Transit/Transfer Ledger, Debtor Ledger, Transporter, Agent, Commission Rate etc. will be populated according to the selected Destination Site. You can change Transporter, Agent and Form Name from the respective window by clicking on the Search ( ) icon beside the field.
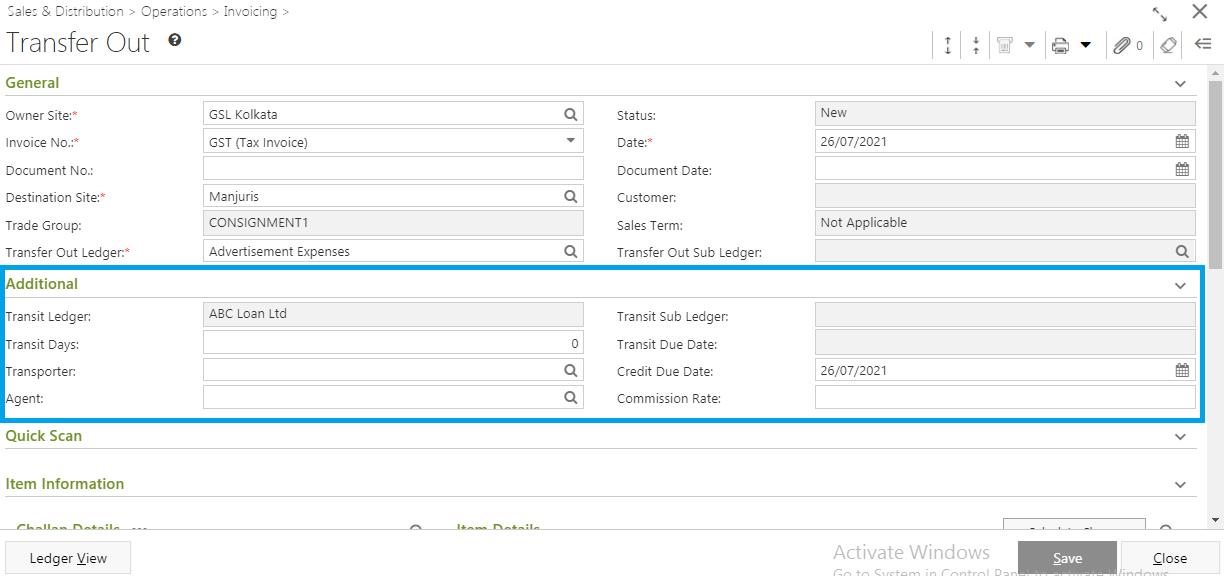
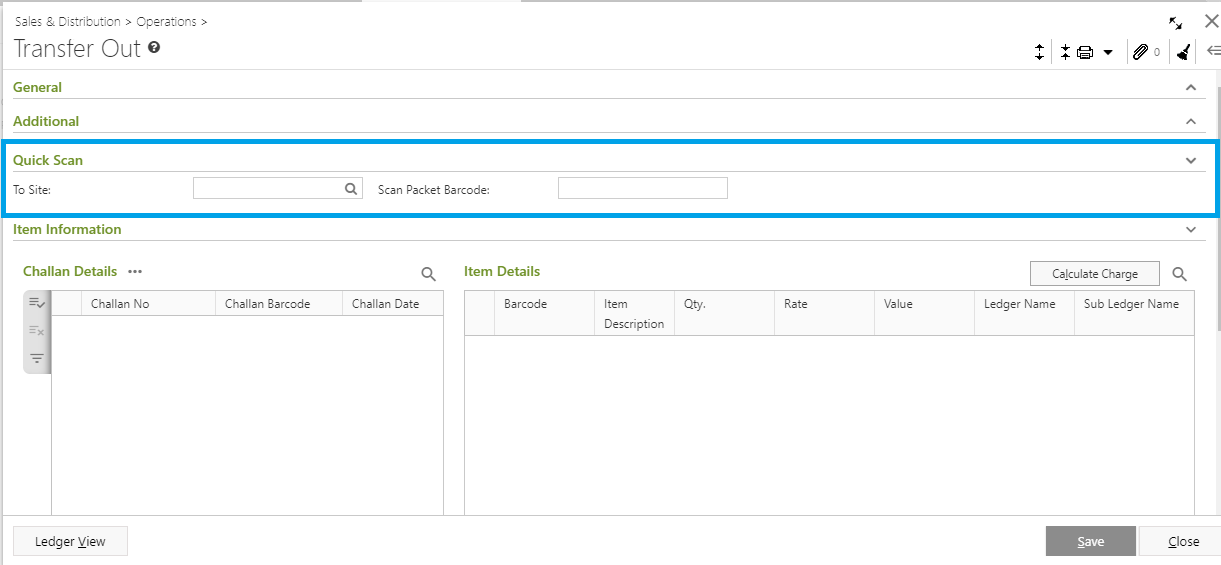
- Quick Scan: You can scan the Packet Barcode to select Delivery Challan quickly. After putting the Packet Barcode, the Delivery Challan and Item Details details will be populated in the Challan Details and Item Details section.
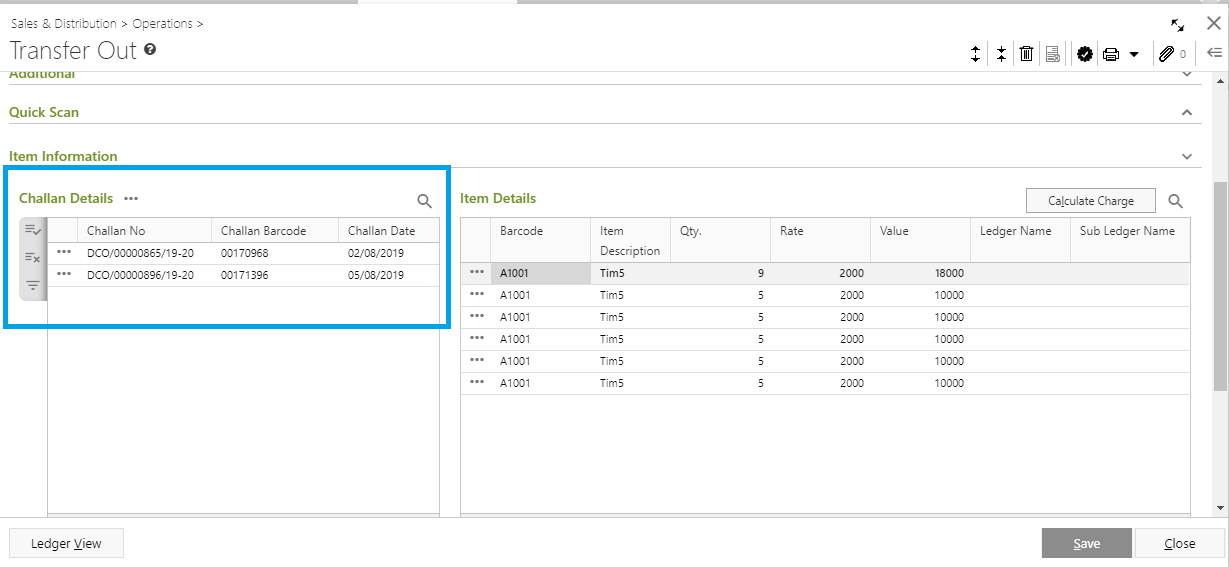
- Item Information: You will get two sub section in the Item Information section - a. Challan Details and b. Item Details.
- Challan Details: You will get two option to select challan - Search Challan and Import Barcode.
- Search Challan:
- Click on Search Challan option.
- Search Challan window will open.
- You will get two section - Search Criteria and Available Delivery Challan.
- Search Criteria:
- Put in the Search Criteria like - Agent, Date From, Date to, Transporter and Order No. You can put all the fields and only one field to search.
- Click on the Search button.
- Available Delivery Challan:
- The searched Delivery Challan will be populated in the Available Delivery Challan section with Challan Barcode, Agent, Transporter etc.
- Select the Delivery Challan you want to populate.
- Search Criteria:
- Click on the Populate button to populate the Delivery Challan in the Challan Details section with Challan No., Challan Barcode and Challan Date.
- Import Barcode: The Import Barcode feature allows to populate Delivery Challan using the .csv or .txt files.
- Import Barcode: The Import Barcode feature allows to populate Delivery Challan using the .csv or .txt files.
- Search Challan:
- Item Details: The items present in the selected Delivery Challan will be populated with Item Barcode, Qty., Rate, Value etc in the Item Details section.
- Challan Details: You will get two option to select challan - Search Challan and Import Barcode.
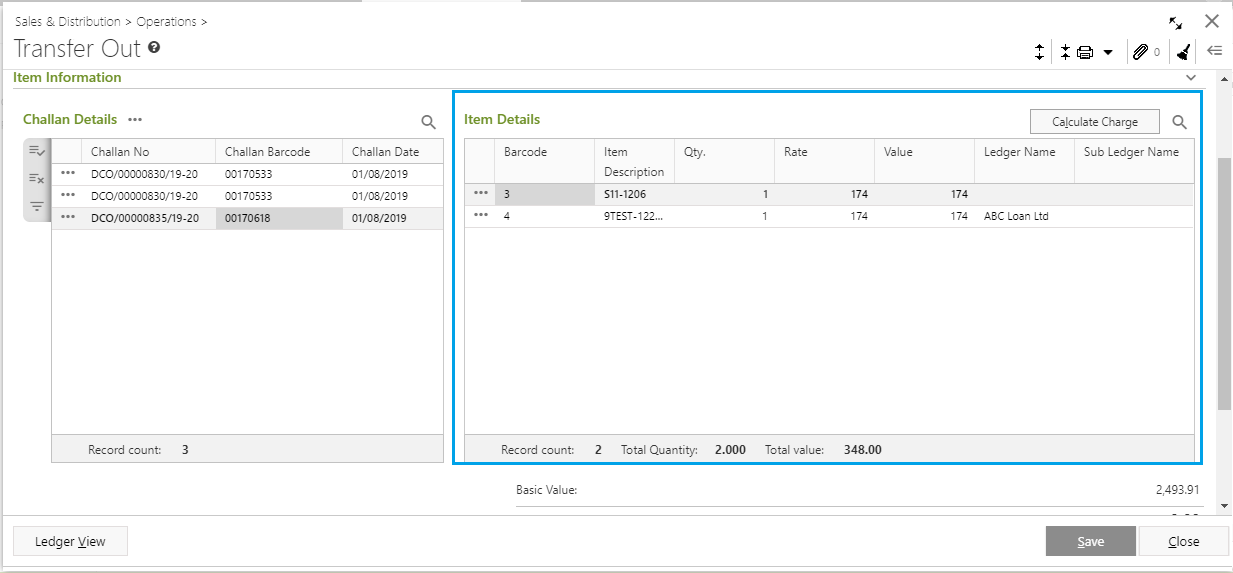
Click on the Calculate Charge button to calculate the charges:
Note:
- If the selected Delivery challan belong to single Sales Order, then
- Sales Term to be populated from Sales Order.
- Item level charge will get populated as specified in the Sales Order.
- Document level charge will get populated as specified in the Sales Order.
- If the selected Delivery challan belong to more than one Sales Order, then
- Sales Term to be retained as per default hierarchy from Destination site.
- Item level charge will get populated as selected Sales Term.
- Document level charge will get populated as selected Sales Term.
If the selected Delivery Challan are from Adhoc and single sales order, then
- Sales Term to be populated from Sales Order.
- Item level charge will get populated as specified in the Sales Term.
- Document level charge will get populated as specified in the Sales Term.
- If the selected Delivery challan belong to single Sales Order, then
- User Defined Fields: There are various User Defined Fields - Memo, Num, Date etc, present in Transfer Out.
- Logistics: Logistic details will be populated as per selected Destination Site.
- Others: You can put in the Remarks for the Transfer Out in Others section.
Click on the Save button to generate the Transfer Out and you will get a message - "Transfer No.<Transfer Out No.> saved successfully..."
Note: You will get a Ledger View button at the left bottom corner of the window. You will get the details ledger view of the Transfer Out.
Prerequisites
- The users' role must have access to the Edit app operation in the Transfer Out feature in Sales & Distribution - Operation - Transfer through Roles in Ginesys Web - Admin - Security.
- Transfer Out must be created and Un-posted.
Step-by-step guide
- Go to Ginesys Web > Sales and Distribution > Operations > Transfer > Transfer Out.
- Transfer Out module will open.
- All the previously created Transfer Out will be listed.
- Select the Transfer Out you want to edit.
- You can use Filter to search particular Transfer Out(s).
- Go to Action > Edit.
- Transfer Out window will open.

- If you want to edit the Destination Site, you will get a message - "Please remove the selected Delivery Challan before changing the destination site". After removing the DC(s) you can change Destination Site.
- You can add or remove Delivery Challan. Delivery challan modification does not depend on the modification of Destination Site.
- The items will be modified as per modification of Delivery Challan.
Click on the Save button to save the modified Transfer Out
Information

You will get Delete, Cancel and Release icon in the Edit mode with others icons at the top right corner of the window.
Delete: You can Delete the Transfer Out from the Edit Mode by clicking on the Delete icon (
 ).
).Release: You can Release the Transfer Out from the Edit Mode by clicking on the Release icon (
 ).
).
Prerequisites
- The users' role must have access to the Delete app operation in the Transfer Out feature in Sales & Distribution - Operation - Transfer through Roles in Ginesys Web - Admin - Security.
- Transfer Out must be created and Un-posted.
- Transfer Out must not be released.
- Transfer Out must not be canceled.
Step-by-step guide
The steps are as follows:
- Go to Ginesys Web > Sales and Distribution > Operations > Transfer > Transfer Out
- Transfer Out module will open.
- All the previously created Transfer Out will be listed.
- Select the one Transfer Out you want to delete.
- You can use Filter to search particular Transfer Out(s).
- Go to Action > Delete.
- You will get a message - "Document once deleted cannot be retrieved. Do you want to delete this document?"
If you click on Yes, you will get a confirmation message "Transfer No. <Transfer Out No:> - Successfully deleted".
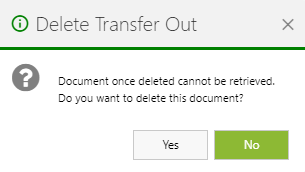
Note: If you want to delete a posted document, you will get a message - "Transfer No. <Transfer Out No:> - Cannot delete released document".
Prerequisites
- The users' role must have access to the Release app operation in the Transfer Out feature in Sales & Distribution - Operation - Transfer through Roles in Ginesys Web - Admin - Security.
- Transfer Out must be created and un-posted.
- Transfer Out must not be released.
- Transfer Out must not be canceled.
Step-by-step guide
The steps are as follows:
- Go to Ginesys Web > Sales and Distribution > Operations > Transfer > Transfer Out
- Transfer Out module will open.
- All the previously created Transfer Out will be listed.
- Select the one Transfer Out you want to delete.
- You can use Filter to search particular Transfer Out(s).
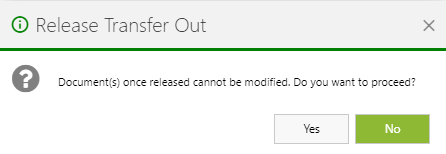
- Go to Action > Release.
- You will get a message - "Document(s) once released cannot be modified. Do you want to proceed?"
- If you click on Yes, you will get a confirmation message "Invoice No. <Transfer No:> - Released Successfully".
Prerequisites
- The users' role must have access to the Revert app operation in the Transfer Out feature in Sales & Distribution - Operation - Transfer through Roles in Ginesys Web - Admin - Security.
- Transfer Out must be created and posted.
- Transfer Out must not be released.
- Transfer Out must not be canceled.
- The site must be un-managed site.
Step-by-step guide
The steps are as follows:
- Go to Ginesys Web > Sales and Distribution > Operations > Transfer > Transfer Out
- Transfer Out module will open.
- All the previously created Transfer Out will be listed.
- Select the one Transfer Out you want to delete.
- You can use Filter to search particular Transfer Out(s).
- Go to Action > Revert.
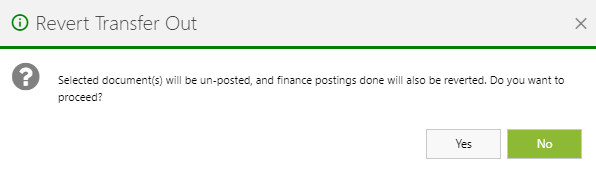
- You will get a message - "Selected document(s) will be un-posted, and finance postings done will also be reverted. Do you want to proceed?"
- If you click on Yes, you will get a confirmation message "Invoice No. <Transfer No:> - Reverted Successfully".