How to: Implement Digital Signature in Ginesys Mail Notification Service
Summary
Digital signatures are the most advanced and secure type of electronic signature. You can use them to comply with the most demanding legal and regulatory requirements because they provide the highest levels of assurance about each signer's identity and the authenticity of the documents they sign. Digital signatures is a certificate file in form of a .PFX file issued by an accredited Certificate Authority (CA) or Trust Service Provider (TSP) so when you digitally sign a document, your identity is uniquely linked to you, the signature is bound to the document with encryption, and everything can be verified using underlying technology known as Public Key Infrastructure (PKI).
Prerequisites for implementation of Digital Signature in Ginesys
- The certificate (.PFX) and password of the file collected from your licensed certificate vendor. You need to verify with the the vendor that the certificate has been issued by accredited Certifying Authority and must be intended for document signing. (see FAQ section)
- Functioning Ginesys Mail Notification utility. Basic configuration of Mail Notification utility should already be done and auto-emails are going. See How To: Configure Auto Email in GINESYS HO
Configuration Steps
Step 1: Install the certificate (.PFX) on Application Server
- Place the given Certificate file (.pfx) in a location on Ginesys HO application server.
- Double click on .PFX certificate and the Certificate Import Wizard will open.
- Select Local Machine and click on Next button.
- You may receive an User Account Control prompt, click on Yes to proceed.
- Browse the folder location where the file is kept and then click on Next button.
- Enter the password which was received from provider. No need to change default selections of Import options. Click on Next button.
- Select the option 'Place all certificates in the following store'. Browse and select Personal certificate store. Click Next.
- The window shows the settings which have been specified.
- Click on Finish button to completes the certificate instillation.
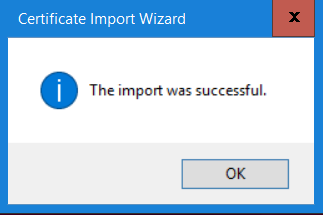
- On successful complete the message 'The import was successful.' should appear.
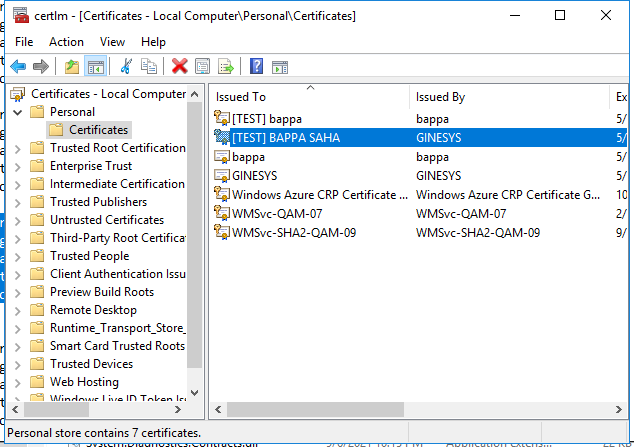
Step 2: Check the imported certificate and get the Serial Number
- Go to Run – Type certlm.msc and press enter.
- You may receive an User Account Control prompt, click on Yes to proceed.
- A window name with certlm will open.
- In the right section, open the directory Personal > Certificates.
- A list of certificates will appear and you should see the certificate you have imported.
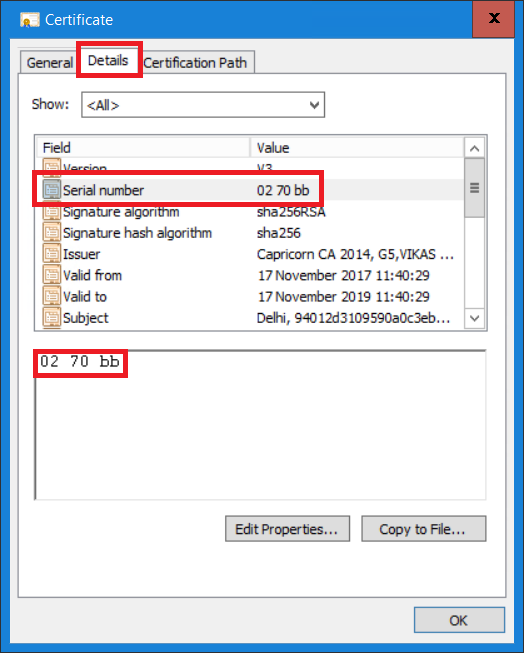
- Double click the certificate to open the certificate property. Go to Details tab.
- Select the Serial number field and note the serial number. The serial number will be used in next step. Remove the spaces if found.
Step 3: Implement the certificate in Ginesys: Configure SMTP Mailer JSON File
- In 'Shared' folder within the Ginesys application directory, you'll find a template JSON file, DigitalSignSettings.json. By default Windows doesn't display the known file extension. You may find the file as DigitalSignSettings.json only, without any extension. Make copy of that file and rename as DigitalSignSettings.json. Make sure the the spelling, The file name and extension must be exact the same as it is mentioned here.
Now open DigitalSignSettings.json
You have to update the content with appropriate values. There are different parameters mentioned in each line. Following tables will help you to understand the parameters and expected values.
Content of SMTPMailer JSON file
Initial content of DigitalSignSettings.json, copied from DigitalSignSettings.json
     [
        {
          "ReportName":"",
          "IsSignatureReq":0,
          "SerialNumber":"",
          "Location":"",
          "Password":"",
          "Reason":"",
          "ImagePath":"",
          "SignaturePage":""
       },
       {
          "ReportName":"",
          "IsSignatureReq":0,
          "SerialNumber":"",
          "Location":"",
          "Password":"",
          "Reason":"",
          "ImagePath":""
          "SignaturePage":""
        }
     ]
Information
- There are two sets of parameters mentioned in initial JSON file (Template). The lines within "{ }" denote a set. For each report you want to be digitally signed you have to fill a set.
- You can leave one set unfilled without mentioning any values. Ensure that the value for "IsSignatureReq" is set as '0' for unfilled set.
- You can add more sets as per requirement. Sets should be separated by comma (,).
- All values which contains text string and must be mentioned within double-quote, except the parameter "IsSignatureReq"which is a number field.
- There are two sets of parameters mentioned in initial JSON file (Template). The lines within "{ }" denote a set. For each report you want to be digitally signed you have to fill a set.
| Parameter | Description | Value | Mandatory | Remarks |
|---|---|---|---|---|
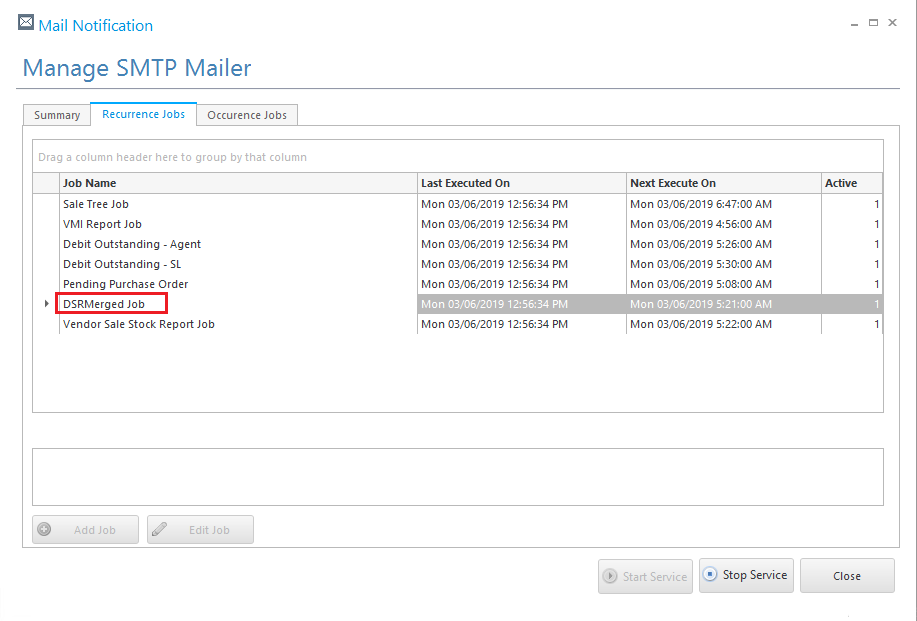
| ReportName | Name of the mailer job which sends the report you want to be signed. Job name is case insensitive. | Mention the Report Job name as mentioned in Ginesys 'Mail Notification' utility | Yes | See the Image 13 |
| IsSignatureReq | Parameter to enable the digital signature for a job | 0 = Digital Signature disabled 1 = Digital Signature enabled | Yes | This is a numeric value hence, shouldn't be mentioned within double-quote (") |
| SerialNumber | The serial number of the certificate (.pfx) file. This is the identification of the certificate you've installed | You can get from vendor or certlm.msc | Yes | Serial number what received from Certificate property (as mentioned in Step 2 ). Remove the spaces or any special characters when typing in JSON file |
| Location | Position of the signature on the report page | TL = Top-left TM = Top-Middle TR = Top-right BL = Bottom-left BM = Bottom-middle BR = Bottom-right | Yes | |
| Password | None | Blank | No | This parameter is not in use hence not required |
| Reason | Any remarks you want to include. Like, "Approved" or '"YourCompanyName" | No | ||
| ImagePath | None | Blank | No | This parameter is not in use hence not required |
| SignaturePage | On which page you want the signature to place in a multi-page report | F - First L - Last A - All If left blank, then the digital signature will be displayed in all pages by default. | No |
Example
An example of modified JSON. The signature is configured for 'DSR Merged Report'
     [
        {
          "ReportName":"DSRMerged Job",
          "IsSignatureReq":1,
          "SerialNumber":"0270bb",
          "Location":"BM",
          "Password":"",
          "Reason":"Approved",
          "ImagePath":"",
          "SignaturePage":"L"
       },
       {
          "ReportName":"",
          "IsSignatureReq":0,
          "SerialNumber":"",
          "Location":"",
          "Password":"",
          "Reason":"",
          "ImagePath":""
          "SignaturePage":"L"
        }
     ]
Screenshots
Installing Certificate:
Image 1
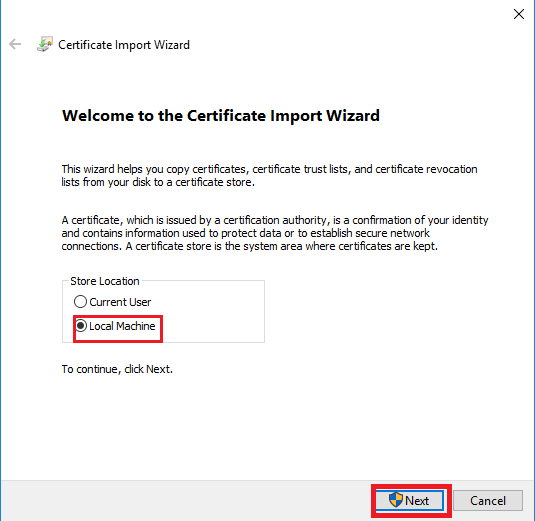
Image 2
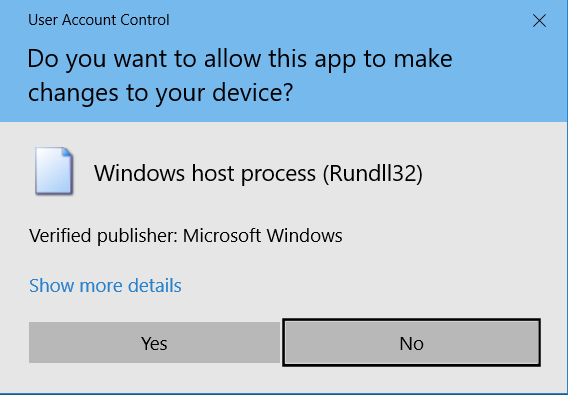
Image 3
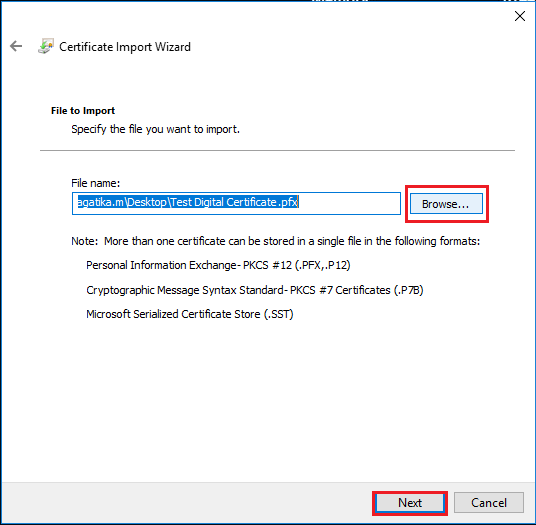
Image 4
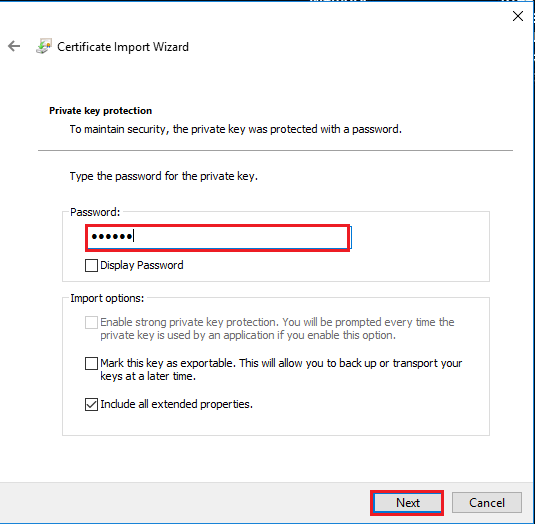
Image 5
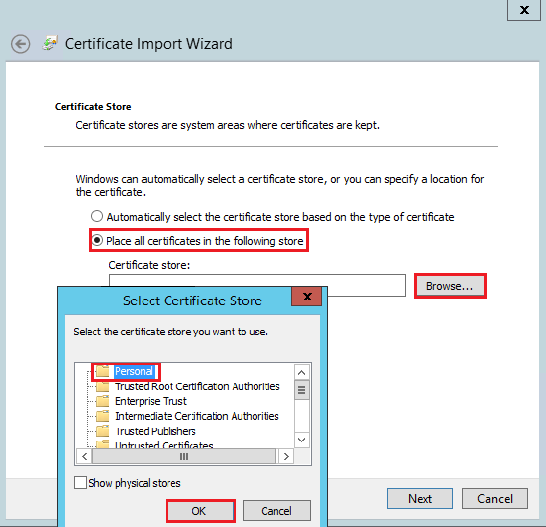
Image 6
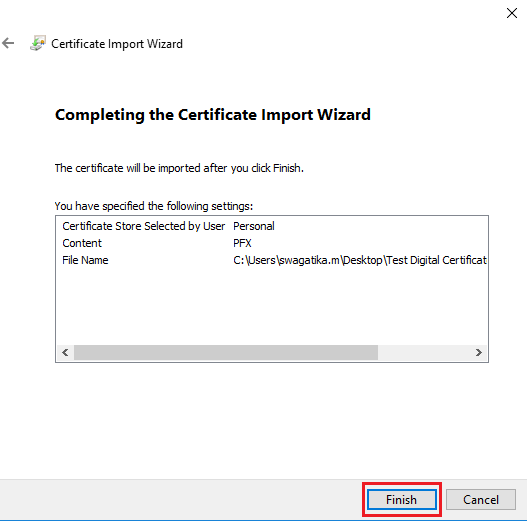
Image 7
Verifying Certificate and getting the serial number:
Image 8
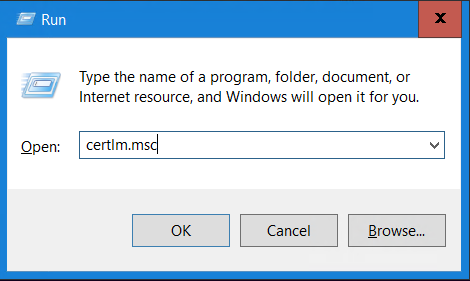
Image 9
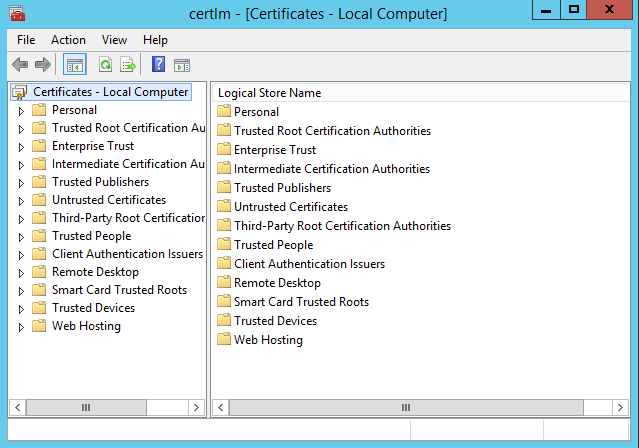
Image 10
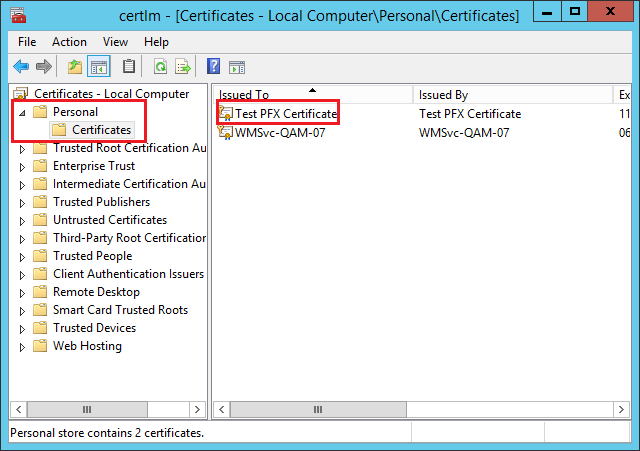
Image 11
DigitalSignSettings.json:
Image 12

Job Name:
Image 13
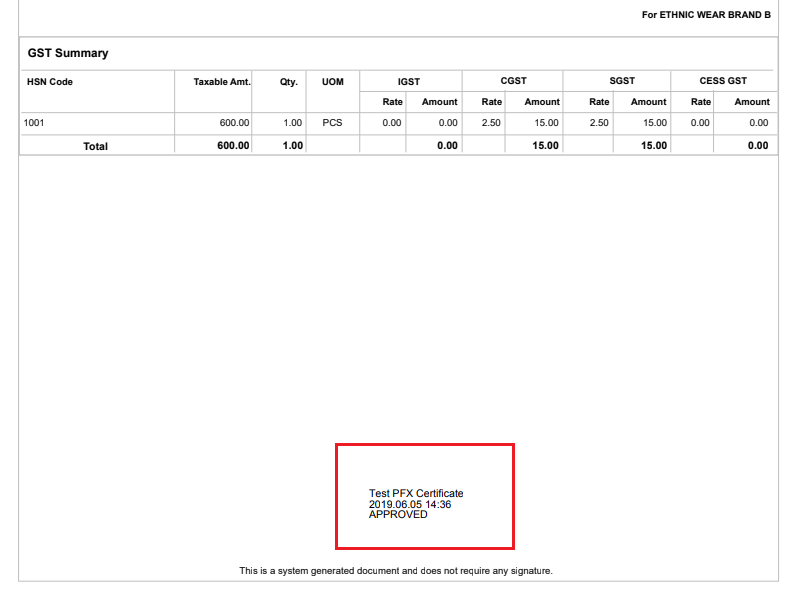
Sample signed report:
Image 14
Digital Signature Implementation for Ginesys Reports:
- Web report KIT related files taken from U:\atanu.g\FolderMgmt_18042022
- Copy all the files and paste these files to C:\GSL\GINESYS12\GinesysReport\FolderMgmt folder
- Sample file given with KIT C:\GSL\GINESYS12\GinesysReport\FolderMgmt folder\DigitalSignSettings.json
Modify the DigitalSignSettings.json file as per the requirement to print of DSC in reports (PDF format) into this .Json file and dictionary having like
{

   "ReportName":"Finance\\Documents\\#Sales Invoice(GST)#90",      -------------- This report name and path has to be change
   "IsSignatureReq":1,                                                                            --------------- 0 for don't print DSC and 1 for print DSC
   "SerialNumber":"4e 0a e3 82 ea b8 00 1e 5f 33 d4 a3 3e 6f 03 fc",   -------------- serial number of signature
   "Location":"BR",                                                                                  -------------- Print position  BR,BM,BL,TR,TM,TL
   "Reason":"Approved by GINESYS QA Team",                                    -------------  Details of DSC
}- Install . PFX file to the local system (this is DSC file ) with right click > Install
- Import .PFX to the local certificate 'Personal' folder
- Check the right section this imported DSC file name and double click on that install certificate and take serial number from this file.
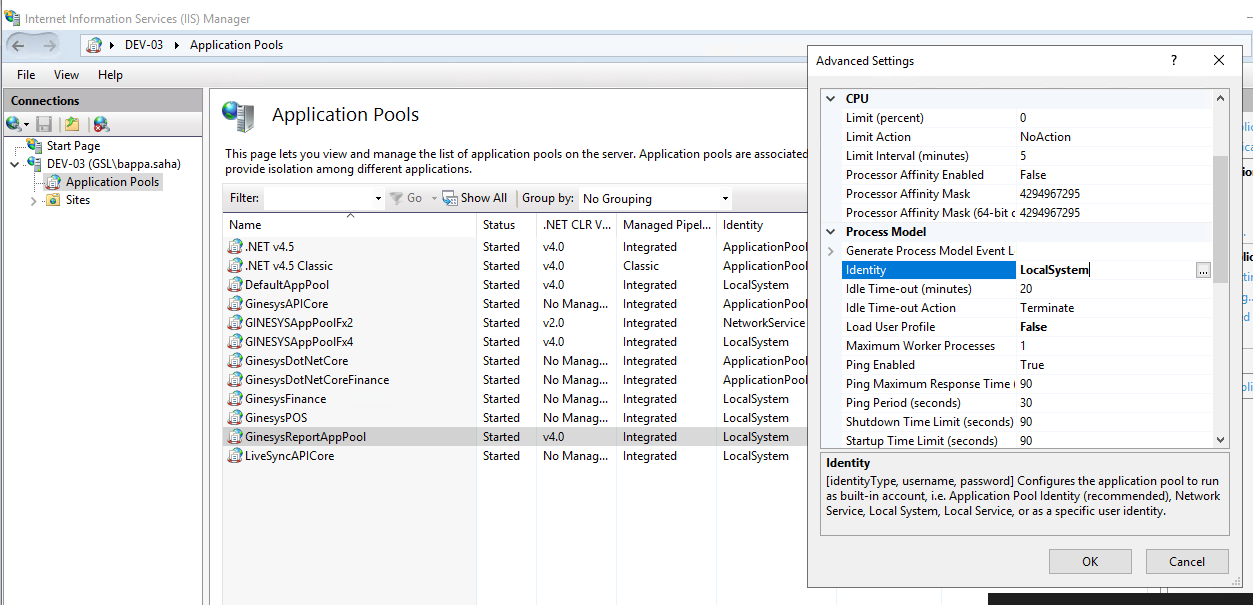
- Change the setting in application pool's identity to 'Local System' from advance setting.
- Run the provided report and export to PDF file. Now DIGITAL SIGNATURE will be seen into the PDF report
Troubleshooting the process
Step 2: Open properties for MachineKeys Folder and go to Security tab.
Step 3: Provide read & execute and List folder contents permission for IUserand Network Service account.
Step 4: Once MachineKeys folder is granted for IIS worker process, impersonated user, and Network service, you will find that lock sign has gone for the folder MachineKeys.
FAQ
- What is .PFX file for Digital signature? What does a .PFX contain?
Personal Information Exchange Format (PFX) enables transfer of certificates and their private keys from one computer to another. It is usually password protected and can be stored on your computer in PKCS#12(keystore type) file format (Personal Information Exchange file, PFX). - What type of certificate required here?
Digital Certificate may be used for - What are the mandatory parameters in DigitalSignSettings.json file to send attachment with digital signature successfully?
The mail notification with digital signature in attachment will only be sent if the following parameter in .Json file exists."IsSignatureReq":1
The report name parameter in DigitalSignSettings.json file is to be exactly mapped with the job name in Mail Notification in Ginesys HO. Job name is case insensitive.
Following are the mandatory parameters."ReportName":"""IsSignatureReq":1"SerialNumber":"""Location":""
Following is an example of properly modified content of a DigitalSignSettings.json file.[{"ReportName":"DSRMerged Job","IsSignatureReq":1,"SerialNumber":"0270bb","Location":"BM","Password":"","Reason":"Approved","ImagePath":"","SignaturePage":"L"},{"ReportName":"","IsSignatureReq":0,"SerialNumber":"","Location":"","Password":"","Reason":"","ImagePath":"""SignaturePage":""}] - Are 'ImagePath' and 'Password' options workable?
No these are not workable now. How to check logs if the the report is successfully signed?
- Go to following log folder.
C:\ProgramData\Ginesys\Logs\Emailservice - Log file name
EmailService_<Date>_<Time>.log
Sample Log (Success):19-Aug-2019 03:59:43 PM> Scheduler: Preparing to send mail....
19-Aug-2019 03:59:43 PM> JSON configuration file for digital certificate is found.
19-Aug-2019 03:59:43 PM> Configuration for this job is found in JSON configuration file and digital signature is required.
19-Aug-2019 03:59:43 PM> File to be attached is : C:\GSL\GINESYS12\Shared\Attachments\MAIL_3453\DSRMerged.pdf
19-Aug-2019 03:59:43 PM> Signed document is found.
19-Aug-2019 03:59:43 PM> Attachment is done for the file :C:\GSL\GINESYS12\Shared\Attachments\MAIL_3453\DSRMerged.pdf
19-Aug-2019 03:59:47 PM> Scheduler: 1 MAILS WERE SENT.- Go to following log folder.