What is Sync?
Synchronization, verbally known as Sync, is a process to exchange set of data between two or more than two systems. Sync process establishes the consistency among systems and subsequent continuous updates to maintain consistency. The data sync should not be considered as a one-time task. It is a process which needs to be planned, owned, managed, scheduled and controlled.
In Ginesys data Sync process performs to exchange data between HO and POS. HO can keep track of all transactions, activities etc of POS and POS can access the policies and other functionalities provided by the HO through Sync. Sync process can be manual or automatic as per schedule. Generally Sync process runs automatically as per scheduled time. But when HO needs to send some policies, data etc to POS or POS need to send any report or bill urgently in between two sync scheduled time, then the manual sync required.
How the Manual Sync process works in Ginesys:
Sync can be performs from both side, like - from HO to POS and from POS to HO.
Sync from HO to POS: Sync from HO to POS(s) required when HO sends policies, assign users etc.
Sync process completes through the following steps:
- Step1: Send data from HO to Web Database
- Open Ginesys Launchpad.
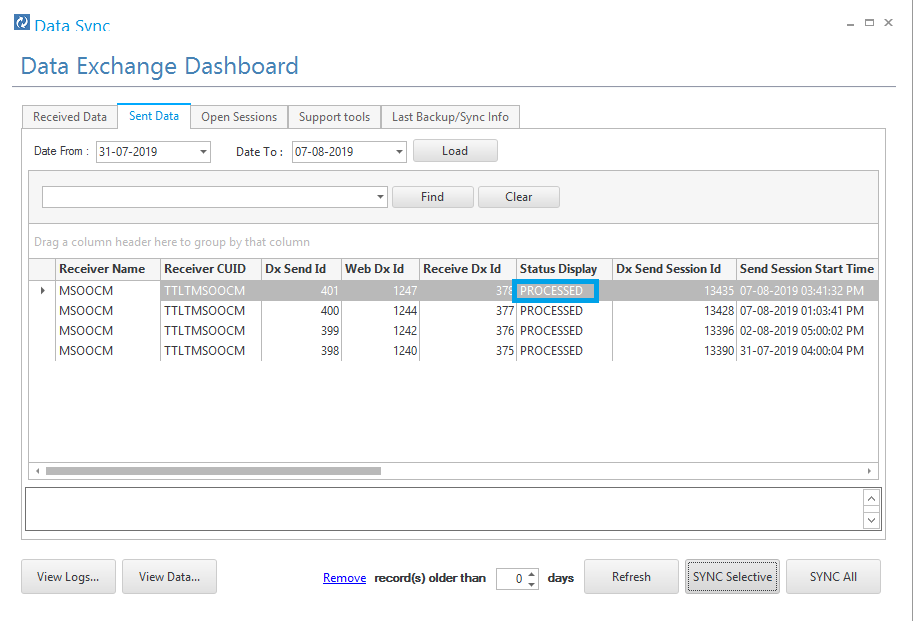
- Click on the Data Sync tab.
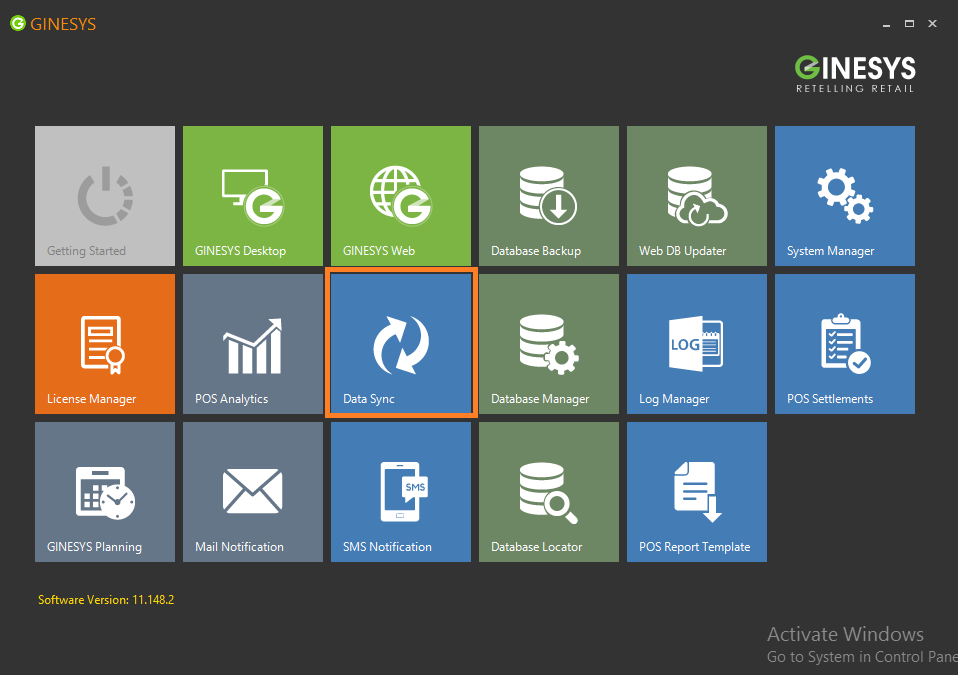
- Data Sync window will open.
- You will get two button - Sync Selective and Sync All.
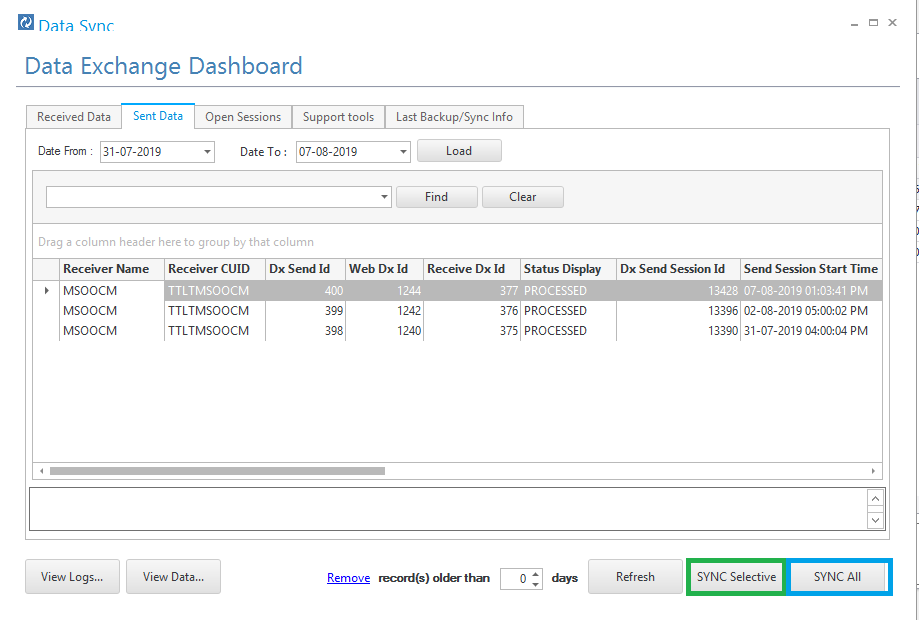
- Sync Selective: If HO wants to send data to its particular site, then perform the sync through Sync Selective.
- Sync All: If HO wants to send data to all its sites, the perform sync through Sync All.
- If you click on the Sync Selective, the Select Site window will appear.
- Select the site(s) where you want to send data and click on OK.
or - Click on Sync All button.
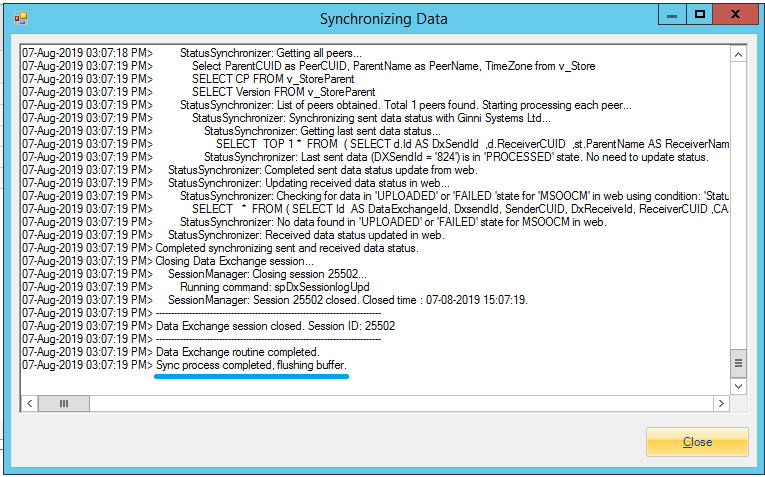
- The Sync process will run.
- After completing the Sync process, you will get a message in the same window- "Sync process completed, flushing buffer.".
- The sent data will be uploaded in the Web Database.
- Close the window.
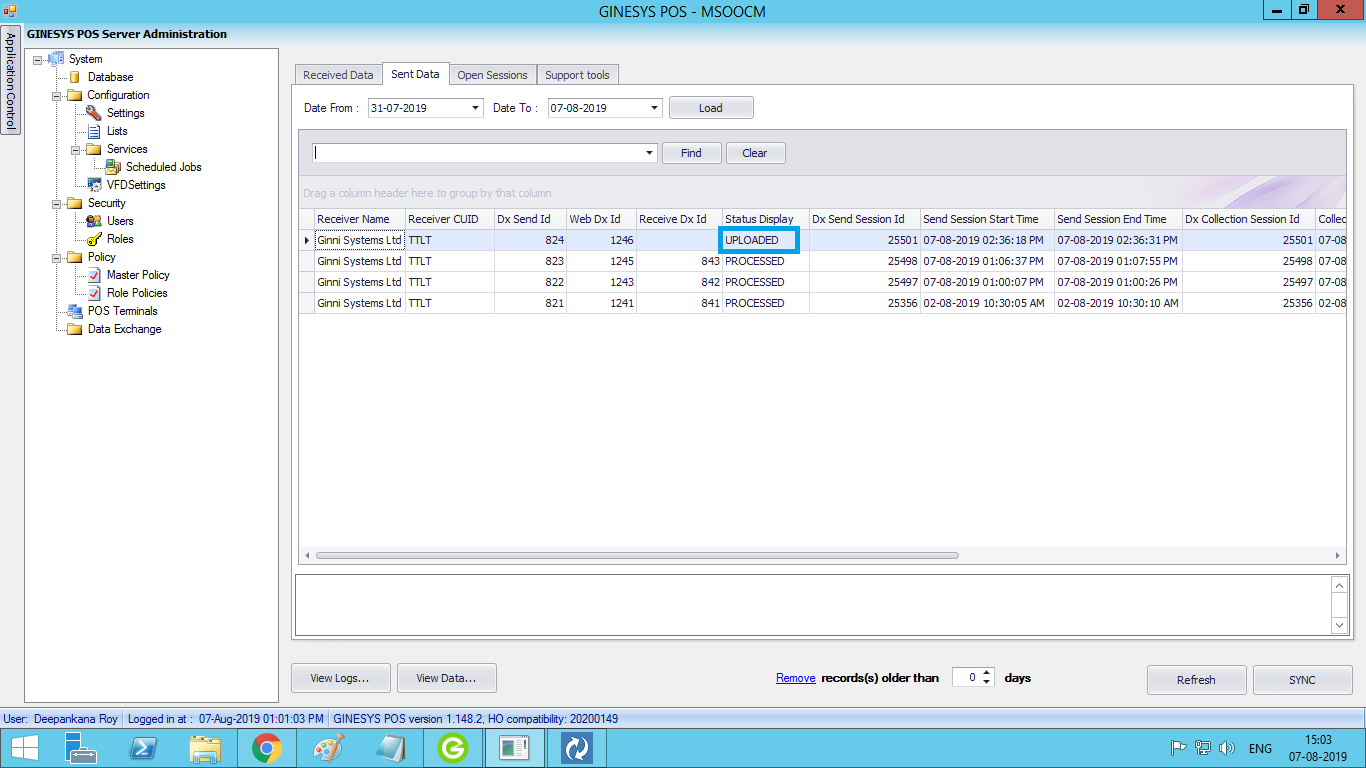
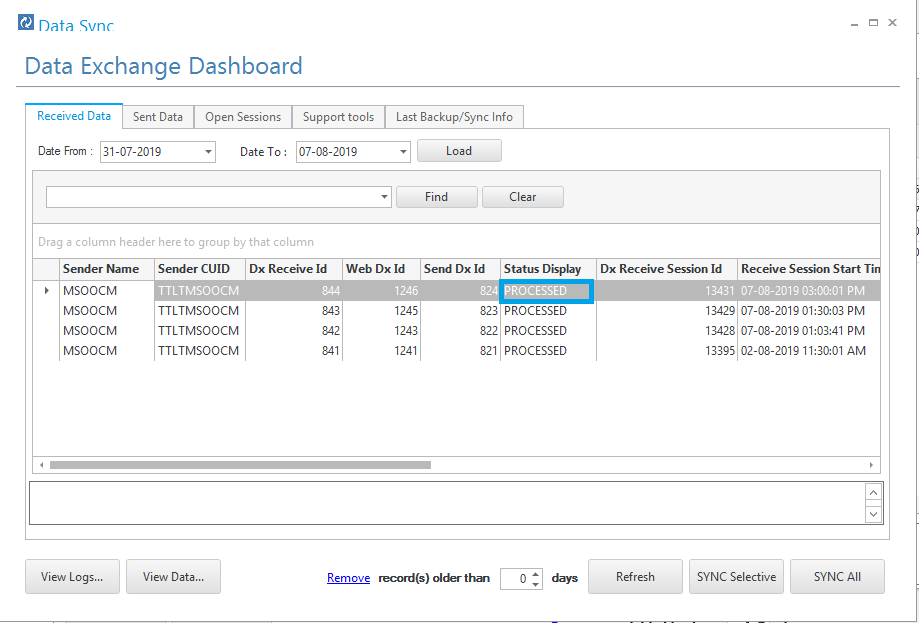
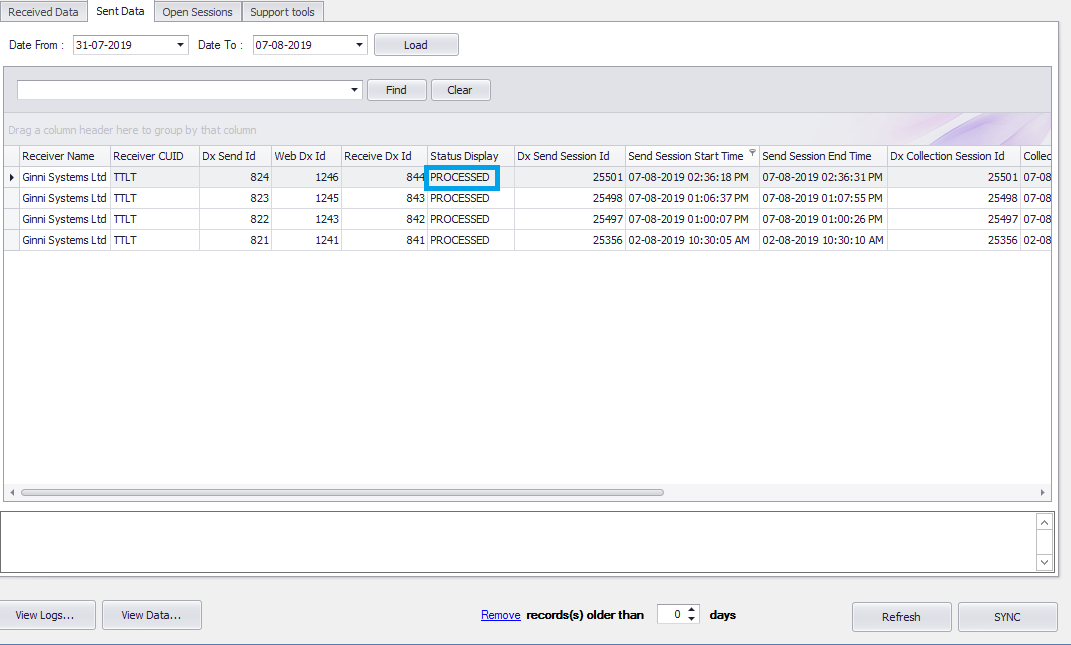
- You will get the details of sent data in the Sent Data tab.
- The status of the sent data will be UPLOADED.

- Step2: POS Receive the sent data from Web Database and send an acknowledgement to the Web Database.
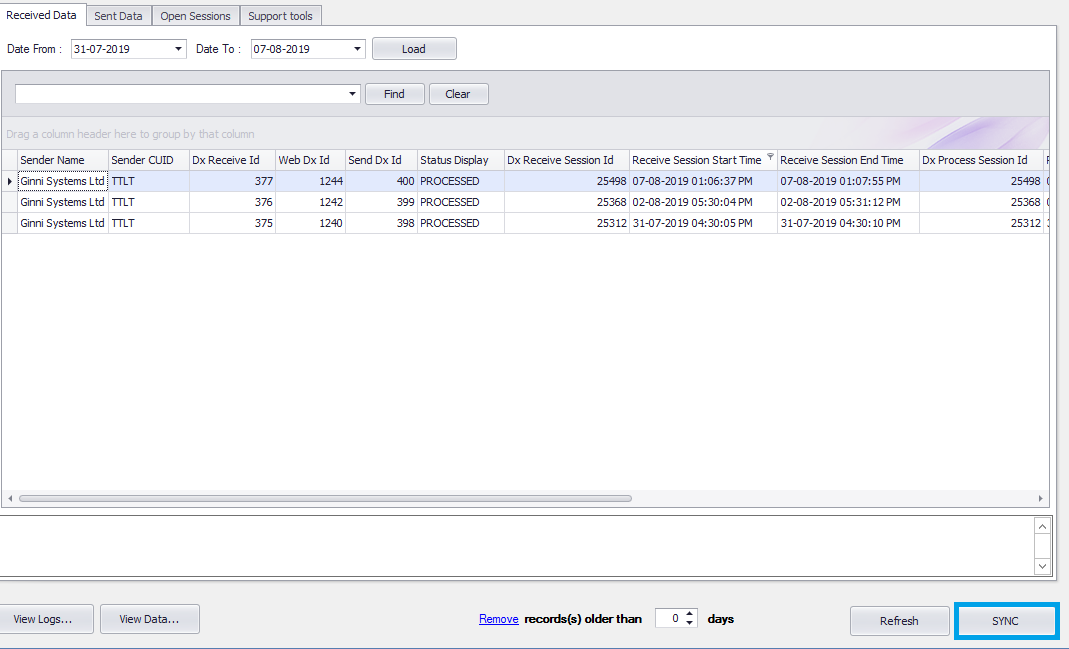
- Open the POS site where the HO have sent the data.
- Go to Administration tab.
- Click on Data Exchange.
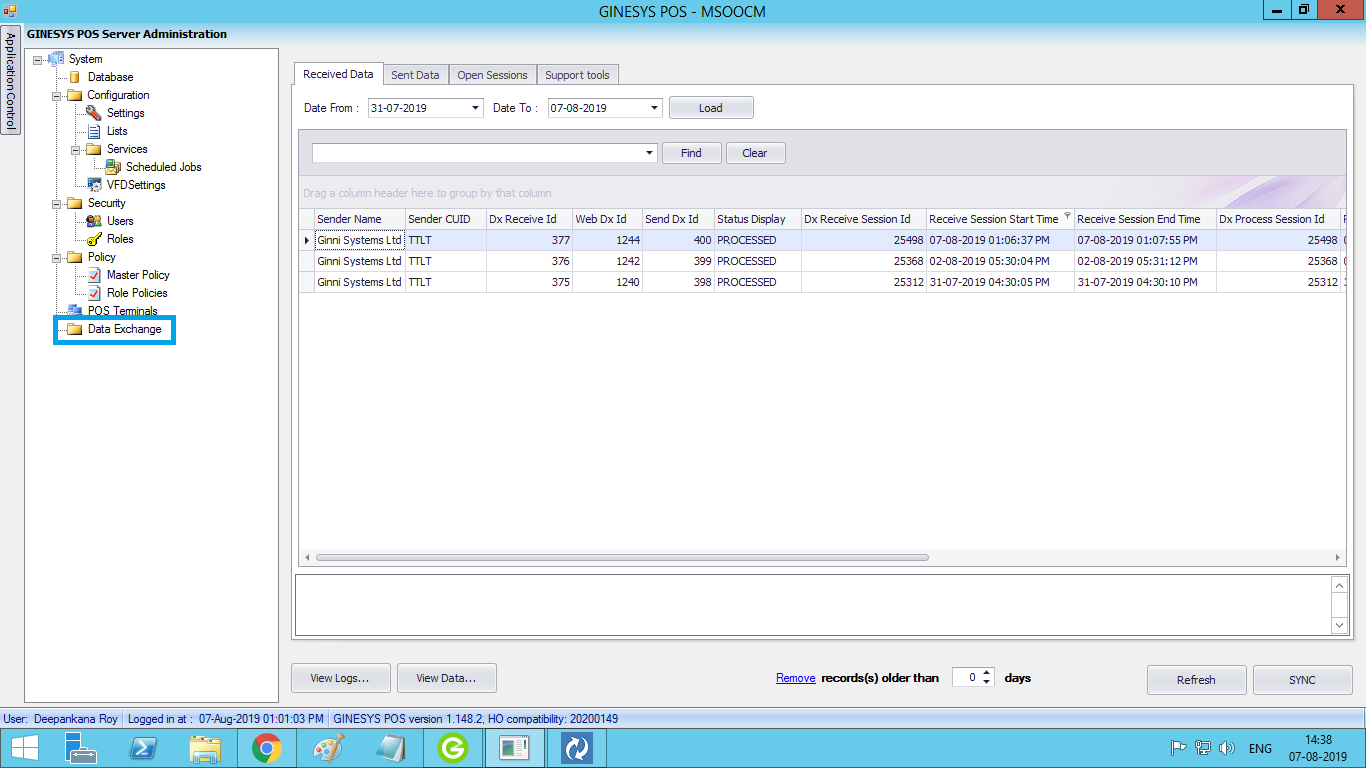
- Sync module will open.
- Click on the Sync button.
- The Sync process will run.
- After completing the Sync process, POS will get the sent data and you will get a message in the same window- "Sync process completed, flushing buffer.".
- Close the window.
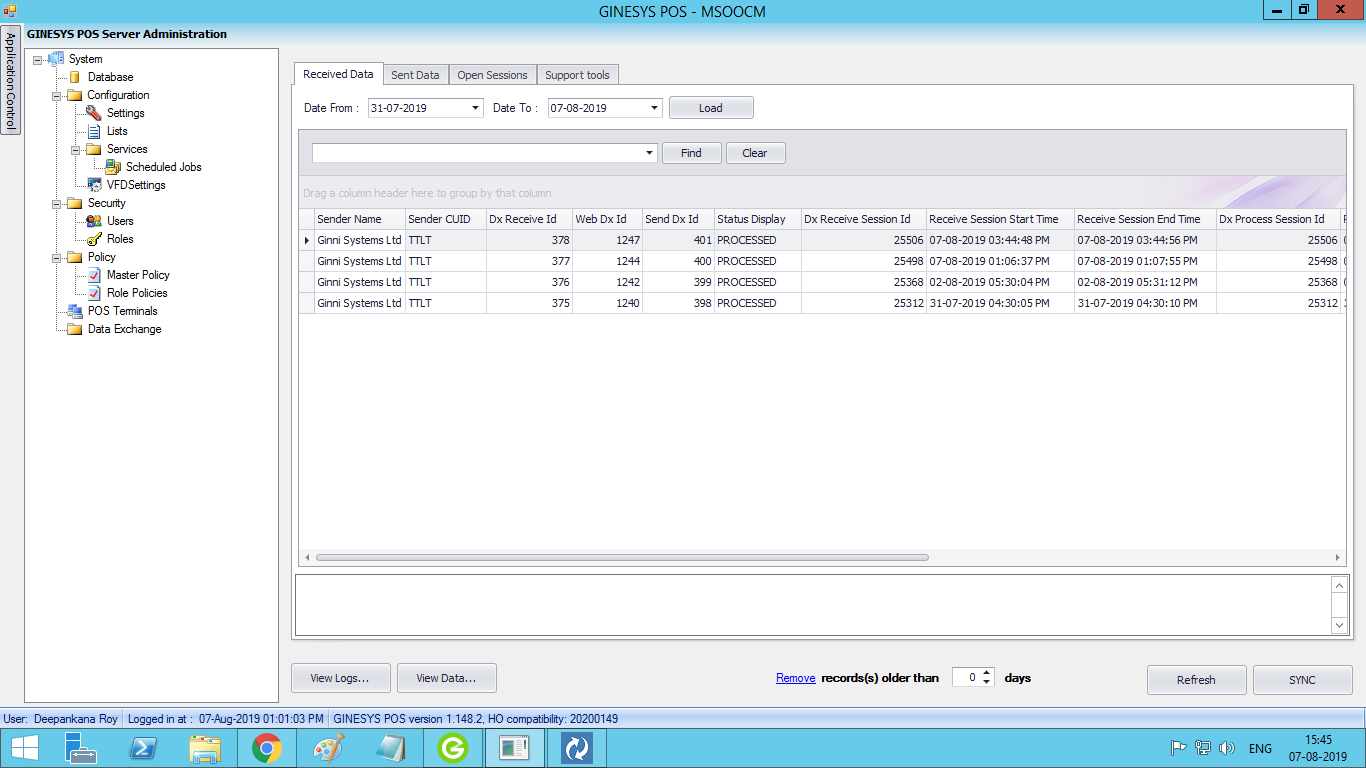
- You will get the details of received data in the Received Data tab.
- The status of the received data will be PROCESSED.
- The acknowledgement of getting data will be uploaded to the Web Database after completing the same Sync process.
- Step3: HO Receive the acknowledgement from Web Database.
- Again go to Launchpad > Data Sync.
- Repeat the sync process same as Step1: d to j.
- The status of the sent data will be changed to PROCESSED from UPLOADED.
- HO will get the acknowledgement from the POS.
- After performing above three steps successfully, the sync process completes.
Sync from POS to POS: Sync from POS to HO required when POS sends Bill, others documents, stock details etc.
Sync process completes through the following steps:
- Step1: Send data from POS to Web Database
- Open the POS site.
- Go to Administration tab.
- Click on Data Exchange.
- Sync module will open.
- Click on the Sync button.
- The Sync Process will run.
- After completing the Sync process, you will get a message in the same window- "Sync process completed, flushing buffer.".
- Close the window.
- You will get the details of sent data in the Sent Data tab.
- The status of the send data will be UPLOADED.
- Step2: Receive the sent data from Web Database to HO and send an acknowledgement to the Web Database.
- Open Ginesys Launchpad.
- Click on the Data Sync tab.
- Data Sync window will open.
- You will get two button - Sync Selective and Sync All.
- Sync Selective: If HO wants to get the data from particular site, then perform the sync through Sync Selective.
- Sync All: If HO wants to get the data from all its sites, the perform sync through Sync All.
- If you click on the Sync Selective, the Select Site window will appear.
- Select the site(s) where you want to send data and click on OK.
or - Click on Sync All button.
- The Sync process will run.
- After completing the Sync process, HO will get the sent data and you will get a message in the same window- "Sync process completed, flushing buffer.".
- HO will get the sent data from Web Database.
- Close the window.
- You will get the details of received data in the Received Data tab.
- The status of the sent data will be PROCESSED.
- The acknowledgement of getting data will be uploaded to the Web Database after completing the same Sync process.
- Step3: POS receive the acknowledgement from Web Database.
- Again go to POS.
- Repeat the sync process same as Step1: b. to h.
- The status of the send data will be changed to PROCESSED from UPLOADED.
- HO will get the acknowledgement from the POS.
- After performing above three steps successfully, the sync process completes.
Sync can be performed automatically as per scheduled time set by the user. Sync Schedule reduced the time of manual sync process. One example is given below:
Suppose there are two POS running under a HO. The sync schedule time gap of POS1 is 15 min and it is 30 min for POS2. If the first sync occurs at 8:00 AM in POS1, then next sync will perform automatically at 8:15 Am, 8:30 AM and so on. Same as if the sync occur at 8:00 AM in POS2, then the next sync will occur at 8:30 AM, 9:00 AM and so on. The scheduled sync has been explained through the given diagram below:
Site Time | 8:00 AM | 8:15 AM | 8:30 AM | 8:40 AM |
|---|---|---|---|---|
| POS 1 |
| |||
| POS 2 |
|
For more details please check the link given below:
How To: Configure the Data Sync Scheduler at HO
/wiki/spaces/~5570584eb70e2b10514081a4b0925399f77519/pages/1156579996