How To: Change Web Database details in Ginesys
This Article describes how to change Web Database details in Ginesys. Generally, this action will be required whenever there is any change in Web Database connection details, that might be due to Web Database server change or Hosting provider change or login details change.
Alert
This guidance is only applicable if the current Web Database must be in active state and Data Synchronization is working among HO and all POS sites. In any case the current Web Database is already offline then please flow only first 2 steps. Post that you have to update all POS sites manually using WebDB.cfg file.
Also, make sure, all the data sent from HO are in processed state. Otherwise new information will not circulated to pending or failed sites.
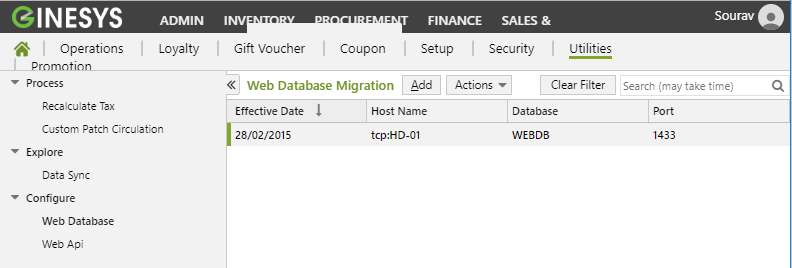
Steps to follow
| Actions | Reference screenshots |
|---|---|
|
|
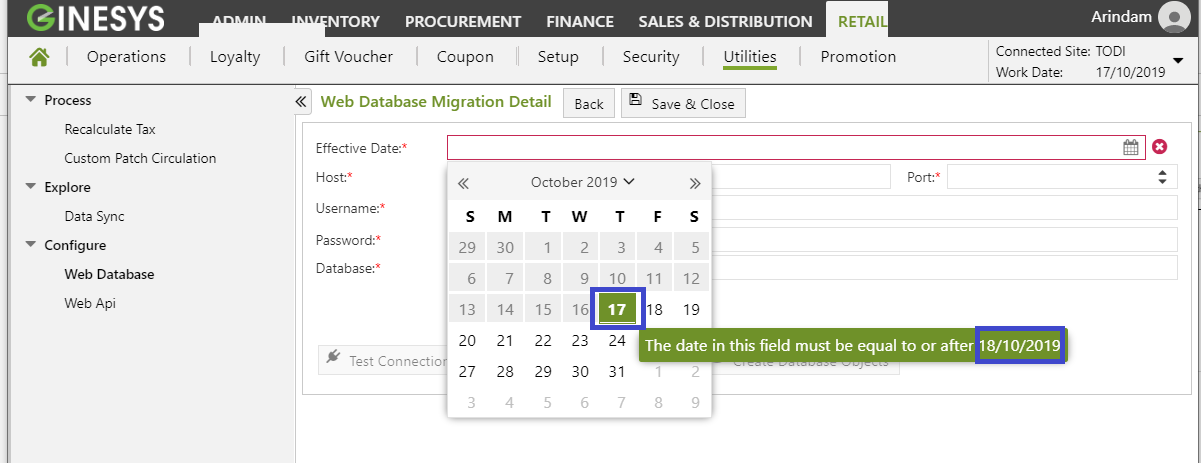
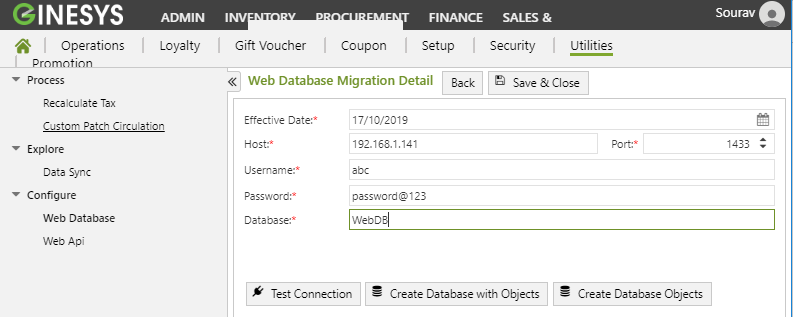
2. Insert new Web Database connection details
Effective Date
|
|
3. Now perform Data Sync at HO. This will circulate the new connection details and effective date to all POS sites. Once sync completes at HO, observe the Data Exchange Dashboard. There must be data rows for each site in UPLOADED state where Dx Events colomn contains 'WEBDBCONFIGURATION' | [Image] |
4. Now Sync should run at all POS locations. Either you can wait for auto synchronization or perform manual Data Sync at all locations. To verify whether the Web Database connection information has been processed, check the Data Exchange Dashboard and observe the last sent receive data where Event has WebDBconfiguration is in PROCESSED state. | [Image] |
5. Once the sync completes all sites successfully that means all sites received information of new Web Database. Those will start to communicate with new Web Database on and onward the Effective Date mentioned. Now, on the day of 'Effective Date' all POS sites and HO site should connect new Web Database. Ideally, we can assume, existing Web Database is in Offline state. Now you can take backup of the existing Web Database and restore it to newly created Web Database. You must ensure, all the details remain same as those mentioned in Step 2. This completes the Web Database switch. You can check by running all sites. |