How To: Backup data files in HO
Database backup is a representative copy of data; when the original data is lost, the backup can be used to reconstruct lost information. Backing up is the activity of copying files or databases so that they will be preserved in case of equipment failure or any other issues. Putting back the data in the system is called restoring them. Backup needs to be restored when the system is formatted for any reason. It is advised to always take backup at regular intervals in order to prevent loss of valuable information.
Note: The backup should ideally be taken in an external storage so that even if the system crashes, the data is safe.
Pre-requisites
Please make sure you have followed the checklist below before taking backup:
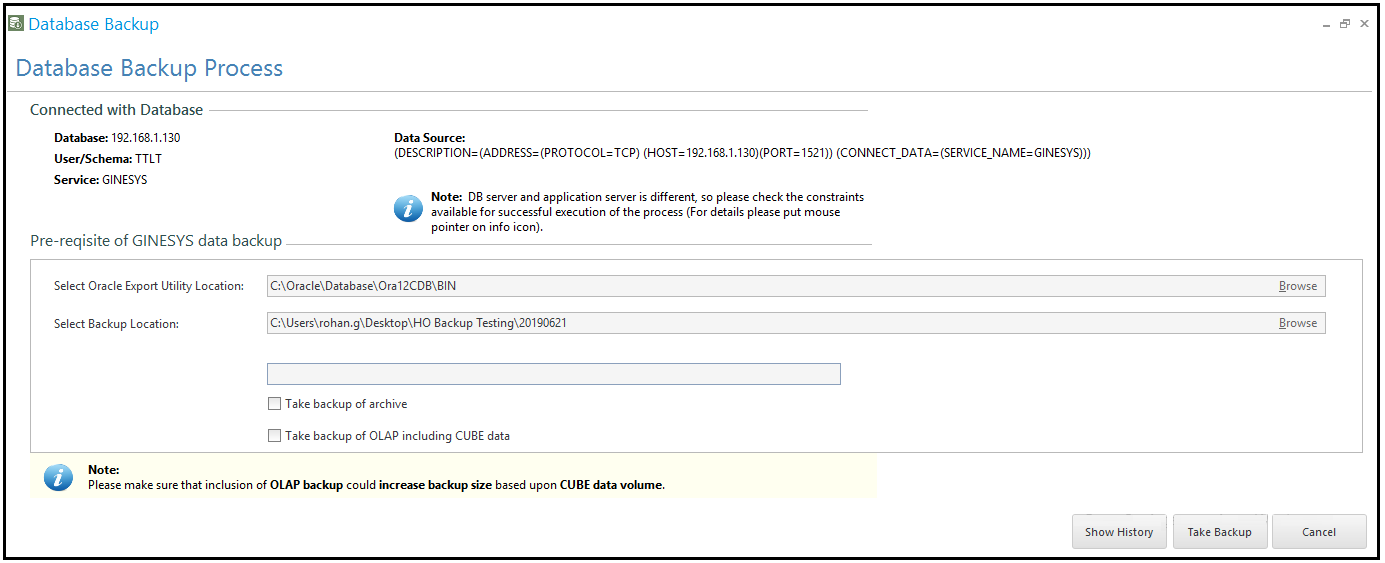
The ORACLE export / import utility location is selected.
To check the location follow the path: <Installed drive>\Oracle\Database\Ora12CDB\BIN
The Backup location is present.
The system will not allow you to proceed if the Backup folder is absent and or there is insufficient privilege for file creation in selected backup location.
- The disk of your backup location has sufficient space available to store the backup.
- A proper database connection is present.
Step-by-step guide
The steps are as follows:
- Go to Ginesys Launchpad - Database Backup. The Database Backup window opens.
You may either click on the Take Backup button directly or select
 the type / types of backup you want to take.
Simply clicking on the Take Backup button makes a copy of all the raw data present in the database.
But if you select any of the type / types of backup, then it will make an added copy of that particular type of data. It takes much longer time but selecting the options for backup ensures that in case of recovering the data, the whole data is recovered and nothing is lost. Hence, your system will be as it was before it needed restoration.
There are three additional options available for backups :Take backup of archive (This option allows you to take backup of your archives.)
Archives are helpful when the system needs to be formatted under certain circumstances. They help in recovering the data that would have been lost otherwise.Take backup of OLAP including CUBE data (This option allows you to take backup of your CUBE data.)
Note: Please make sure that the inclusion of OLAP backup could include backup size based upon CUBE data volume.
Take backup of GINESYS Application (This option allows you to take backup of the Ginesys application.)
Important
Take backup of GINESYS Application takes the most time while Take backup of archive takes a much lesser time.
Version 11.147.8 onward a new database utility will be used to take back up which will reduce the backup time by a significant amount. However, the changes are all in the background. So the user will take backup in the same way as given above.
Notable change
Take backup of GINESYS Application has been removed to improve performance of the tool.
- Backup Process Completed Successfully. - message is displayed at the lower left-hand side of the window.
- Click on the Back button (if you want to take any other type of backup) or Close button (to close the window).
The Show History button
This button displays the entire list of backups taken. On clicking the button, it opens the Backup History window (display only). It displays the entire history of backups taken in a table format with the following heads:
- Mode
- Backup Taken On
- Location
- File Name
- File SIze
- Backup Successfull
- Physical File Exist
- Version
- User