How To: Install SQL Server 2012 Express Edition in POS
When new a POS site is being opened with SQL Server 2012 Express edition database or an existing POS site is installing a new SQL Server 2012 database, you would need to know the following information.
Important: Please ensure the following before you start the installation
- Server Machine Name and Windows User Name (who is installing) must not be same. Please change the Windows User Name if you are having this scenario.
- Uninstall all previous instances of SQL Server installations before proceeding with the current installations.
- Please leave all check boxes, that are not mentioned in Step 3, unchecked for smooth installation of the software.
- Some of the steps will be skipped by the SQL Server 2012 Installation Wizard if no changes are needed in their default settings; however, you can always click on the Back button from the next screen to check the skipped screens. For example, if no installation rules are contradicted by the Feature Selection process, then you will not see the Installation Rules screen. The process will move directly on to the Instance Configuration screen. In case you wish to check the installation rules, click on the Back button from the Instance Configuration screen.
Step-by-step guide
Step No. | Steps | Image |
|---|---|---|
| 1. | Run the SQL Server 2012 Express edition by double clicking it and select the " New SQL Server stand-alone installation or add features to an existing installation" option. It will show a message of "Please wait while Microsoft SQL Server 2012 Setup processes the current operation". | 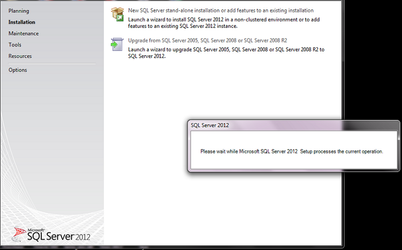 |
| 2. | Accept the licensing terms by checking the box - " I accept the license terms." and clicking on the Next button. | 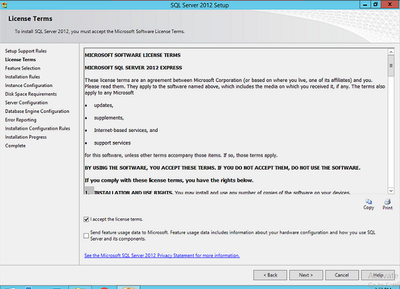 |
| 3. | In the Feature Selection screen, select the following features:
Now click on the Next button, to move to the next step. | 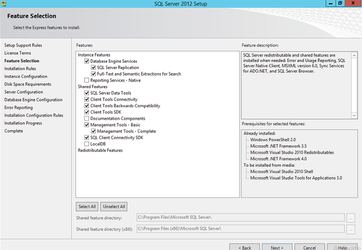 |
| 4. | In Instance Configuration screen, check the following details:
Now click on the Next button, to move to the next step. | 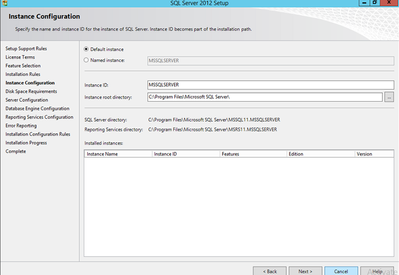 |
| 5. | If your Disk Space Requirements are adequately fulfilled, that screen will be skipped to move to Server Configuration. In the Server Configuration screen check the following details:
Now click on the Next button, to move to the next step. | 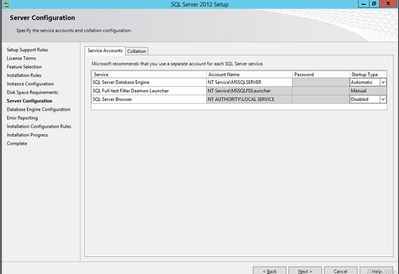 |
| 6. | In the next Database Engine Configuration screen, the Server Configuration tab should have the following details as given below:
| 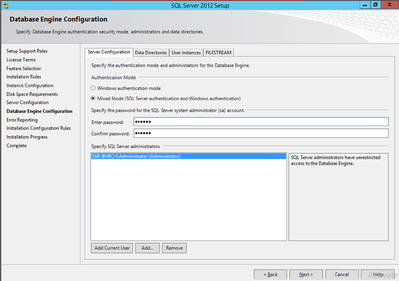 |
| 7. | In the next Database Engine Configuration screen, the Data Directories tab should have the following details as given below:
Now click on the Next button, to move to the next step. | 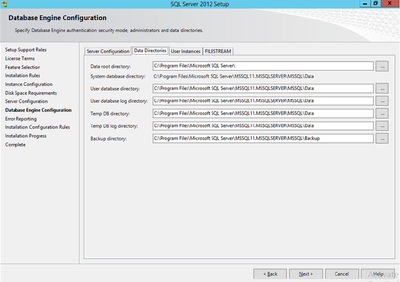 |
| 8. | The optional Error Reporting screen is shown. You may check the box here to send the Windows and SQL Error Reports to Microsoft. Now click on the Next button, to move to the next step. | 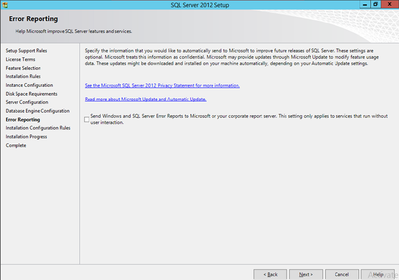 |
| 9. | The Installation Configuration Rules and Installation Progress screens will quickly skip to reach the Complete screen which will show in details the features installed through this installation process. |