How To: Enable IIS in your system
IMPORTANT
Important Notes regarding enabling IIS:
Note: Depending upon the Operating Software (OS) you use, some of these prerequisites may already be present in your system. However, please check out if each of the prerequisites are already enabled or installed.
Note: The servers must be 64 bit machines by default but terminals may be 32 bit or 64 bit as required. However, if any of your terminals run on Windows 10 then the machine has to be a 64 bit one.
Note:GINESYS has provided a batch file for automatic installation of IIS if it is not installed in your intended machine. This .bat file can be found at the following location:
(Root directory of your installation CD or DVD)/IISConfig/InstallIIS.exe
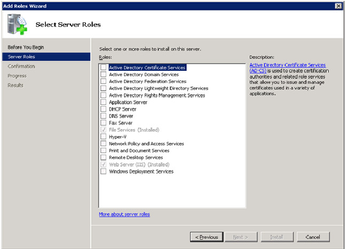
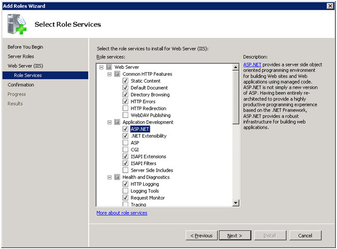
In case the installer cannot run for some reason, please note that you must enable IIS through Server Roles option in the Add Roles Wizard; if you are running Windows 2008 / Windows 2008R2 / Windows 2012 for servers.
Please follow the illustrations given below:

IIS has to be mandatorily enabled for GINESYS V11.100.0 because presently, only the Retail, Web Services and Shipment tracking related operations are running through IIS. But modules which are running in D2k platform are going to be converted gradually into Web platform in near future. So, it would be safe to configure the IIS from day one.
It is important to note that ASP.NET under IIS feature must be enabled in both servers and terminals.
The v11.100.0 can either be newly installed in a system or be migrated from an old one, below are given the steps for making new installations as well as migrating from previous version.
There are also a few steps which need to be executed for both new installations and migrating from previous versions creating a new database and finally migrating from previous versions keeping the existing database.
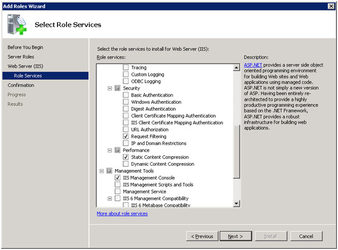
Note: During GINESYS installation only the 'WebServer (IIS)' role is to be checked.