Prerequisites- The users' role must have access to the Add app operation in the Sales Return feature in Sales & Distribution - Operation - Invoicing through Roles in Ginesys Web - Admin - Security.
- Document Numbering Scheme must be present for the module.
- The masters must be present - Item, Customer, Term etc.
Step-by-step guide- Go to Ginesys Web > Sales and Distribution > Operations > Invoicing > Sales Return.
- Sales Return module will open.
- All the previously created Sales Return will be listed here.
- Click on Add button.
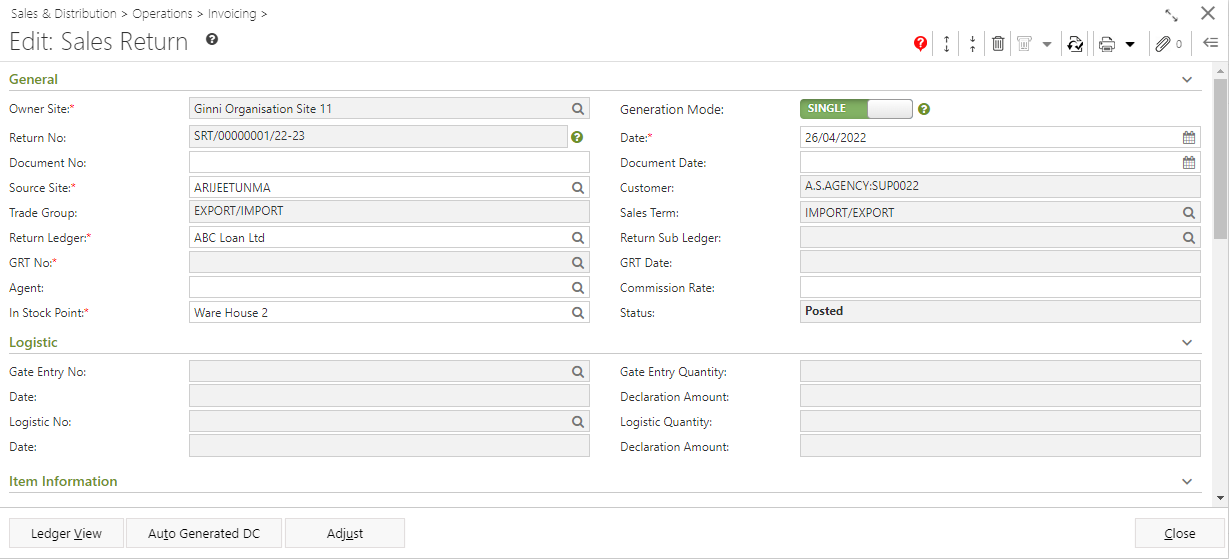
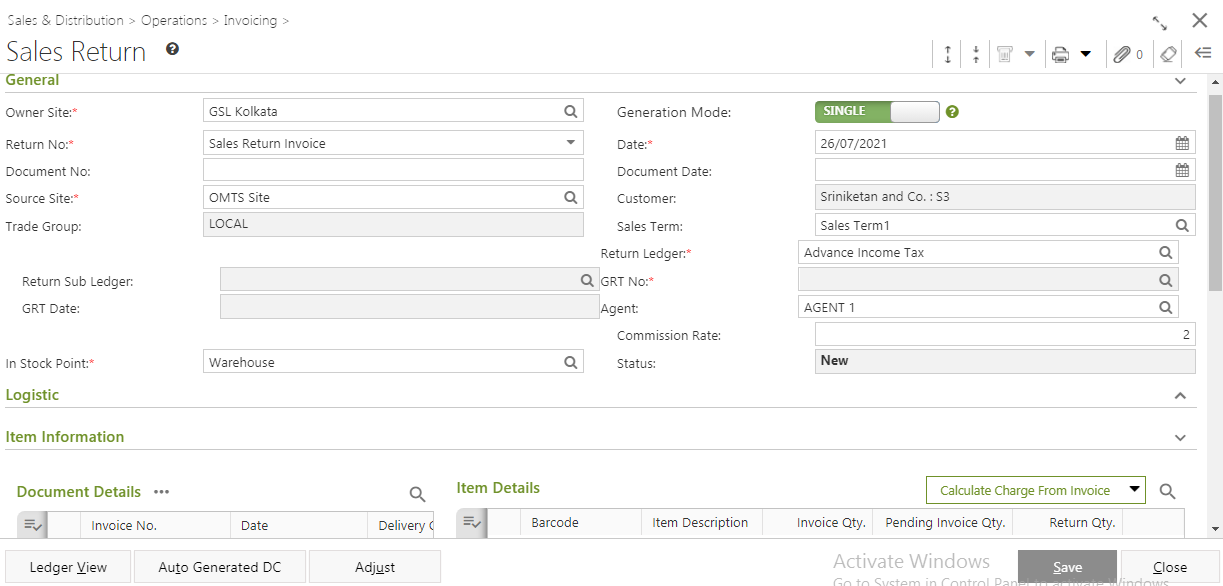
- Sales Return window will open.
 - You will get group of icons at the top right corner of the window.
 Image Modified Image Modified
The icons name from left to right are - Expand All, Collapse All, Print Document Report, Attachments, Clear Form and Open Side Panel.
Expand All: Clicking on this icon, all the sections will be Expand if they are collapsed. Collapse All: Clicking on this icon, all the sections will be Closed if they are expanded. - Print Document Report: Clicking on the Down Arrow beside this icon, you will get Print Preference option with already created Report File Template. This option is used to print document.
- Attachments: You can Upload some required documents from this option.
- Clear Form: Clicking on this icon, you can Clear all the data already entered.
- Open Side Panel: Clicking on this, you will get the details of the current Transfer In as follows:
- Document Summary: In this section you will get the details of Selected Items, Sale Type, Owner Site, Modified byetc.
- Customer Details: You will get the Selected Customer Details like Address, Contact Details, Tax Region, Credit Limit, Overdue Amount etc.
- Customer Statistic: This section describes the Delivered not Invoiced amount, Outstanding Amount, Last Invoice Date etc. You will get six sections - General, Transfer Out Details, Logistic Information, Item Information and Others.
- You will get six sections - General, Logistic Information, Item Information and Others.
- General:
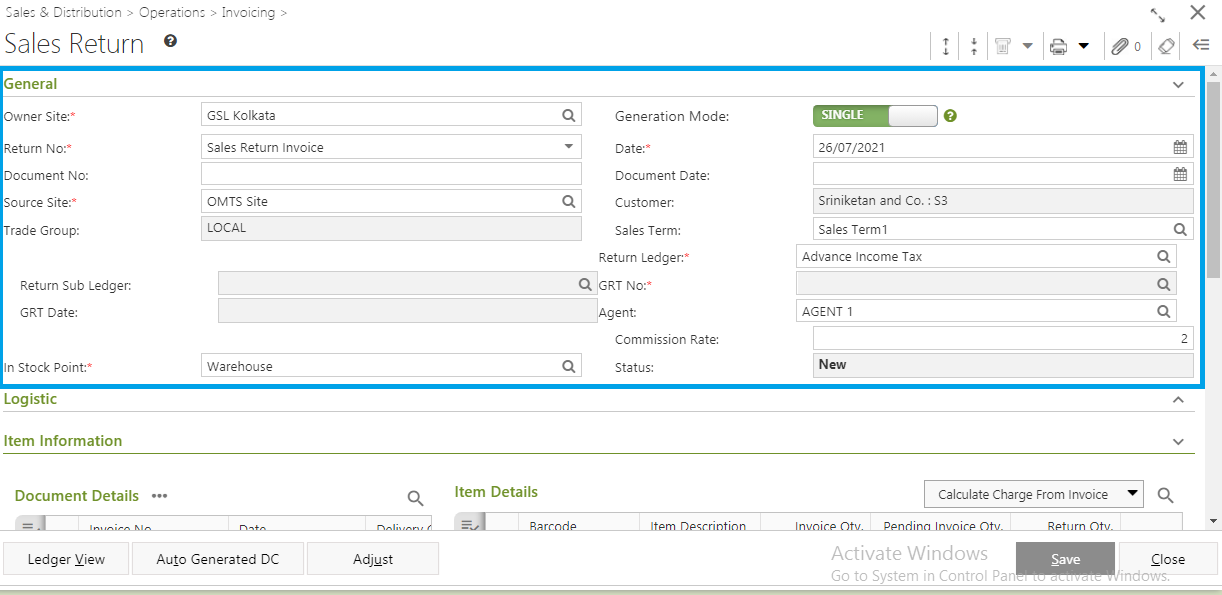
- Select the Owner Site (Mandatory Field) for which you want to create the Sales Return (Owner Site wise General Ledger selection is applicable).
- Select Return No. from the drop down list (Mandatory Field).
- Select the Source Site (Mandatory Field)from the Source Site Pop-Up form. Customer, Sales Term, Trade Group, Commission Rate will be populated based on Source Site.
Return Ledger, Transit Ledger, Agent, Customer etc will be populated as per Source Site selection. You can change the Transfer In Ledger, Agent and Transfer In Sub Ledger. Generation Mode has two option Single & Multiple.
Status will be populated automatically. | Tip |
|---|
| title | Mandatory Information |
|---|
| Source Site, Return Ledger, GRT No., Date and In Stock Point are all mandatory fields and need to be specified before any other segment is approached. |
- System date will be populated in the Date field (Mandatory Field). You can change the date as per your requirement. You can only select the past date from the system date but not any future date.
- Logistic Details: Logistic Details will be populated according to the selection of Source Site. Gate Entry No. is the mandatory field.
- Item information:
- You will get two sections in the Item Information section - Document Detail and Item Details.
- Items can be selected only through Add Items window for Managed Site.
- All the packets of selected GRT will be populated. You can populate all the packet together.
- Items of the selected GRT No. can be selected through Scan Item, Select Item, and Import
Barcode from the menu of Add Item window. - You can populate packets and selected items together.
- You can select the Invoice Resolution Option as - FIFO, LIFO or Do Not Resolve. According to that the items and packets will be populated.
- Items can be selected through Specific Invoice, Set off Invoice and Import File for Unmanaged Site.
- Specific Invoice:
- Click on the Specific Invoice option.
- Specific Invoice window will open.
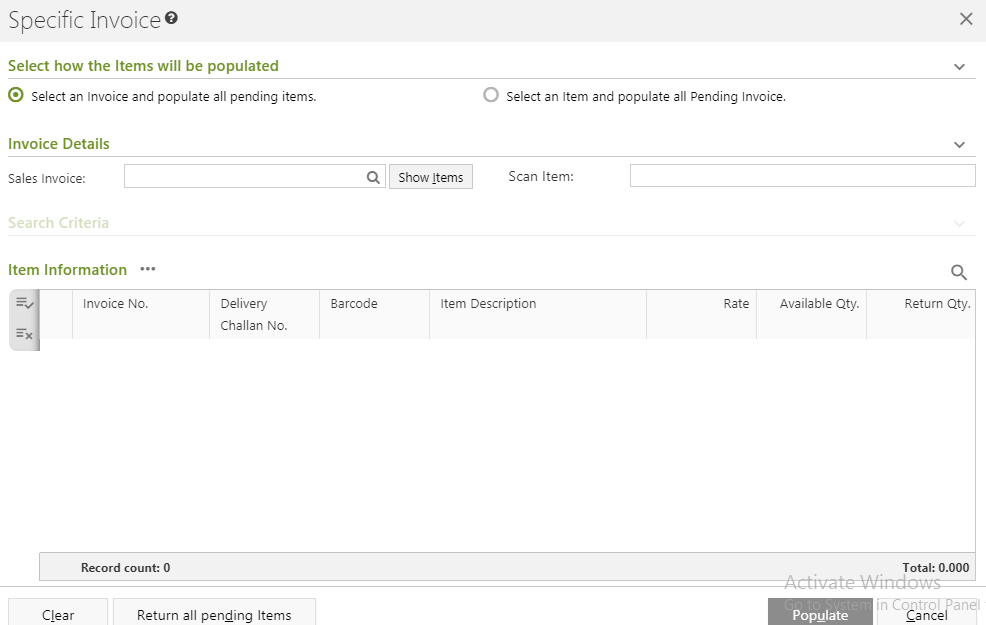 Image Modified Image Modified
- You will get two radio button under Select how the Items will be populated - Select an Invoice and populate all pending items and Select an Item and populate all Pending Invoice.
- Select an Invoice and populate all pending items:
- You will get Sales Invoice and Scan Item fields to search pending invoices and items present in the pending invoice. Invoice selection is mandatory.
- Click on the Show Items button.
- All the items will be populated in the item information section according to the search criteria.
- You can manually put the return quantity. You can also click on the Return all pending Items.
- Click on the Populate button.
- All the listed items and the invoices will be populated in the Item Details section.
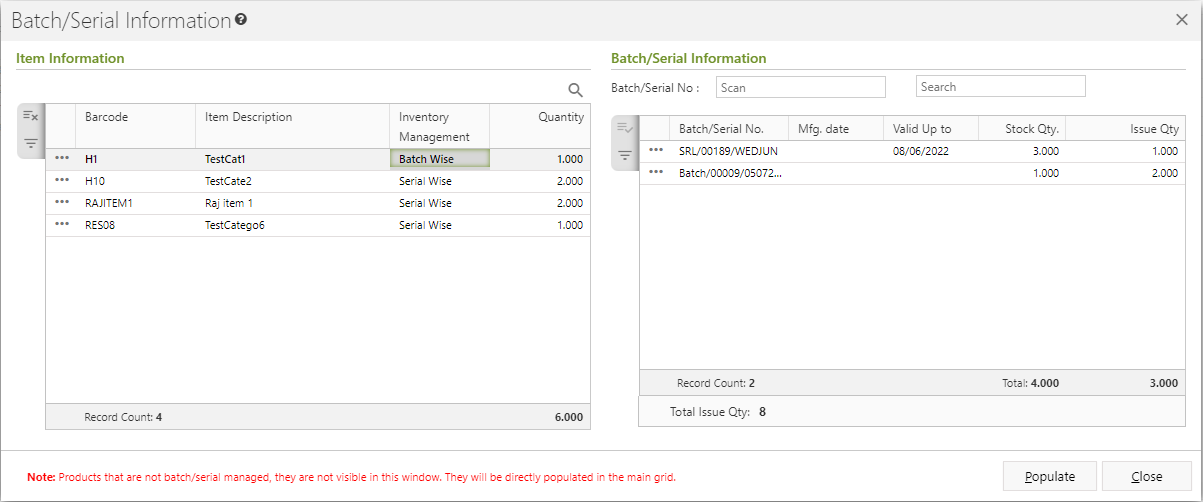
- Setoff Invoice:

- Click on the Setoff Invoice option.
- Setoff Invoice window will open.
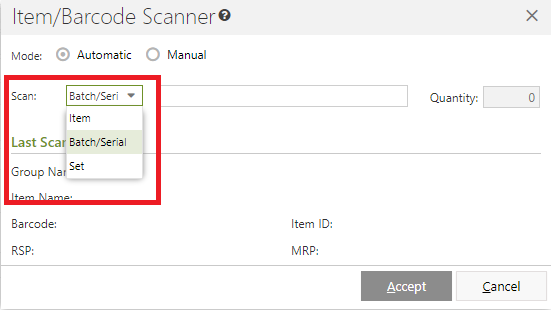
- Items can be selected through Select Item, Scan Item, and Import Barcode.
- Selected Items will be populated in the Item Information section.
- You can put the quantity for return in the Assign Quantity field.
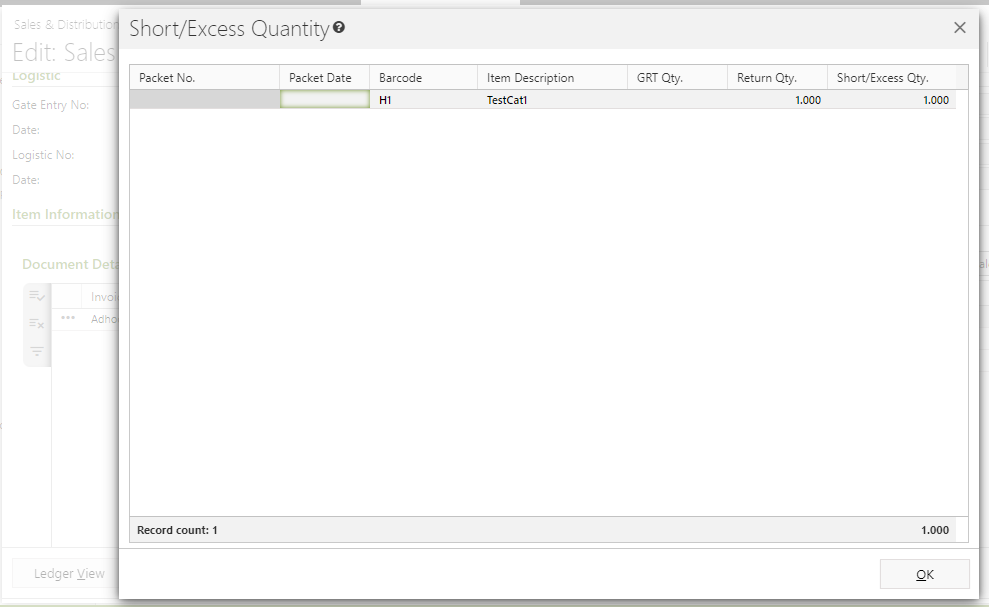
Selected Items can be setoff against available invoices, provided FIFO/LIFO, is selected as setoff basis. In case no invoice found, or quantity is more than available
invoice quantity, items to be populated as Adhoc with the surplus quantity. If resolution basis is chosen as FIFO, then From Date can be provided optionally. If provided, then invoice between From Data and Return Date to be setoff. If resolution basis is chosen as LIFO, then Till Date can be provided optionally. If provided, then invoice between Till Date and Return Date to be setoff. | Note |
|---|
- Do not Resolve Invoices: In this option you will get list of all the items.
- Resolve Invoices based upon FIFO(if applicable): In this option you will get those items which are present in the invoices from a particular date you provided in First In First Out (FIFO) manner. You will get From Date field in the FIFO mode. You cannot select the date more than system date. The system will search the invoices created between the provided From Date and the Sales Return Document Date.
- Resolve Invoices based upon LIFO(if applicable): In this option you will get those items which are present in the invoices up to a particular date you provided in Last In First Out (LIFO) manner. You will get Till Date field in the LIFO mode. You cannot select the date more than system date. The system will search the invoices created between the provided Sales Return Document Date and Till Date.
|
- The selected items will be populated in the Item Details section.
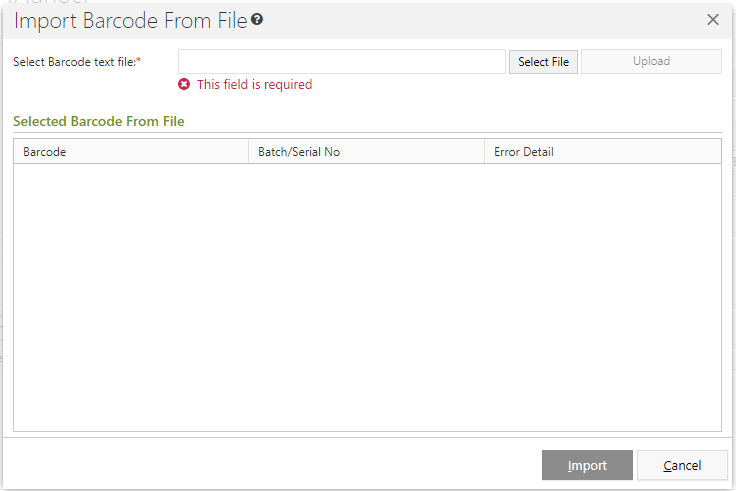
- Import File:
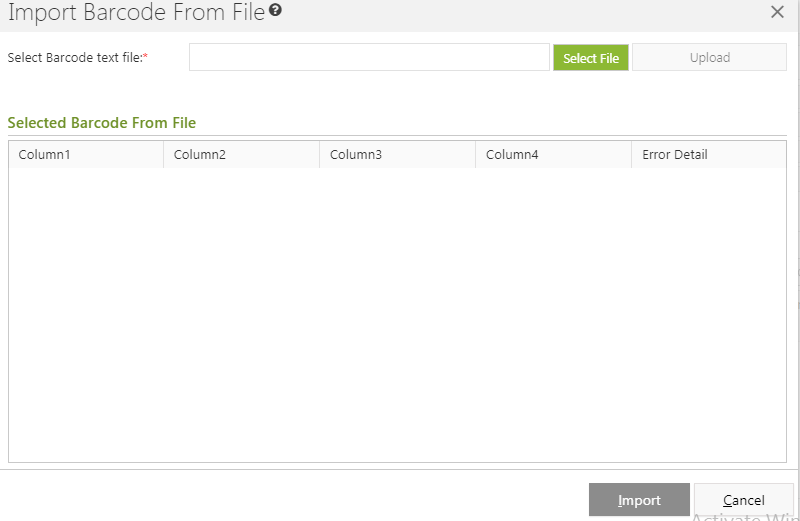
- Click on the Import File option.(Barcode text file (.TXT or .CSV) needs to be selected and uploaded).
- Columns can be mapped for Invoice No., Barcode, Quantity.
- Mapping of Invoice No. and Barcode columns is mandatory. Quantity mapping is optional.
- On successful import, Invoice wise items to be populated.
Click on the Calculate Charge button to calculate the charges:
| Tip |
|---|
| title | Logic for Charge Population |
|---|
| Note: |
- Others: You can put in the Remarks for the Sales Return in Others section.
- Click on the Save button to generate the Sales Return and you will get a message - "Document <Sales Return No.> saved successfully".
|