We’re excited to announce that the latest information is now available on our new site, the Ginesys One Wiki!. Visit the site for up-to-date resources and insights. We look forward to continuing to support you there!
We’re excited to announce that the latest information is now available on our new site, the Ginesys One Wiki!. Visit the site for up-to-date resources and insights. We look forward to continuing to support you there!
How To: Manage Print Preference
- Deepankana Roy (Unlicensed)
- Aparajita Basu Roy
Print Preference option is introduced to setup document printing preference from various web transaction entry. You can print document and packet or item barcode just after saving the document. This article describes the general process of configuring Print Preference option of Barcode and Document printing for different modules.
Applicable Modules
Ginesys Web – Inventory – Operations – Miscellaneous
Ginesys Web – Procurement – Operations – Goods In/Out - Receipts
Ginesys Web – Sales & Distribution – Operations – Packing - Delivery - Adhoc
Ginesys Web – Sales & Distribution – Operations – Packing - Delivery - Against Order
Ginesys Web – Sales & Distribution – Operations – Packing - Delivery - Against Reservation
Ginesys Web – Sales & Distribution – Operations – Transfer Out
Ginesys Web – Sales & Distribution – Operations – Transfer In
Ginesys Web – Sales & Distribution – Operations – Invoice - Sales Invoice
Ginesys Web – Sales & Distribution – Operations – Invoice - Sales Return
Pre-requisites
- The users' Role must have access to the Print and Print Packet Barcode app operations in many of the features in Sales & Distribution through Roles in Ginesys Web - Admin - Security.
- WebClientPrint Processor (WCPP) must be installed in the logged-in system. If WCPP is not installed, the process will be stopped and the user will be prompted to download and install the file.
- Barcode Printer and Document Printer must be connected to the network as per functional requirement.
Step-by-step guide
The steps are as follows:
Generally, you will get Print Preference option in the top right corner of the window as given below:

- Click on the Down Arrow icon beside the Print Document Report icon.
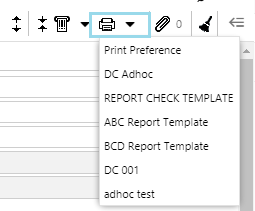
- You will get the Print Preference option with already created Report Templates.
- Select the Print Preference option from the drop down list to configure the document printing settings. You can select the Report Template to print that report directly but it is only allowed after saving the document.
- Print Preference window will open by clicking on the Print Preference option.
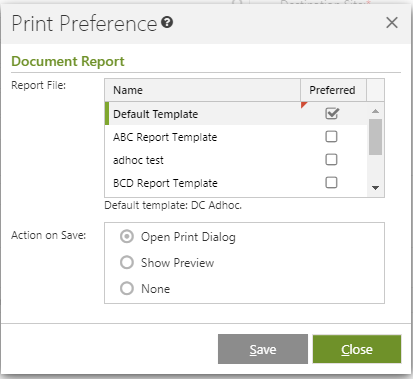
- You will get two sections - Report File and Action on Save.
Normally, Default Template will be selected. However, you can select other template as Preferred. Only one template can be set as Preferred at a time.
Note: The template which set as default in the Report Template master through Admin > Utilities > Manage > Report Template, will be be printed if the user select the Default Template option for printing document.
- You will get three options in the Action on Save section - Open Print Dialog, Show Preview and None.
- If you select Open Print Dialog option, then at the time of Document Printing, the Print Dialog window will open.
- If you select Show Preview option, then at the time of Document Printing, the Print Preview window will open.
Otherwise, for selection of None option, the Document will print directly without opening any Print Dialog or Print Preview.
Note: If Action on Save is selected as - Open Print Dialog or Show Preview, a report template must be marked as preferred. Otherwise, you will get a message - "Please select a template as preferred".
- Click on the Save button to save the Print Preference setting for Document Printing.
- You will get a message - "Print Preference saved successfully".
- Click on the Down Arrow icon beside the Print Barcode icon.
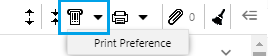
- You will get Print Preference option as showing in the above picture.
- Print Preference window will open.
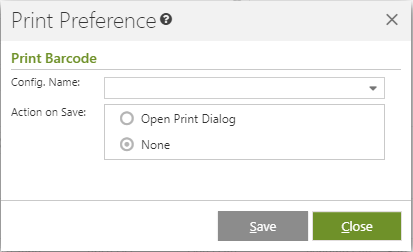
- You need to select the Config. Name from the drop down list. If there is only one Config. Name, then that name will be populated in this field. Otherwise you need to select it from the drop down list.
- Select any radio button option on Action on Save section. The options are - Open Print Dialog and None.
- If you select Open Print Dialog option, then at the time of Packet Barcode Printing, the Print Dialog window will open.
- Otherwise, for selection of None option, the packet barcode will print directly without opening any Print Dialog.
- Click on the Save button to save the Print Preference setting for Packet Barcode Printing.
- You will get a message - "Print Preference saved successfully".