Adding, Editing, Deleting & Printing Site Stock Transfer in Ginesys Web
- Deepankana Roy (Unlicensed)
- Subhasree Banerjee (Unlicensed)
- Debrupa Datta (Unlicensed)
- Aparajita Basu Roy
In an outright-sale business, there might be a need to frequently maintain records of secondary stock, i.e., the stock which you have sold to an outright customer. It might be necessary to know - how much of the stock has been actually sold by the outright customer, what is the current stock of various items in that location etc., to plan replenishment in a Shop-in-Shop setup. Now it might happen, that there are two locations of the same customer but the stock is not getting sold from one location. Then it might be a wiser decision to transfer the stock to the better selling site, or maybe use it to replenish the stock short at one location. These stock transference records are maintained through the Site Stock Transfer module.
What is the purpose of this form?
This form allows you to create/modify the transfer documents from customer's site to other site.
Prerequisites
- The users' role must have access to the Add app operation in the Site Stock Transfer feature in Sales & Distribution - Operations - Invoicing through Roles in Ginesys Web - Admin - Security.
- Stock must be present in the Source Site.
Step-by-step guide
The process is divided in the following steps:
- Go to Sales & Distribution - Operations - Invoicing - Site Stock Transfer.
- Site Stock Transfer module will open.
- Click on the Add button.
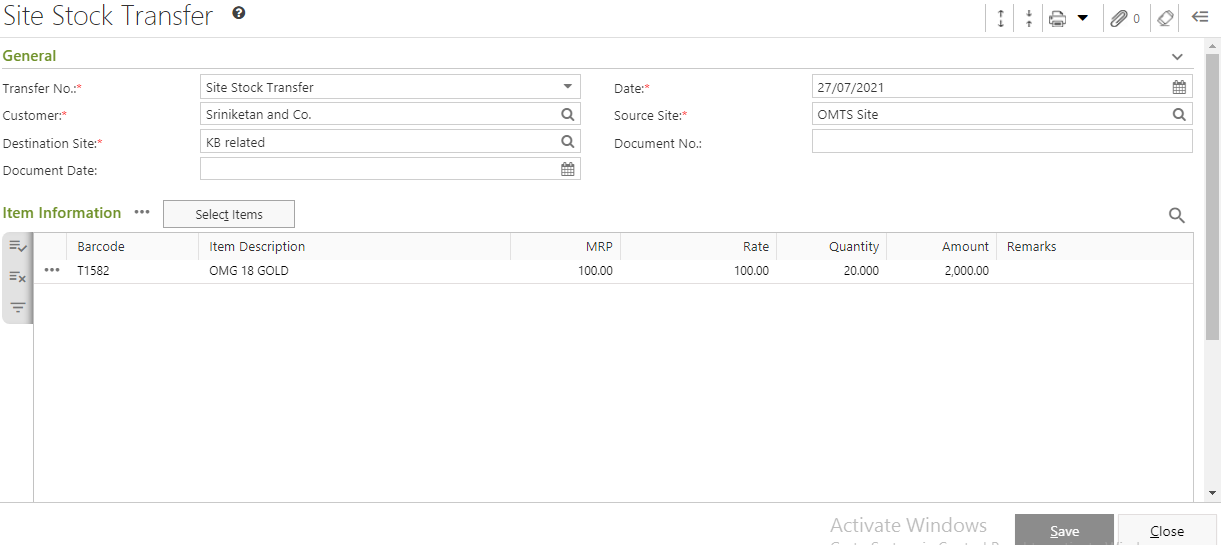
- Site Stock Transfer window will open.
- You will get a group of icons at the top right corner of the window.

- Expand All, Collapse All, Delete, Print Document Report, Attachments, Clear Form and Open Side Panel.
Expand All: Clicking on this icon, all the sections will be Expand if they are collapsed.
Collapse All: Clicking on this icon, all the sections will be Closed if they are expanded.
- Print Document Report: Clicking on the Down Arrow beside this icon, you will get Print Preference option with already created Report File Template. This option is used to print document.
- Attachments: You can Upload some required documents from this option.
- Clear Form: Clicking on this icon, you can Clear all the data already entered.
- Open Side Panel: Clicking on this, you will get the details of the current Site Stock Transfer as follows:
- Document Summary: In this section you will get the details of Total Item Count, Transfer Quantity, Transfer Amount etc.
- Source Site Details: In this section you will get the details of Source Address and Source City.
- Destination Site Details: In this section you will get the details of Destination Address and Destination City.
- Expand All, Collapse All, Delete, Print Document Report, Attachments, Clear Form and Open Side Panel.
- You will get four sections - General, Item Information, User Defined Fields and Others.
- General:
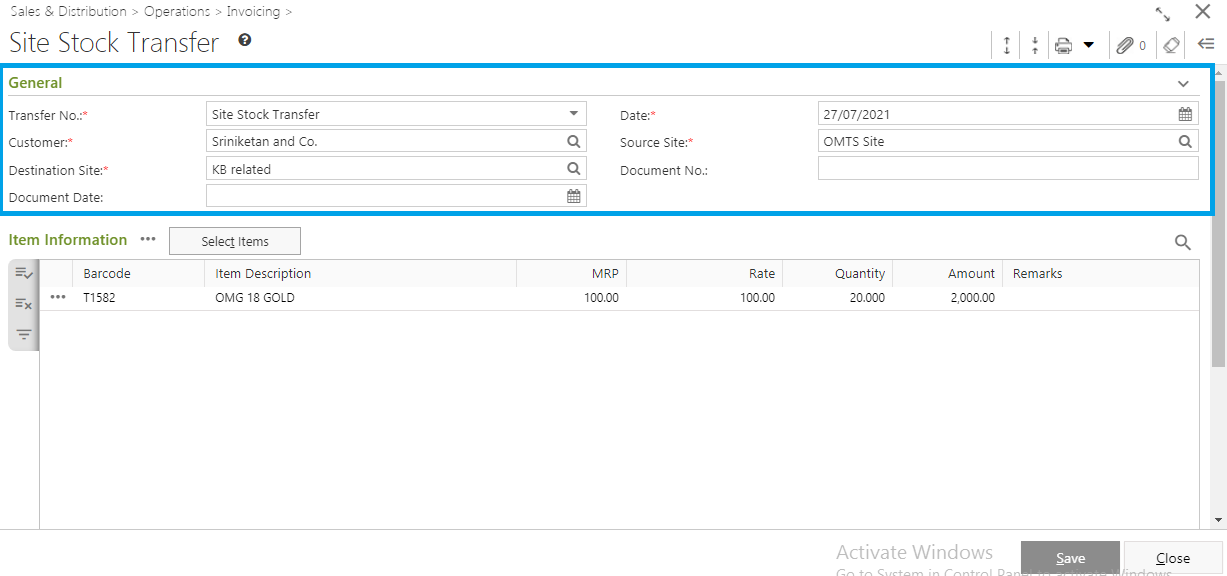
- Select a Transfer No., already created in the master, from the drop down list (Mandatory Field).
- Select the Customer (Mandatory Field) from the lookup window.
- Select the Source Site (Mandatory Field) from the Source Site Pop-Up form.
Select the Destination Site(Mandatory Field) from the Destination Site Pop-Up form.
Note: Source Site and the Destination Site cannot be same. If you select the Destination Site same as Source Site, the you will get a message - Destination Site and Source Site cannot be same.
- System date will be populated in the Date field (Mandatory Field). You can change the date as per your requirement. You can only select the past date from the system date but not any future date.
- You can put in Document No. and Document Date.
- General:
- Item Information:
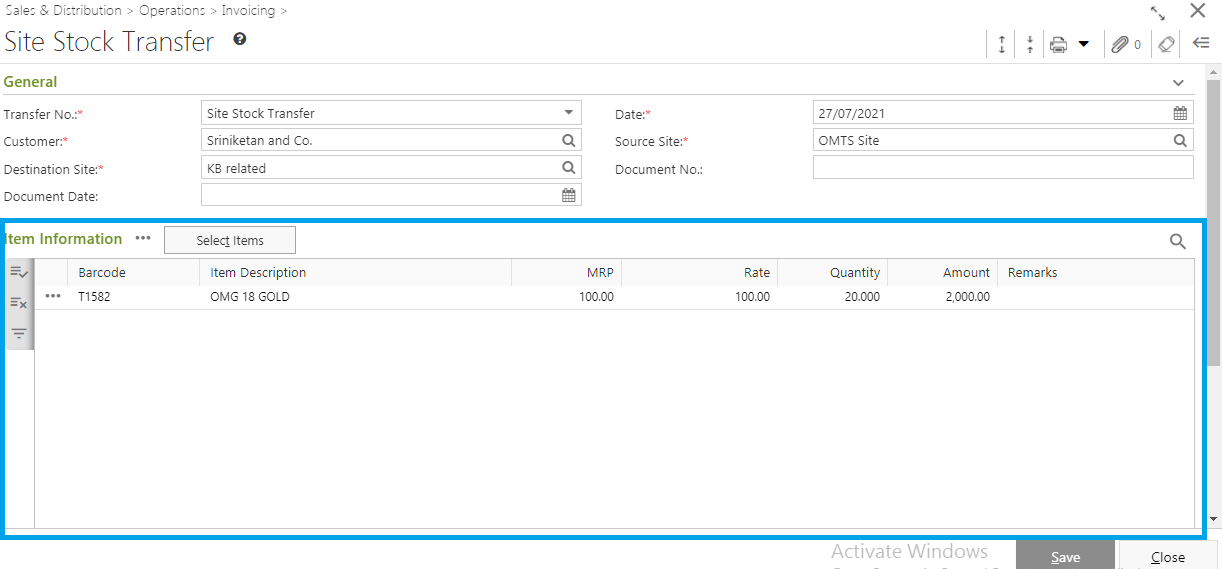
- You will get Select Item option.
- Click on the Select Item option.
- Select Item window will open.
- You will get two options - Select Items by search criteria and Select Item by scanning each item.
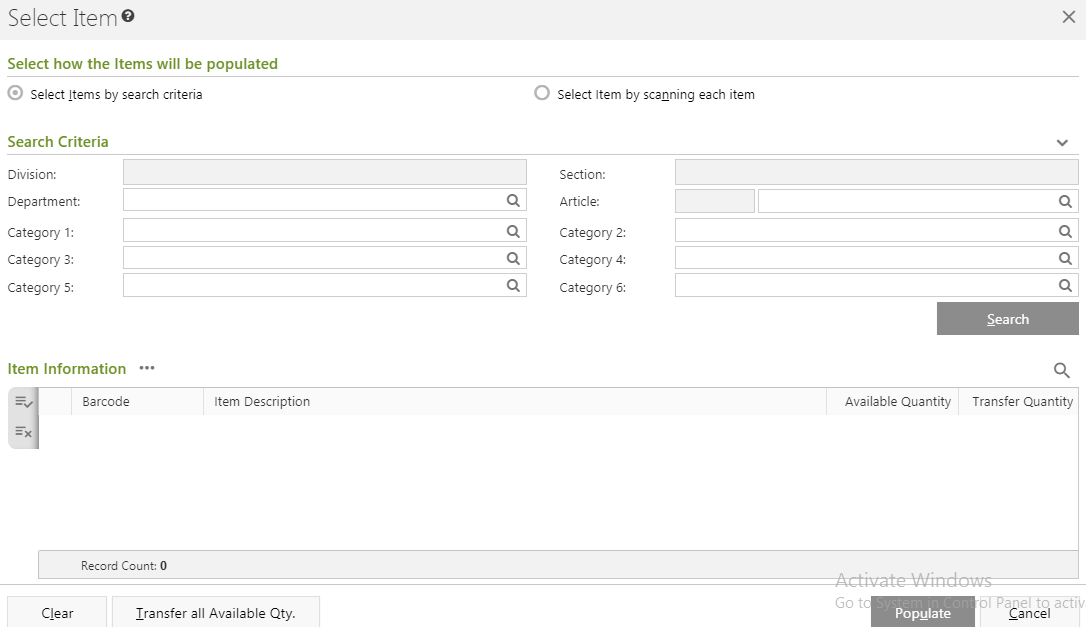
- Select Items by search criteria:
- Selecting this option, you will get a Search Criteria section.
- Putting search criteria like - Division, Categories etc, you can search your required items.
- Select Item by scanning each item:
- You can directly scan item barcode.
- Select Items by search criteria:
- Selected item will be populated in the Item Information section with Barcode, Item Description and Available Quantity.
- Put in the Transfer Quantity manually or Click on the Transfer All Available Quantity.
- Click on the Populate button.
- The items will be populated in the Item Information section with Barcode, Item Description, RSP, MRP etc.
- You will get two options - Delete Record and View Property beside the every item row.
- requirement.
- User Defined Fields:
- User Defined Fields: You can use user defined fields like Number etc. as per your requirement.
- User Defined Fields: You can use user defined fields like Number etc. as per your requirement.
- Others:
- You can put in the remarks for the Site Stock Transfer from the Remark field under Others fields.
- Now click on the Save button.
- You will get a confirmation message - "The Document <Transfer No..> saved successfully".
Impact of Batch/Serial functionality on S&D - Site Stock Transfer - Select Batch information
New columns have been added
Three columns have been added - Batch/Serial No., Mfg. Date and Valid Upto under the Main window Item grid & Select items > Item information grid
Behaviour
All column types are “View only”, i.e. modification is not allowed.
The columns are hidden by default but can be made visible by the column chooser.
Changes in column selection are retained in grid state.
Data in these columns will autoflow from selected batch/serial information.
Select Item window operations
Select items by search criteria
Search Criteria > Search :
For Batch/Serial applicable items data will be populated Batch/Serial wise.
Select Item by scanning each item
Item information grid > Scan Item
Exceptions
- Window will display item/batches/serial that are available in the Source Site and exclude stocks for those are already populated in the grid.
- Window will display only those batch/serial which exist for that particular item which is present in the item grid and exclude stocks for those that are already populated in the grid in “Transfer Quantity” column.
- If no items exist in the item grid and scan is clicked, system will show the following error - “No data present in item grid, Add data in item grid and try again”
Impact of Batch/Serial functionality on Item Grouping and Pricing Logic
- Barcode wise - Batch/Serial No. Wise - Rate wise.
- Based on Effective rate.
“Negative stock alert method” under this module should always be set to “Stop”, i.e. user can only issue those items that are present in stock. Needless to say, Adhoc scanning or selection of batch/serial won’t be allowed here.