Adding, Editing, Deleting & Printing GRT (Goods Return Challan) in Ginesys Web
The GRT (Goods Return Challan) in Ginesys is a basic entry module where you can keep a record of any stock/goods returned to a supplier. Goods Return Challan Against Receipt is made when details of GRC raised while receiving from the supplier is known. The goods returned affect the inventory stock only. If you do not have the GRC details, you can return goods using Goods Return Challan - Adhoc.
Important information - All types of GRT (Adhoc and Against Order) have been merged in same module but cannot be created in same instance. Mixed GRT cannot be made.
Note: GRT Wizard has been put into the Action button in the web version.
Important - Applicability of Consignment and Non-consignment mode to GRT against GRC
If the GRC mode is consignment then GRT can be done right after the GRC.
If the GRC mode is non-consignment then GRT can be done only after creating PI (Purchase Invoice).
Prerequisites
- The users' role must have access to the Add app operation in the Return feature in Procurement - Operation - Goods In/Out through Roles in Ginesys Web - Admin - Security.
- The document numbering scheme for GRT must be present for the connected site. In case, you wish to automatically create Purchase Return, you need to have the document scheme for Purchase Return too.
The following masters need to be created and updated in Admin, Inventory and Procurement modules:
Step-by-step guide
The steps are as follows:
- Go to Ginesys Web > Procurement > Operation > Goods In/Out > Return.
- Goods Return Challan module will open.
- All the previously created GRTs will be listed here.
- Click on Add button.
- Goods Return Challan window will open.
- You will get group of icons at the top right corner of the window.

- The icons name from left to right are - Expand All, Collapse All, Print Barcode, Print Document Report, Attachments, Clear Form and Open Side Panel.
- Expand All: Clicking on this icon, all the sections will be Expand if they are collapsed.
- Collapse All: Clicking on this icon, all the sections will be Closed if they are expanded.
- Print Document Report: Clicking on the Down Arrow beside this icon, you will get Print Preference option with already created Report File Template. This option is used to print document.
- Attachments: You can Upload some required documents from this option.
- Clear Form: Clicking on this icon, you can Clear all the data already entered.
- Open Side Panel: Clicking on this, you will get the details of the current Goods Return Challan as follows:
- Document Summary: In this section you will get the summary of Selected Items, Sale Type, Owner Site, Modified by etc.
- Vendor Details: You will get the Selected Vendor Details like Address, Contact Details, Tax Region, GST Details etc.
- Vendor Statistic: This section describes the Received not Invoiced amount, Outstanding Amount, Last Invoice Date etc.
- Document Summary: In this section you will get the summary of Selected Items, Sale Type, Owner Site, Modified by etc.
- Expand All: Clicking on this icon, all the sections will be Expand if they are collapsed.
- The icons name from left to right are - Expand All, Collapse All, Print Barcode, Print Document Report, Attachments, Clear Form and Open Side Panel.
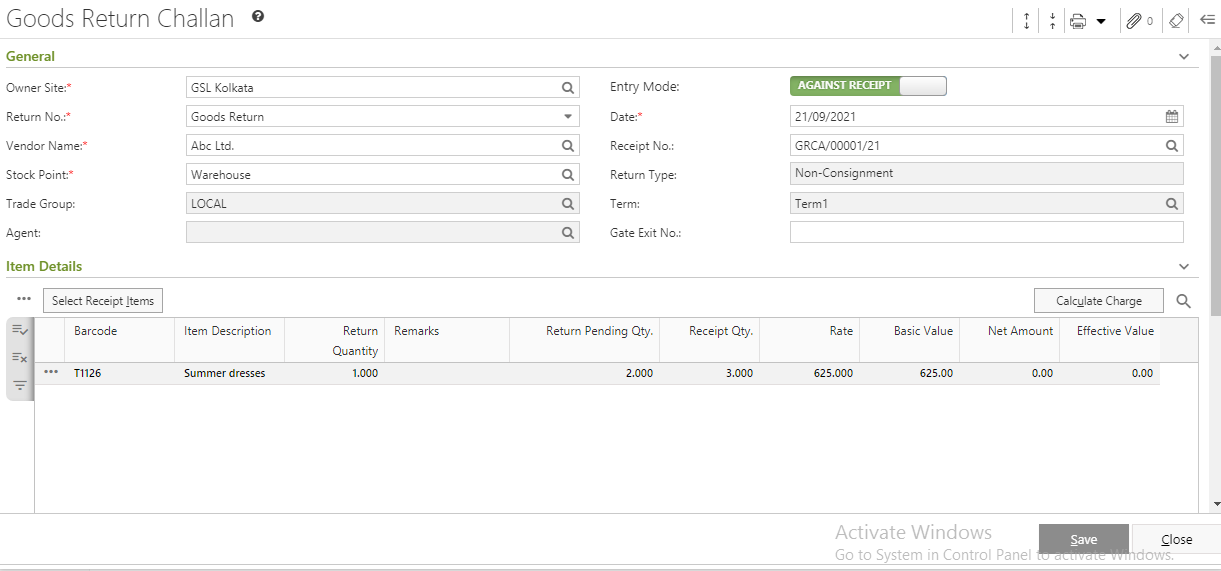
You will get four sections - General, Item Details, User Defined Fields and Others.
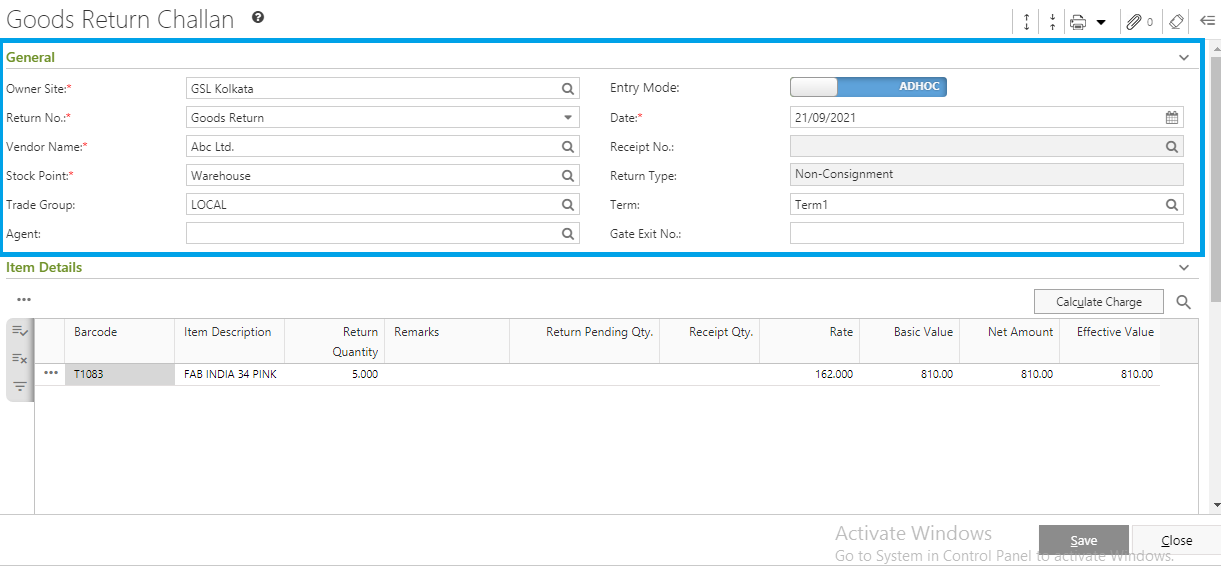
- You can create both GRT Adhoc or GRT Against Receipt separately in the same form by selecting the Entry Mode using toggle button. When you switch between GRT Adhoc and GRT Against Receipt, a message will be displayed - "Change of mode will clear the entry. Are you sure to continue?". If you click on the Yes, the Entry mode will be changed.
- General:
- Select the Owner Site (Mandatory Field) for which you want to create the GRT.
- Select a Document Numbering Scheme, already created in the master, from the field Return No.
- Select the Vendor Name (Mandatory Field) from the drop down list.
- According to the selected Vendor Name, other fields like Stock Point, Trade Group, Return Type and Term.
- System Date will be populated in the Date field, but user may change it to an earlier date provided his lock days do not restrict him and the Inventory Months are open for that date.
Return Type always will be Non- Consignment. You cannot change this field.
Note: Receipt No. field remains inactive when you select Adhoc mode.
- Select the Owner Site (Mandatory Field) for which you want to create the GRT.
- Item Details:
- You need to add items in the GRC by using Search Item, Scan Item, Import Barcode and Copy Challan.
- Search Item: This process will search the items from the Item Master according to the search criteria.
- Scan Item: You can directly Scan the Barcode to add items.
- Import Barcode: The Import Barcode feature allows to populate items using the .csv or .txt files.
Copy Return: Only item details of existing challans can be copied and the items included to create new challans.
- Search Item: This process will search the items from the Item Master according to the search criteria.
- Selected items details will be populated with Barcode, Item Description, Rate, Return Qty., Order No., Order Date etc.
- If you click on the
 button left side of the populated item, you will get a drop down list.
 - You will get Delete Record, Item Charge and View Properties.
- Delete Record: You can delete the populated item from the list as per your requirement.
- Item Charge: The charges applied on the particular item will be displayed by clicking on this option. However, you may change the factors of the charges applied based on the settings in your user profile.
- View Properties: You can check the item details by clicking on this option. It will open the Item Master window but you cannot edit any details.
- Delete Record: You can delete the populated item from the list as per your requirement.
- You need to add items in the GRC by using Search Item, Scan Item, Import Barcode and Copy Challan.
- Others:

- section.
- section.
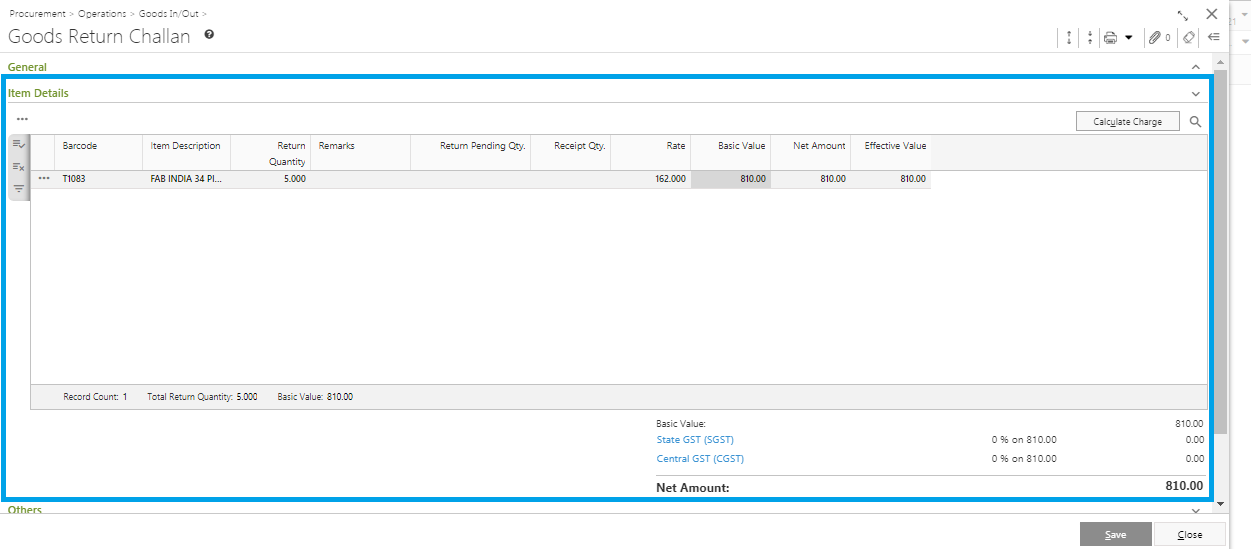
- Now you need to calculate Charge. Click on the Calculate Charge button. But even if you skip this step, charges applied will be automatically calculated on saving the form.
- Charges will be calculated and the final amount after charge application will be populated as Net Amount.
- If you click on any applicable charge, Applicable Item window will open. You can alter the charge factor if you have enabled the proper user profile setting. The applicable charge amount or discount amount will be divided between all the items.
- Click on the Save button to save GRT. You will get a message - "Document <GRT No.> saved successfully."
- If the user profile - Allow auto creation of Purchase Invoice and Purchase Return is selected, then a message will be displayed - "Do you want to generate Purchase Return against this Challan?".
- If you click on Yes, Purchase Return window will open. You can create a purchase return against the created GRT.
- General:
- General:
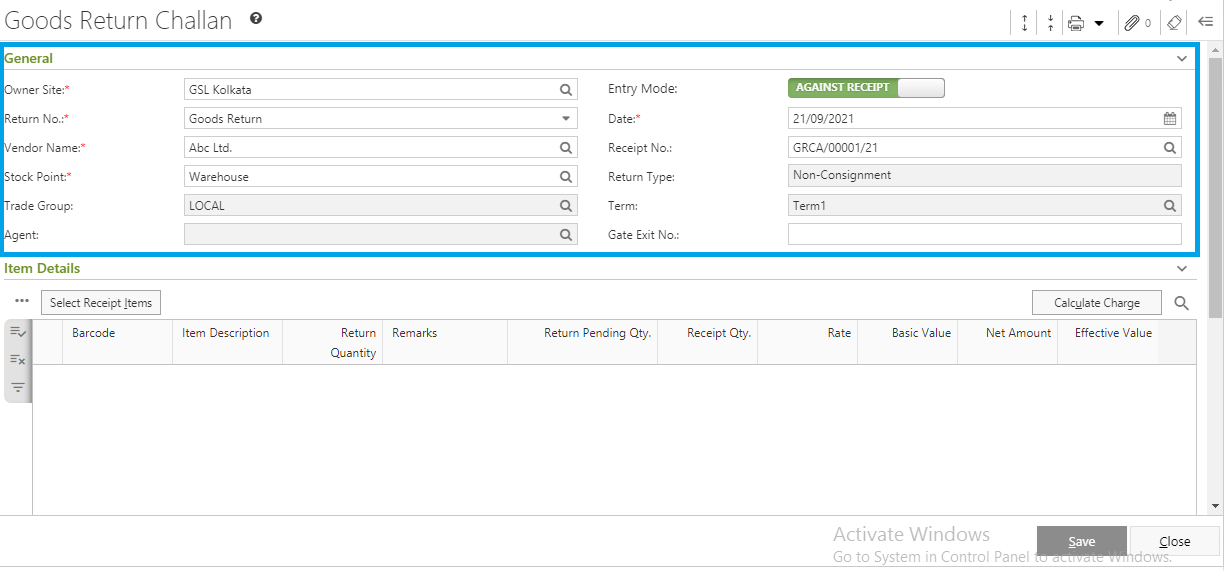
- Select the Owner Site (Mandatory Field) for which you want to create the GRT.
- Select a Document Numbering Scheme, already created in the master, from the field Receipt No.
- Select the Vendor Name from the drop down list.
Select the Receipt No (Mandatory Field).
Important - Applicability of Consignment and Non-consignment mode to GRT against GRC against GRC
Note: The Receipt No. dropdown will only show value based on whether the receipt (GRC) is Consignment type and in case of non consignment GRC; Purchase Invoice has to be created first.
- According to the Receipt No., others details like Return Type, Trade Group, Term etc. will be populated.
- Select the Owner Site (Mandatory Field) for which you want to create the GRT.
- Item Details:
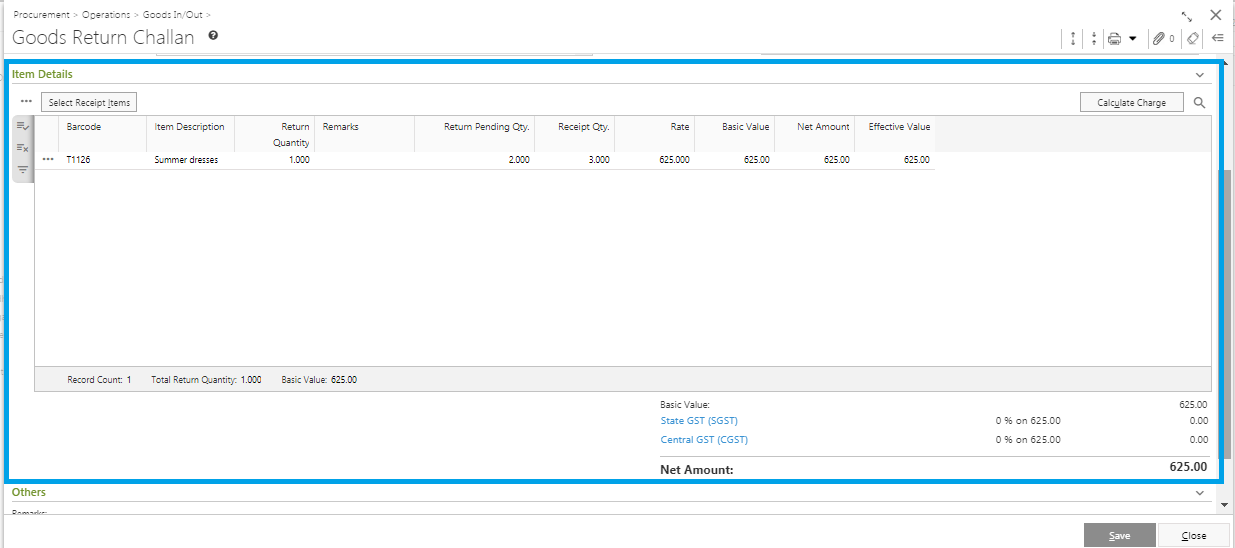
- You can only select items present in the selected receipt.
- Click on the Select Receipt Item.
- Select Receipt Item window will open.
- GRC No. will be populated in the Receipt No. field.
- You can click on the Show Item button. The items present in the GRC, will be listed in the Item Information section.
- You can scan the item barcode in the Scan Barcode field. If the scanned item is not present in the GRC, then you will get a message - "You have scanned an invalid item/the item is no more pending/the item does not belong to the selected order. Please select another item."
- You will also get a Search Criteria section. Put the search criteria, Department, Category, Section etc. for the item(s) present in the GRC.
- Click on the Search button.
- The searched items will be populated In the Item Information section.
- You can put the return quantity manually or click on the Return All Pending Qty. to return all the pending quantity.
- You will get a summary of Record Count, Total Pending Quantity and Total Return Quantity.
- Click on the Populate button.
- All the selected items will be populated in the Item Details section.
If you click on any applicable charge,Applicable Itemwindow will open. You can alter the charge factor if you have enabled the proper user profile setting. The applicable charge amount or discount amount will be divided between all the items.
- Click on the Select Receipt Item.
- You can only select items present in the selected receipt.
- Other:
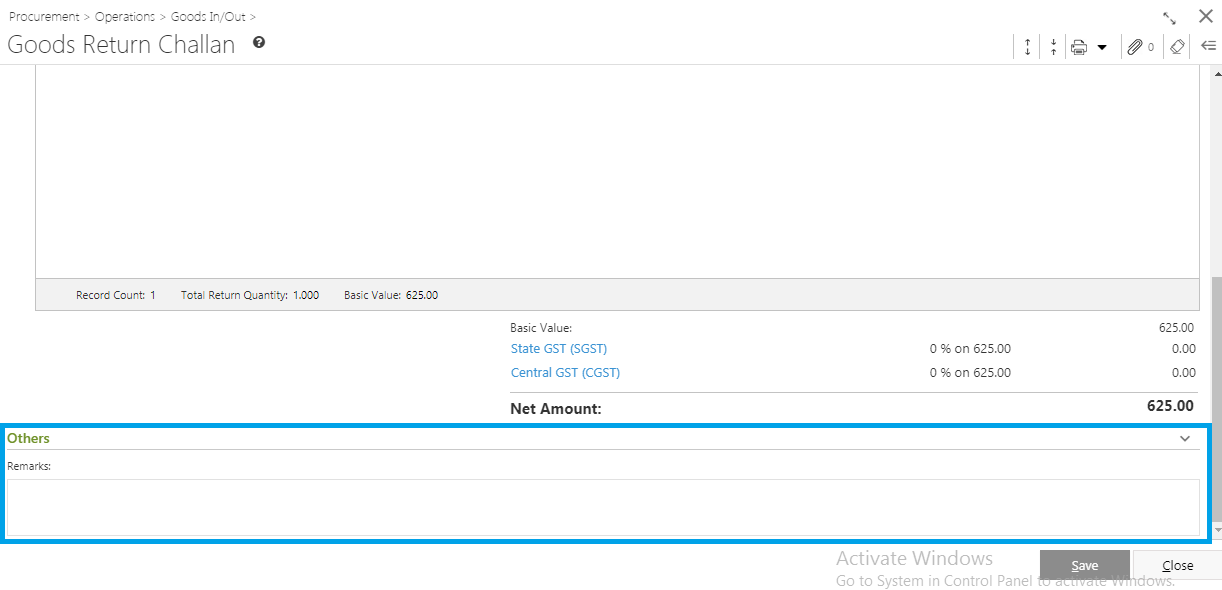
- You can also put in Remarks field in Others section.
- You can also put in Remarks field in Others section.
- Click on the Save button to save GRT. You will get a message - "Document <GRT No.> saved successfully."
- General:
Prerequisites
- The users' role must have access to the Edit app operation in the Return feature in Procurement - Operation - Goods In/Out through Roles in Ginesys Web - Admin - Security.
- GRT must be created.
Step-by-step guide
The steps are as follows:
- Go to Ginesys Web > Procurement > Operation > Goods In/Out > Return.
- Goods Return Challan module will open.
- All the previously created GRTs will be listed here.
- Select one GRT you want to edit.
- Go to Actions > Edit.
- Edit: Goods Return Challan window will open.
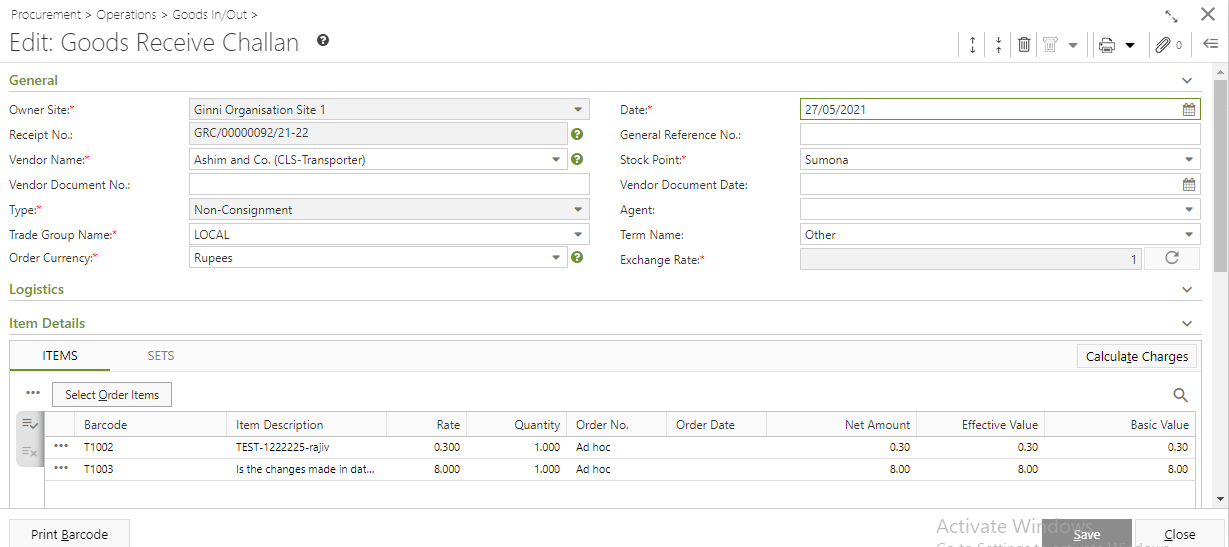
- All the information will be populated in the particular fields.
- You can edit Vendor Name. When you change the Vendor name, you will get an alert message - "Modification of Vendor Name will reset Return Type, Trade Group, Term, Agent, and Rate of all items, as per the setting of new vendor selected. Please confirm."
- If you click on OK, the Vendor Name and others fields will be changed according to the Vendor Name.
- You can add new items. Existing items can be deleted.
Click on the Save button after modification.
Note: Entry Mode cannot be modified in the Edit mode.
Prerequisites
- The users' role must have access to the Delete app operation in the Return feature in Procurement - Operation - Goods In/Out through Roles in Ginesys Web - Admin - Security.
Goods Return Challan must be created and not Released.
Step-by-step guide
The steps are as follows:
- Go to Ginesys Web > Procurement > Operation > Goods In / Out > Return.
- Goods Return Challan Module will open.
- List of already created GRT will appear.
Select the one or more than one GRT you want to delete.
- Go to Acton > Delete.
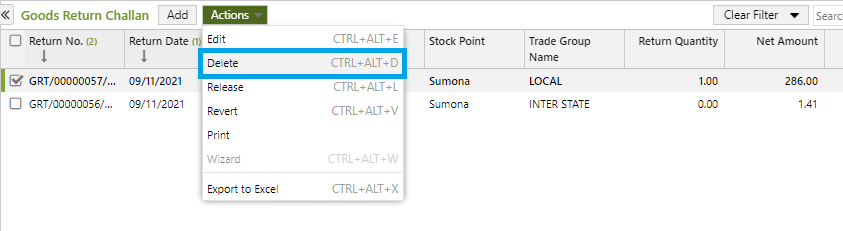
- You will get a message - "Document once deleted cannot be retrieved. Do you want to delete this document?"
- If you click on Yes, you will get a confirmation message "<GRT No:> - Successfully deleted".
Prerequisites
- The users' role must have access to the Release app operation in the Return feature in Procurement - Operation - Goods In/Out through Roles in Ginesys Web - Admin - Security.
Goods Return Challan must be created and not Released.
Step-by-step guide
The steps are as follows:
- Go to Ginesys Web > Procurement > Operation > Goods In / Out > Receipt.
- Goods Return Challan Module will open.
- List of already created GRT will appear.
Select the one or more than one GRT you want to release.
- Go to Action > Release.
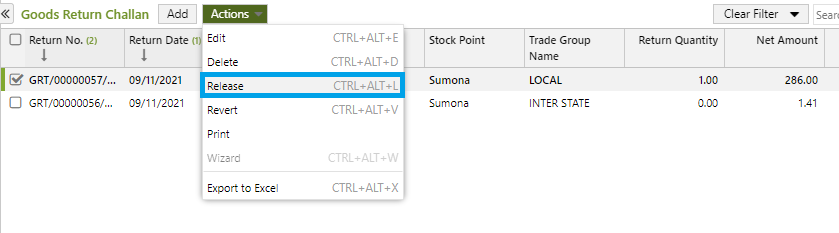
You will get a message - "Document(s) once released cannot be modified. Do you want to proceed?".
Behavior of Revert operation depending on site type
Note:
- GRT for Organization Sites are auto-reverted. In case a user tries to Revert a GRT for Organization site, the following message is seen -
Receipt No. <GRT No.> : Revert operation is not applicable to <Name of Organization Site>
- GRT for Managed Sites have to be reverted.
- If you click on Yes, the GRT will be released.
- You will get a message - "Receipt No: <GRT No.> Released Successfully."
Prerequisites
- The users' role must have access to the Revert app operation in the Return feature in Procurement - Operation - Goods In/Out through Roles in Ginesys Web - Admin - Security.
Goods Return Challan must be created and not Released.
Step-by-step guide
The steps are as follows:
- Go to Ginesys Web > Procurement > Operation > Goods In / Out > Return.
- Goods Return Challan Module will open.
- List of already created GRT will appear.
Select the one or more than one GRT you want to revert.
- Go to Action > Revert.

You will get an alert message "Selected documents will not be released, and stock update done at store will also be reverted. Do you want to proceed?"
Behavior of Revert operation depending on site type
Note:
- GRT for Organization Sites are auto-reverted. In case a user tries to Revert a GRT for Organization site, the following message is seen -
Receipt No. <GRT No.> : Revert operation is not applicable to <Name of Organization Site>
- GRT for Managed Sites have to be reverted.
- If you click on Yes, the GRT will be reverted.
- You will get a message - "Receipt No: <GRT No.> Reverted Successfully."
Prerequisites
- The users' role must have access to the Print app operation in the Return feature in Sales & Distribution - Operation - Packing through Roles in Ginesys Web - Admin - Security.
- GRT must be created.
- GRT must not be canceled.
- Printer must be connected to the device.
Step-by-step guide
The steps are as follows:
- Go to Go to Ginesys Web > Procurement > Operation > Goods In / Out > Return.
- Goods Return Challan Module will open.
- List of already created GRT will appear.
- Select the one or more than one GRT you want to print.
- You can use Filter to search particular GRT.
- Go to Action > Print.
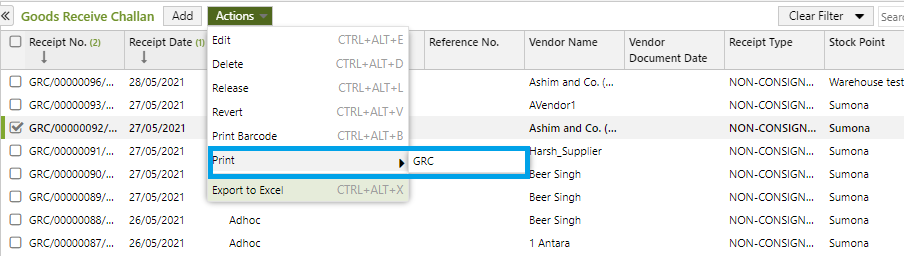
- The GRT will be printed.