Adding, Editing, Deleting, Releasing, Reverting & Printing Purchase Return in Ginesys Web
Purchase Return is a document which is created to reflect the results of a Goods Return in the financial books. Purchase Return in its turn raises Purchase Return Debit Note, unless adjusted with Purchase Invoice. Purchase Return is a type of invoice raised after non-consignment goods are returned by the purchaser under a particular scenario (like defective goods, unsold goods, goods returned by customers etc.) claiming refund in cash or adjustments done with other unpaid purchases from a particular Supplier. This article describes how to create, modify and delete a Purchase Return document.
Prerequisites
- The users' role must have access to the Add app operation in the Purchase Return feature in Procurement - Operation - Invoicing through Roles in Ginesys Web - Admin - Security.
- The document numbering scheme for Purchase Return must be present for the connected site.
The following masters need to be created and updated in Admin, Inventory and Procurement modules:
Step-by-step guide
The steps are as follows:
- Go to Ginesys Web > Procurement > Operation > Invoicing.
- Purchase Return module will open.
- All the previously created Purchase Returns(PRT) will be listed here.
- Click on Add button.
- Purchase Return window will open.
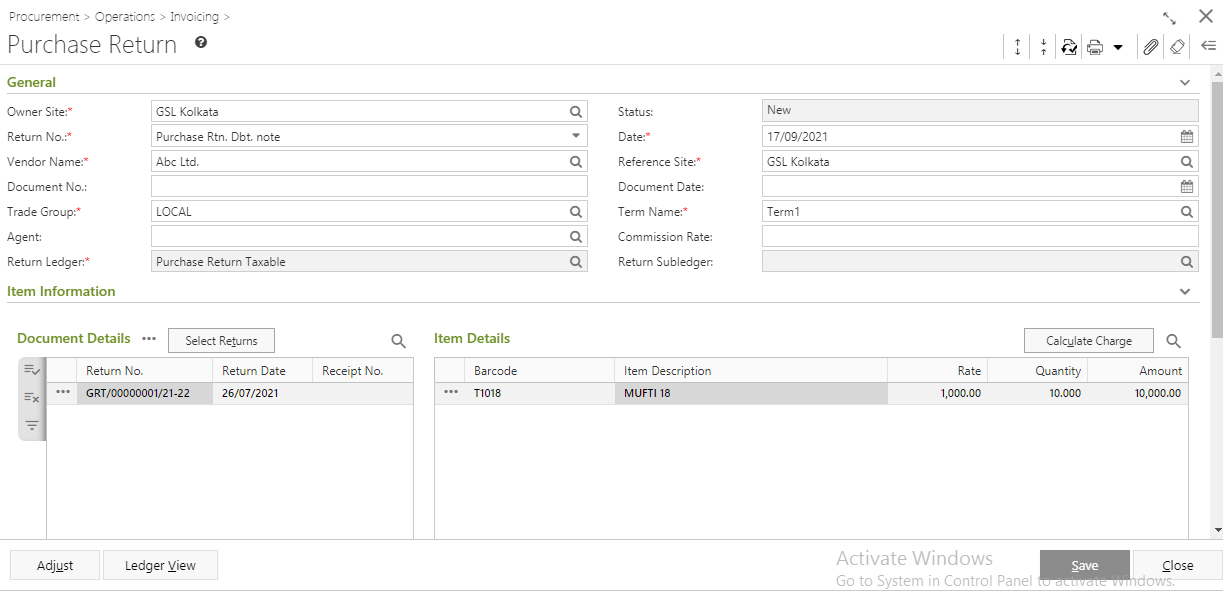
- You will get group of icons at the top right corner of the window.

- The icons name from left to right are - Expand All, Collapse All, Print Barcode, Print Document Report, Attachments, Clear Form and Open Side Panel.
- Expand All: Clicking on this icon, all the sections will be Expand if they are collapsed.
- Collapse All: Clicking on this icon, all the sections will be Closed if they are expanded.
- Print Document Report: Clicking on the Down Arrow beside this icon, you will get Print Preference option with already created Report File Template. This option is used to print document.
- Attachments: You can Upload some required documents from this option, for example some mails exchanged between Vendor and buyer regarding this Return.
- Clear Form: Clicking on this icon, you can Clear all the data already entered.
- Open Side Panel: Clicking on this, you will get the details of the current Purchase Return as follows:
- Document Summary: In this section you will get the summary of Selected Items, Sale Type, Owner Site, Modified by etc.
- Vendor Details: You will get the Selected Vendor Details like Address, Contact Details, Tax Region, GST Details etc.
Vendor Statistic: This section displays the Ledger Balance amount, Outstanding Amount, Last Invoice Date and Last Payment Date.
- Document Summary: In this section you will get the summary of Selected Items, Sale Type, Owner Site, Modified by etc.
- Expand All: Clicking on this icon, all the sections will be Expand if they are collapsed.
- The icons name from left to right are - Expand All, Collapse All, Print Barcode, Print Document Report, Attachments, Clear Form and Open Side Panel.
- You will get five sections - General, Item Information, User Defined Fields, Logistics and Others.
In the General section, you need to fill in -
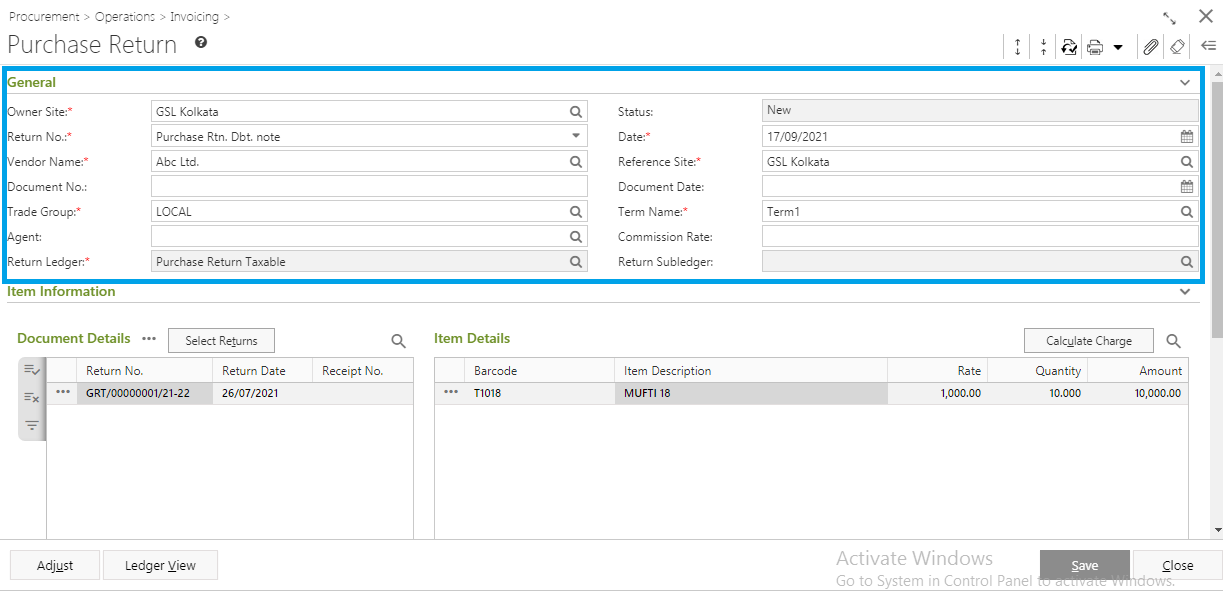
- Owner Site (mandatory) - Site where the document originates.
- Return No. (mandatory) - Document Numbering Scheme for Purchase Return as provided in the Document Numbering Scheme Master
- Date (mandatory) - Date for which the Purchase Return is created. As usual, cannot be date in the future, and has to be a date within the Open Finance Months. Lock days set for user shall also be operational. By default, system date is populated.
- Vendor (mandatory) - The vendor to whom the items are being returned, on selection of the vendor the following fields may be auto-populated provided the details are available in the Vendor Master - Trade Group, Term Name, Return Ledger (only if defined in the selected Term), Reference Site, Agent and Commission Rate.
- Trade Group (mandatory) - Trade Group as defined in Vendor master, in combination with selected Organization site, or may be selected from the drop-down.
- Term Name (mandatory) - From the selected Vendor's default Term or may be selected from the drop-down.
- Return Ledger (mandatory) - Will auto-populate on selection of Owner Site either from Term master or Vendor master or can be selected from the drop-down.
- Reference Site (mandatory) - This field is most important in case of return of local purchase items. The population logic of this field is given below -
- If selected Vendor Class type is not Customer, Owner site is populated as Reference Site.
- If selected Vendor Class type is Customer, then the selected customer/vendor with a single, non-extinct site will populate the customer site as a Reference site. Otherwise,
- either the non-extinct 'Default HO Site' defined for the OU of the selected owner site or
- the Owner Site as Reference Site will be populated.
- either the non-extinct 'Default HO Site' defined for the OU of the selected owner site or
Other than these some other optional data captured in this section - Document No., Document Date, Agent, and Commission Rate. Return Sub Ledger and Status are auto-populated.
- Owner Site (mandatory) - Site where the document originates.
In the Item Information section, you need to fill in -

1st Section - Document Details
This is where you need to select the related GRTs .
- Click on Select Return to open the Return Details window.
- The Return Details window displays the Goods Return documents pertaining to the selected vendor and based on the whether the document scheme number is GST applicable or Excise applicable.
On selection of each GRT the details of items included in the GRT are displayed in the Item Information section.
Quantity and Rate in Item Information
Note: Modification of Quantity and rate of items in GRT is not allowed.
Clicking on OK populates the selected GRT and relevant items in the main grid.
- The Calculate Charges button will automatically calculate the applicable charges based on the selected Term.
- Click on Select Return to open the Return Details window.
The Adjust button is used to adjust Purchase Return with Purchase Invoices raised for the same vendor and released but not adjusted yet. It can also be adjusted with Sales Return, Vouchers etc.
The Adjust button will become operational only after charge is calculated.
It will become mandatory if the user profile (Ginesys Web - Admin - Security - User Profile > Procurement tab) Document adjustment is mandatory in Purchase Return has been ticked. Otherwise, users can adjust optionally.
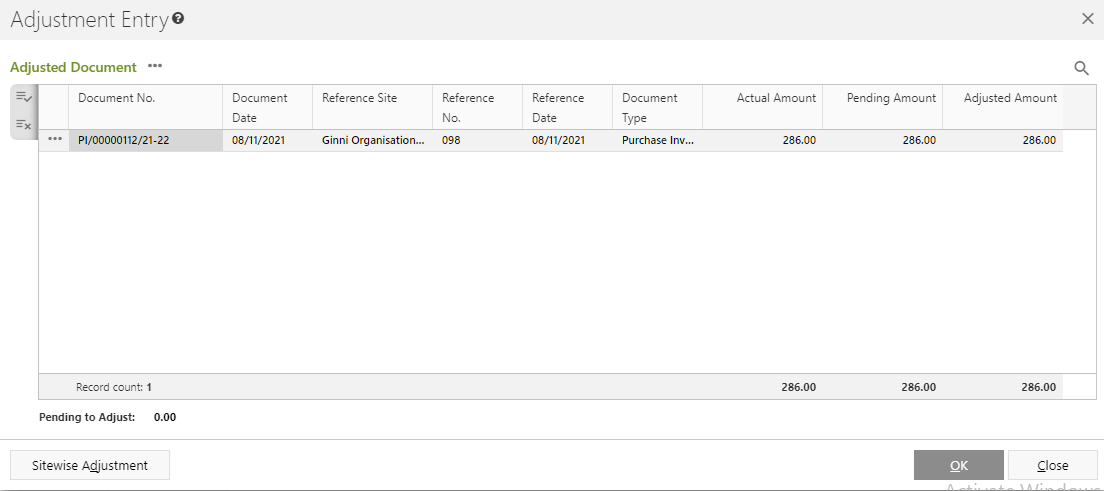
Adjustment Entry can be done in two ways - Auto setup for FIFO and Select Document.
By default the Net amount of purchase return is shown as Pending to Adjust (display only), when no documents are adjusted.Once documents are adjusted then (Net Amount of purchase return - Total of adjusted amount) is displayed as Pending to Adjust.
to be filled if /wiki/spaces/PUB/pages/1264255165 exists. The following fields are applicable if tagged with the Purchase Return-
Logistic No. - Populated from Outgoing LR if Outgoing LR is selected in Vendor Master.
Declaration Amount - Populated from Outgoing LR
Date - Populated from Outgoing LR
Prerequisites
- The users' role must have access to the Edit app operation in the Purchase Return feature in Procurement - Operation - Invoicing through Roles in Ginesys Web - Admin - Security.
- Purchase Return must be created and Un-Posted.
Step-by-step guide
The steps are as follows:
- Go to Ginesys Web > Procurement > Operation > Invoicing > Purchase Return.
- Purchase Return window will open.
- Previously created Purchase Return will be listed.
- Select the Purchase Return you want to edit.
You can use Filter to search particular Purchase Return(s).
Note: If you select multiple Purchase Return, you will get the Edit option disabled. You cannot edit multiple Purchase Return at a time.
- Edit: Purchase Return window will open.
- All the details will be populated.
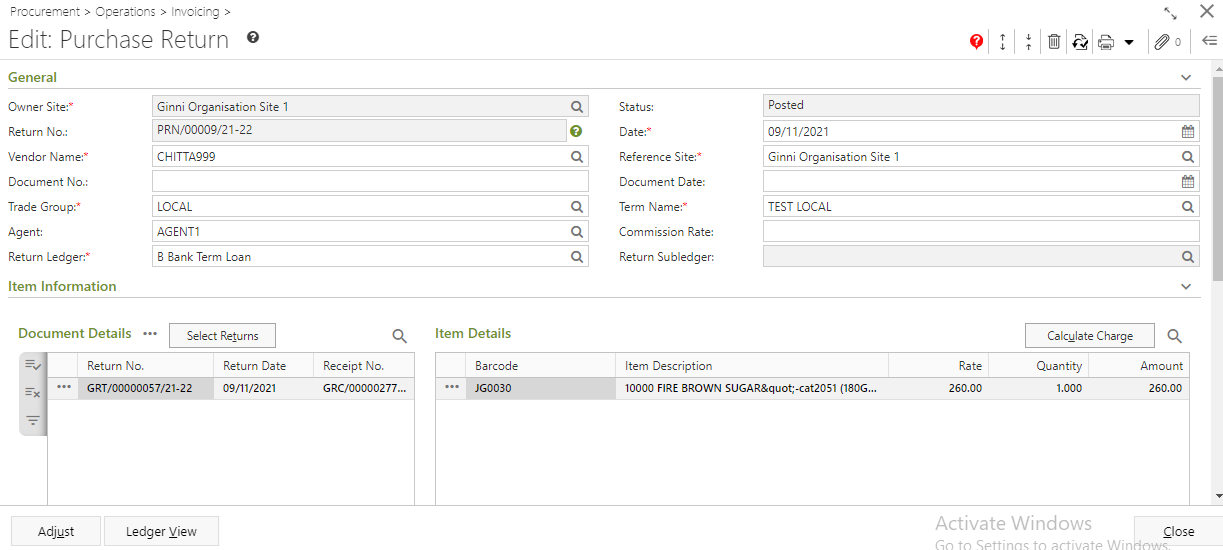
- You will three new icons at the top right corner of the window - Show Message, Delete and Revert.

- Show Message: You will get a message regarding edit of Purchase Return.
- Delete: You can Delete the Purchase Return from the Edit Mode by clicking on this icon.
- Revert: You can Revert the Purchase Return from the Edit Mode by clicking on this icon.
- Show Message: You will get a message regarding edit of Purchase Return.
- If you want to modify the Vendor, you need to remove the Receipt. Otherwise you will get a message - "Please remove the receipt(s) before changing the Vendor.". Others details will be changed as per Vendor changed.
- You can modify Agent, Reference Site, Term etc.
- You can also modify and delete Receipt and Items.
- Click on the Save button to save the modified Purchase Return.
- You will get a message - "Document <Purchase Return No.> saved successfully."
Prerequisites
- The users' role must have access to the Delete app operation in the Purchase Return feature in Procurement - Operation - Invoicing through Roles in Ginesys Web - Admin - Security.
- Purchase Return must be created and Un-Posted.
- Purchase Return must not be Released.
Step-by-step guide
The steps are as follows:
- Go to Ginesys Web > Procurement > Operation > Purchase/Assets > Purchase Return.
- Purchase Return window will open.
- Previously created Purchase Return will be listed.
- Select the Purchase Return you want to delete.
- You can use Filter to search particular Purchase Return(s).
- Go to Acton > Delete.
- You will get a message - "Document once deleted cannot be retrieved. Do you want to delete this document?"
- If you click on Yes, you will get a confirmation message "<Purchase Return No:> - Successfully deleted".
Prerequisites
- The users' role must have access to the Release app operation in the Purchase Return feature in Procurement - Operation - Invoicing through Roles in Ginesys Web - Admin - Security.
- Purchase Return must be created and Un-Posted.
- Purchase Return must not be Released.
Step-by-step guide
The steps are as follows:
- Go to Ginesys Web > Procurement > Operation > Invoicing > Purchase Return.
- Purchase Return window will open.
- Previously created Purchase Return will be listed.
- Select the Purchase Return you want to release.
- You can use Filter to search particular Purchase Return(s).
- Go to Acton > Release.
- You will get a message - "Document(s) once released cannot be modified. Do you want to proceed?"
- If you click on Yes, you will get a confirmation message "<Purchase Return No:> - Successfully released".
Prerequisites
- The users' role must have access to the Revert app operation in the Purchase Return feature in Procurement - Operation - Invoicing through Roles in Ginesys Web - Admin - Security.
- Purchase Return must be created and Un-Posted.
- Purchase Return must not be Released.
Step-by-step guide
The steps are as follows:
- Go to Ginesys Web > Procurement > Operation > Invoicing > Purchase Return.
- Purchase Return window will open.
- Previously created Purchase Return will be listed.
- Select the Purchase Return you want to release.
- You can use Filter to search particular Purchase Return(s).
- Go to Acton > Revert.
- You will get a message - "Finance postings of the selected document(s) will be reverted. Auto DN/CN, if any, will also be deleted. Do you want to proceed?"
- If you click on Yes, you will get a confirmation message "<Purchase Return No:> - Successfully reverted".