Adding, Editing, Deleting & Printing Sales Order (SO) in Ginesys Web
The sales order, also known as SO, is an order raised by a business to a customer. A sales order can be created for both products and/or services. A sales order is an internal document of the company, meaning it is generated by the company itself. A sales order should record the customer's originating purchase order which is an external document. Rather than using the customer's purchase order document, an internal sales order form allows the internal audit control of completeness to be monitored. A sequential sales order number may be used by the company for its sales order documents. The customer's PO is the originating document which triggers the creation of the sales order. A sales order, being an internal document, can therefore contain many customer purchase orders under it. In a manufacturing environment, a sales order can be converted into a work order to show that work is about to begin to manufacture, build or engineer the products the customer wants. Customer may request a Sales Order (SO) to view exact details of the products, price, terms and delivery dates.
Prerequisites
- The users' role must have access to the Add app operation in the Sales Order feature in Sales & Distribution - Operation - Order through Roles in Ginesys Web - Admin - Security.
- Document Numbering Scheme must be present for the module.
- The masters must be present - Item, Customer, Agent, etc.
Step-by-step guide
The process is divided into the following steps:
- Go to Ginesys Web > Sales and Distribution > Operations > Order > Sales Order.
- Sales Order module will open.
- All the previously created SOs will be listed here.
- Click on Add button.
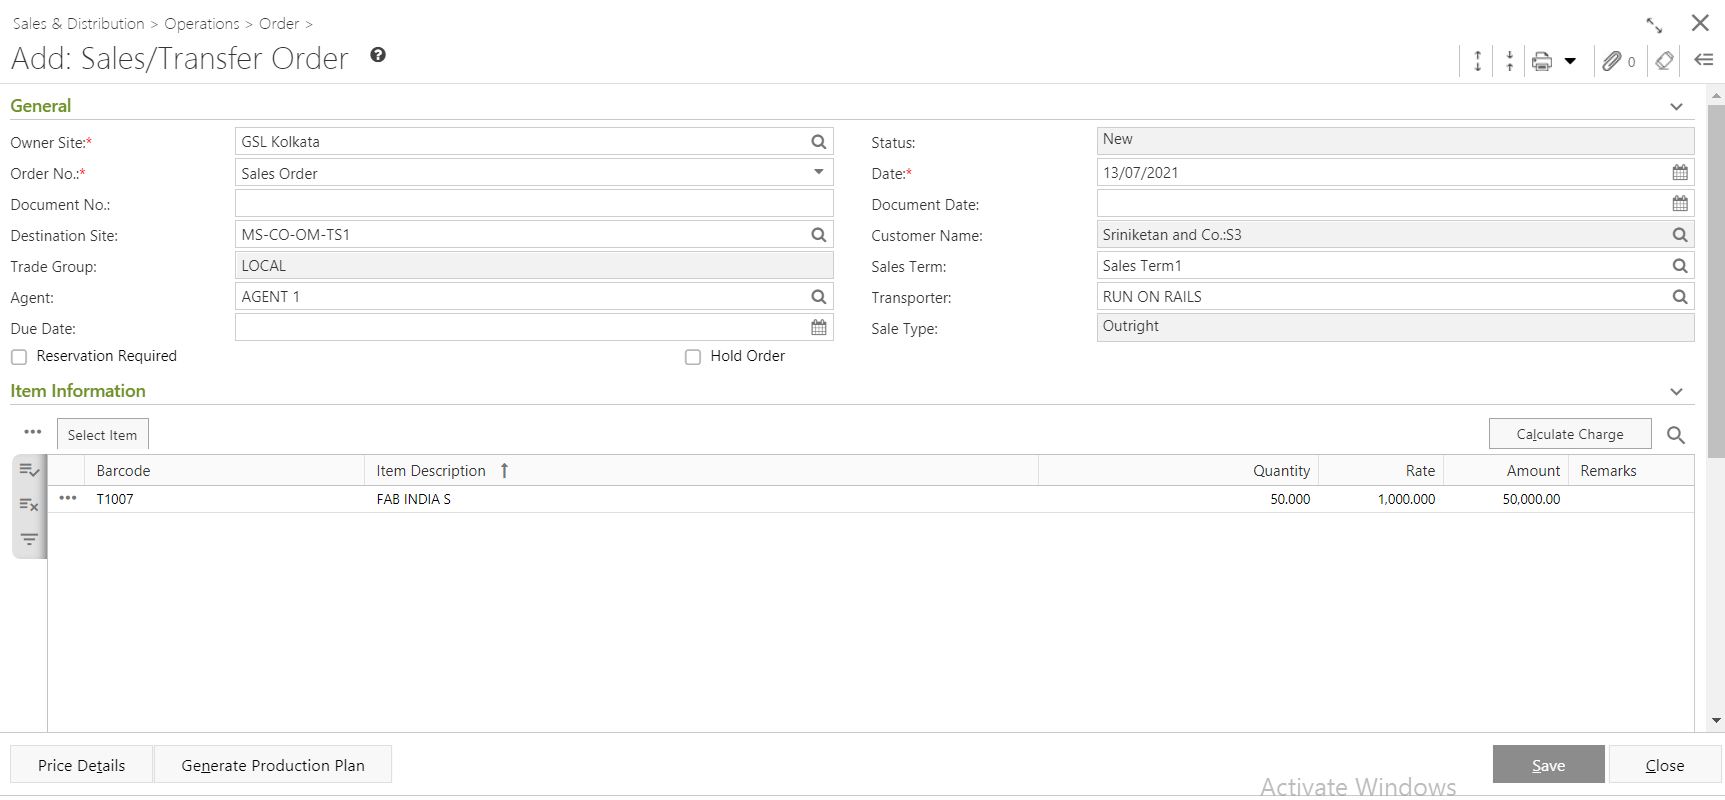
- Sales Order window will open.
- You will get group of icons at the top right corner of the window

- Expand All: Clicking on this icon, all the sections will be Expand if they are collapsed.
- Collapse All: Clicking on this icon, all the sections will be Closed if they are expanded.
- Print Barcode: Clicking on the Down Arrow beside this icon, you will get Print Preference option. This option is used to print barcode.:
- Attachments: You can Upload some required documents from this option.
- Clear Form: Clicking on this icon, you can Clear all the data already entered.
- Open Side Panel: Clicking on this, you will get the details of the current Sales Order as follows:
- Document Summary: In this section you will get the details of Selected Items, Sale Type, Owner Site, Modified by etc.
- Customer Details: You will get the Selected Customer Details like Address, Contact Details, Tax Region, Credit Limit, Overdue Amount etc.
- Customer Statistic: This section describes the Delivered not Invoiced amount, Outstanding Amount, Last Invoice Date etc.
- You will get three sections - General, Item Information and Others.
- General:

- Owner Site (Mandatory Field) will be populated automatically as per the connected site. You can change the site from the lookup window.
- Select a Document Numbering Scheme, already created in the master, from the drop down list Order No. (Mandatory Field).
- Select the Destination Site (Mandatory Field) from the Destination Site Pop-Up form. Transporter, Trade Group, Agent, Customer Name, Sale Term and Sale Type will be populated as per Destination Site selection. You can change the Transporter and Agent from the Transporter and Agent Pop-Up window respectively.
- System date will be populated in the Date field (Mandatory Field). You can change the date as per your requirement. You can only select the past date from the system date but not any future date.
- You can also put in Document No.
- Select Document Date and Due Date if you want.
Click on the check box if you want Reservation Required or Hold Order for a particular Sales Order.
Point to note - Applicability of Batch/Serial functionality on production plan
There is no impact on generation of production plan (only applicable for site type = ‘OS-OO-CM’).
- Item Information:
- You need to add items in the Sales Order by using Search Item, Scan Item, Import Barcode or Copy Challan.
- Search Item: This process will search the items from the Item Master according to the search criteria.
- Scan Item: You can directly Scan the Barcode to add items.
- Import Barcode: The Import Barcode feature allows to populate items using the .csv or .txt files.
Copy Order: Only item details of existing challans can be copied and the items included to create new challans.
- Import Set Barcode: The Import Set Barcode feature allows to populate set of items using the .csv or .txt files.
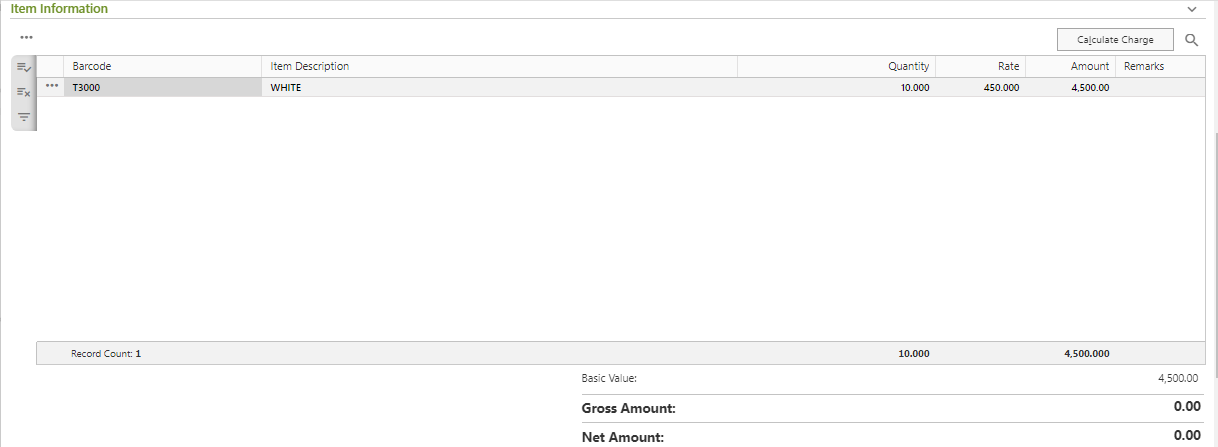
- Selected items details will be populated with Barcode, Item Description, Rate, Qty., Amount etc.
- If you click on the
 button left side of the populated item, you will get a drop down list.
 - requirement.
- Item Charge: The charges applied on the particular item will be displayed by clicking on this option. However, you may change the factors of the charges applied based on the settings in your user profile.
- Now you need to calculate Charge. Click on the Calculate Charge button. But even if you skip this step, charges applied will be automatically calculated on saving the form.
Charge will be calculated and the final amount after charge application will be populated as Net Amount.
If you click on any applicable charge, Applicable Item window will open. You can alter the charge factor if you have enabled the proper user profile setting.
The applicable charge amount or discount amount will be divided between all the items.
Note: If you want to calculate the charge of Adhoc items, you need to select Term Name in the General section. Otherwise you will get a message - "Term selection is required to calculate charges of items without Order. Please select Term to calculate charges."
The charge will be calculated as per the Term selected.
If you save the Sales Order without charge calculation, you will get an alert message - "Charge is not calculated yet. On saving this entry, Charge will be automatically calculated based on selected Term. Please confirm to proceed."
- You need to add items in the Sales Order by using Search Item, Scan Item, Import Barcode or Copy Challan.
- Others:

- You can put in the Remarks for the Sales Order in Others section.
- If you click on the Price Details button, Price Details window will open.
- You can change the Basic Rate, Factor etc.
- Click on Ok after required changes.
- If you click on the Production Plan, you will get a message - "Order will be saved to generate Production Plan. Please confirm to proceed".
- If you confirm then you will get a message - "Order will be authorized after save. Do you want to Authorize?". You can Authorized and save or you can only save the Sales order.
- You directly save by clicking on the Save button to save Sales Order. You will get a message "Document <Sales Order No.> saved successfully."
Impact of Batch/Serial functionality on Sales/Transfer order
Batch/Serial functionality can be applied for all those owner sites which are not consignment mode organization sites.(GRT advice only)
Changes in Item Grid
- Three new columns have been added in the grid - Batch/Serial No., Mfg. Date and Valid Upto
- The columns are hidden by default but can be made visible by the column chooser.
Batch/Serial No. column details
It is an LOV. All existing batch/serial (in INVBATCH_SERIAL) for the item will be displayed here. Mfg. Date and Valid Upto column types are “View only”, i.e. modification is not allowed. Values in Mfg. Date and Valid Upto columns are displayed as populated from the selected batch/serial no., if not available then it will be blank.
Validation on SAVE
User can either provide item/batch-serial combination OR only item, for particular item in the grid
Example: Row1 having Item1 with batch-serial info. & Row2 having Item1 without batch-serial info. This is not allowed.
Important Note
Import Barcode population mode has been affected by Batch/Serial implementation because GRT advice may contain items where Batch/Serial is not specified. Hence, Ginesys has provided batch/serial LOV from where user can select as per his choice if required.
Import barcode:
Batch/Serial No. column has been added and it is a Non Mandatory column.
Batch/Serial No. column would be non mandatory even for batch/serial managed items.
Impact of Batch/Serial functionality on Item rate population logic (In rate column - main grid and Select item > Searched items window)
Case I : When Owner site is Organization Site('OS-OO-CM’)
Based on Effective rate.
Case II : When Owner site is not Organization Site('OS-OO-CM’)
Always 0
Assumption
Currently Ginesys does not have batch/serial applicability for SO/TO but at the time of DC, batch/serial may be applicable. Now if pricing of the item is at batch/serial level then system should not pick item rate, otherwise user will be in dead lock situation as Ginesys does not allow price change in DC against Order. Hence as a workaround, Ginesys auto populates batch/serial price against the item in the in order itself when item price management is at batch/serial level. User can change the price there and same will flow to DC. In future, Ginesys will introduce a user profile in which system will ask if rate recalculation is required at the time of creation of DC and accordingly rate based on batch/serial will get populated in DC.
Prerequisites
- The users' role must have access to the Edit app operation in the Sales Order feature in Sales & Distribution - Operation - Order through Roles in Ginesys Web - Admin - Security.
- Sales Order must be created.
- Document must be unauthorized.
Step-by-step guide
The process is divided into the following steps:
- Go to Ginesys Web > Sales and Distribution > Operations > Order > Sales Order.
- Sales Order module will open.
- All the previously created SOs will be listed here.
Select the one Sales Order you want to edit.
You can use Filter to search particular Sales Order(s).
Note: If you select multiple Sales Order, you will get the Edit option disabled. You cannot edit multiple Sales Order at a time.
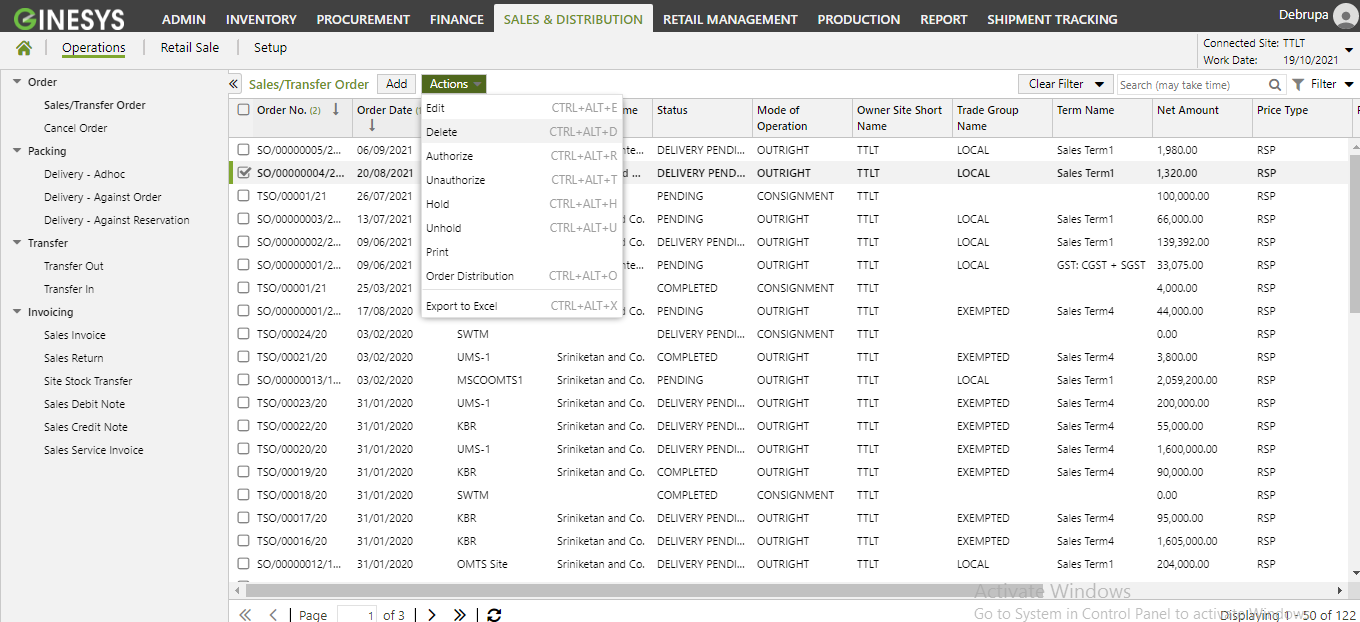
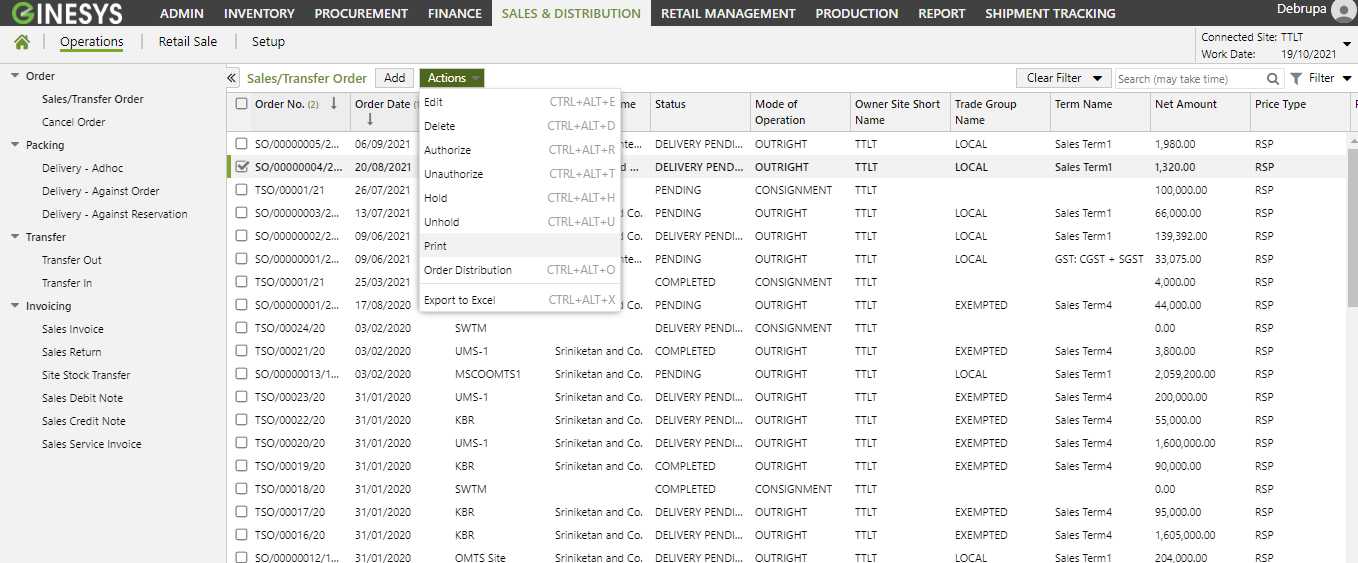
- Go to Action > Edit.
- Edit: Sales Order window will open.
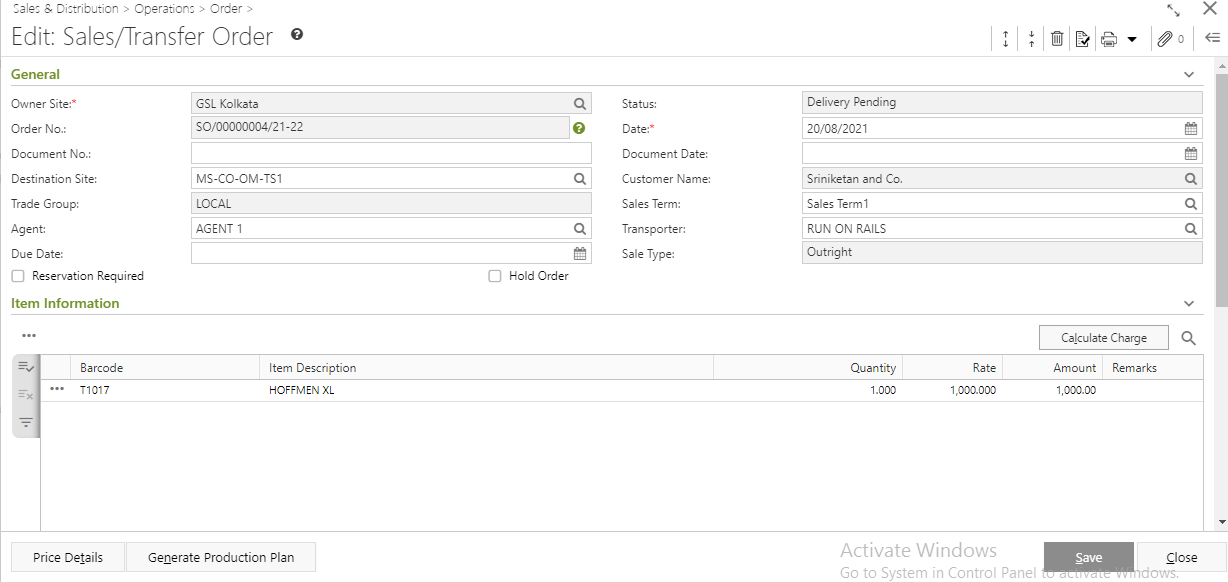
- All the details will be populated.
- You can modify Destination Site. You will get a message - "Change of Destination Site will clear the entry. Please confirm".
- You can add or remove item(s).
- Click on the Save button to save the modified Sales Order Note.
You will get a message - "Document <Sales Order No.> saved successfully".
Information

You will get Show Message, Delete and Revert icon in the Edit mode with others icons at the top right corner of the window.
Show Message: You will get a message regarding edit of Sales Order.
Delete: You can Delete the Sales Order from the Edit Mode by clicking on this icon.
Revert: You can Revert the Sales Order from the Edit Mode by clicking on this icon.
Prerequisites
- The users' role must have access to the Delete app operation in the Sales Order feature in Sales & Distribution - Operation - Order through Roles in Ginesys Web - Admin - Security.
- Sales Order must be created.
- Document must be unauthorized.
Step-by-step guide
The process is divided into the following steps:
- Go to Ginesys Web > Sales and Distribution > Operations > Order > Sales Order.
- Sales Order module will open.
- All the previously created SOs will be listed here.
Select the one Sales Order you want to delete.
You can use Filter to search particular Sales Order(s).
- Go to Action > Delete.
- You will get a message - "Document once deleted cannot be retrieved. Do you want to delete this document?"
- If you click on Yes, the document will be deleted and you will get a message - "<Sales Order No:> - Successfully deleted".
Prerequisites
- The users' role must have access to the Authorized app operation in the Sales Order feature in Sales & Distribution - Operation - Order through Roles in Ginesys Web - Admin - Security.
- Sales Order must be created.
- Document must be unauthorized.
Step-by-step guide
The steps are as follows:
- Go to Ginesys Web > Sales and Distribution > Operations > Order > Sales Order.
- Sales Order module will open.
- All the previously created SOs will be listed here.
- Select the one Sales Order you want to authorized.
- You can use Filter to search particular Sales Order(s).
- Go to Action > Authorized.
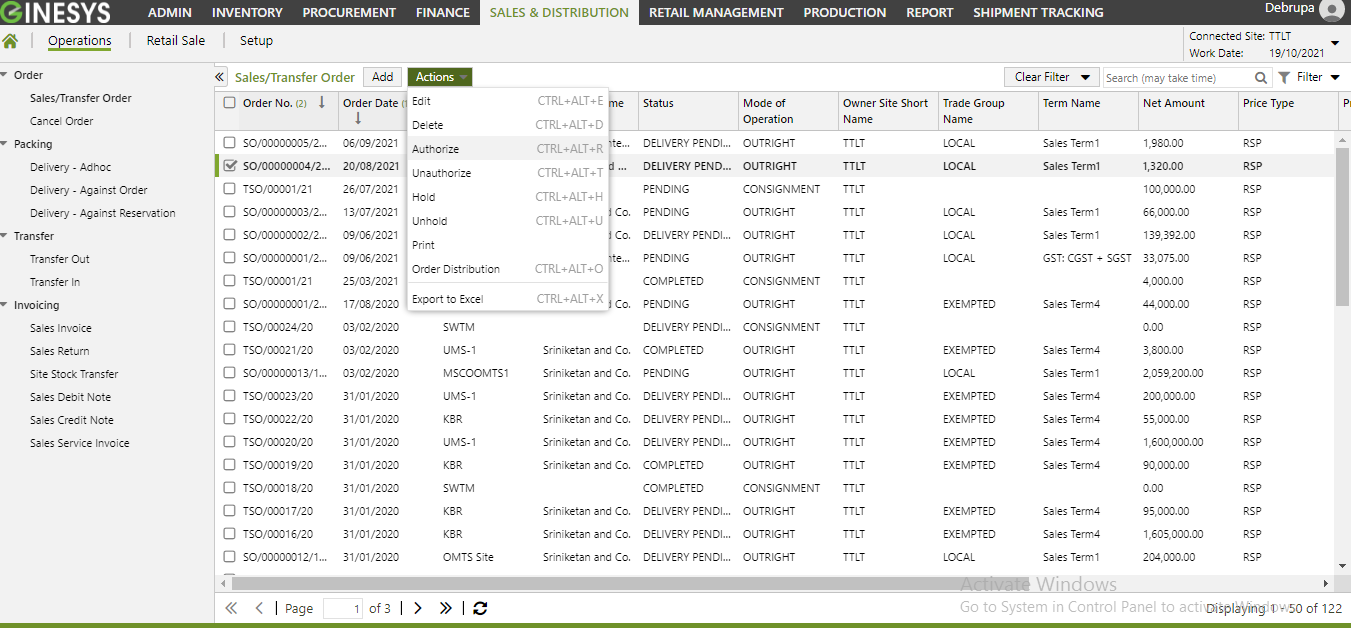
- You will get a message - "Document(s) once authorized cannot be modified. Do you want to proceed?"
- If you click on Yes, you will get a confirmation message "Order No <Sales Order No.> - Authorized Successfully".
Prerequisites
- The users' role must have access to the Unauthorized app operation in the Sales Order feature in Sales & Distribution - Operation - Order through Roles in Ginesys Web - Admin - Security.
- Sales Order must be created.
- Document must be authorized.
Step-by-step guide
The steps are as follows:
- Go to Ginesys Web > Sales and Distribution > Operations > Order > Sales Order.
- Sales Order module will open.
- All the previously created SOs will be listed here.
- Select the one Sales Order you want to unauthorized.
- You can use Filter to search particular Sales Order(s).
- Go to Action > Unauthorized.
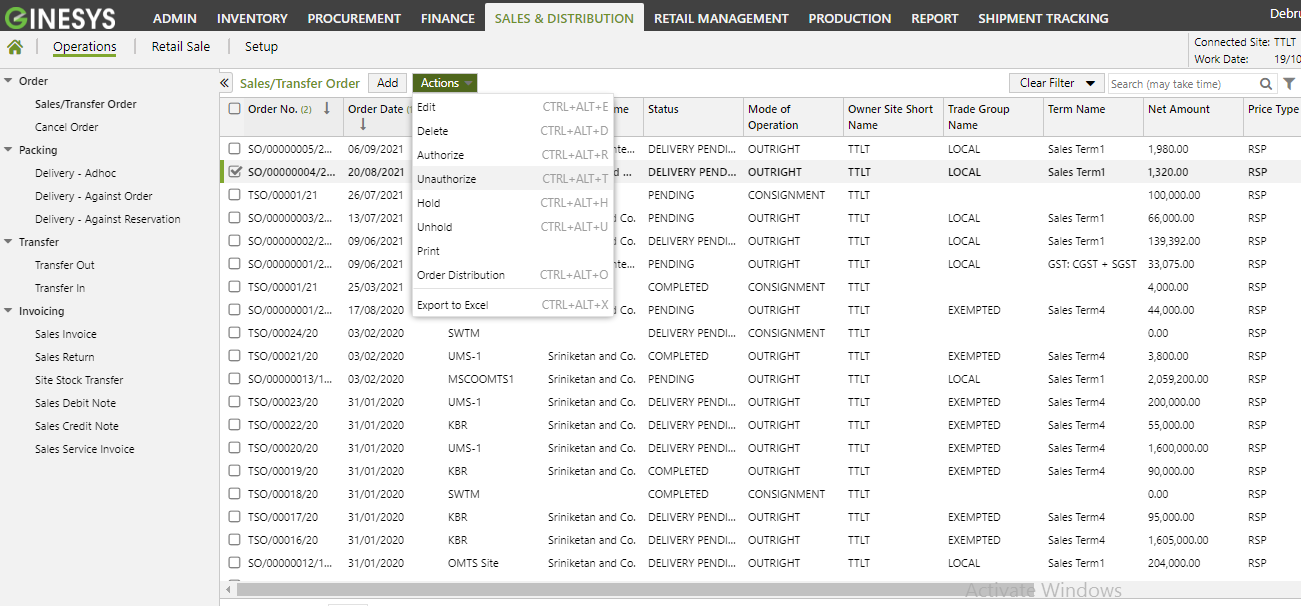
- You will get a message - "Selected order(s) will be unauthorized. Do you want to proceed?"
- If you click on Yes, you will get a confirmation message "Order No <Sales Order No.> - Unauthorized Successfully".
Prerequisites
- The users' role must have access to the Hold app operation in the Sales Order feature in Sales & Distribution - Operation - Order through Roles in Ginesys Web - Admin - Security.
- Sales Order must be created.
- Document must be Unheld.
Step-by-step guide
The steps are as follows:
- Go to Ginesys Web > Sales and Distribution > Operations > Order > Sales Order.
- Sales Order module will open.
- All the previously created SOs will be listed here.
- Select the one Sales Order you want to hold.
- You can use Filter to search particular Sales Order(s).
- Go to Action > Hold.
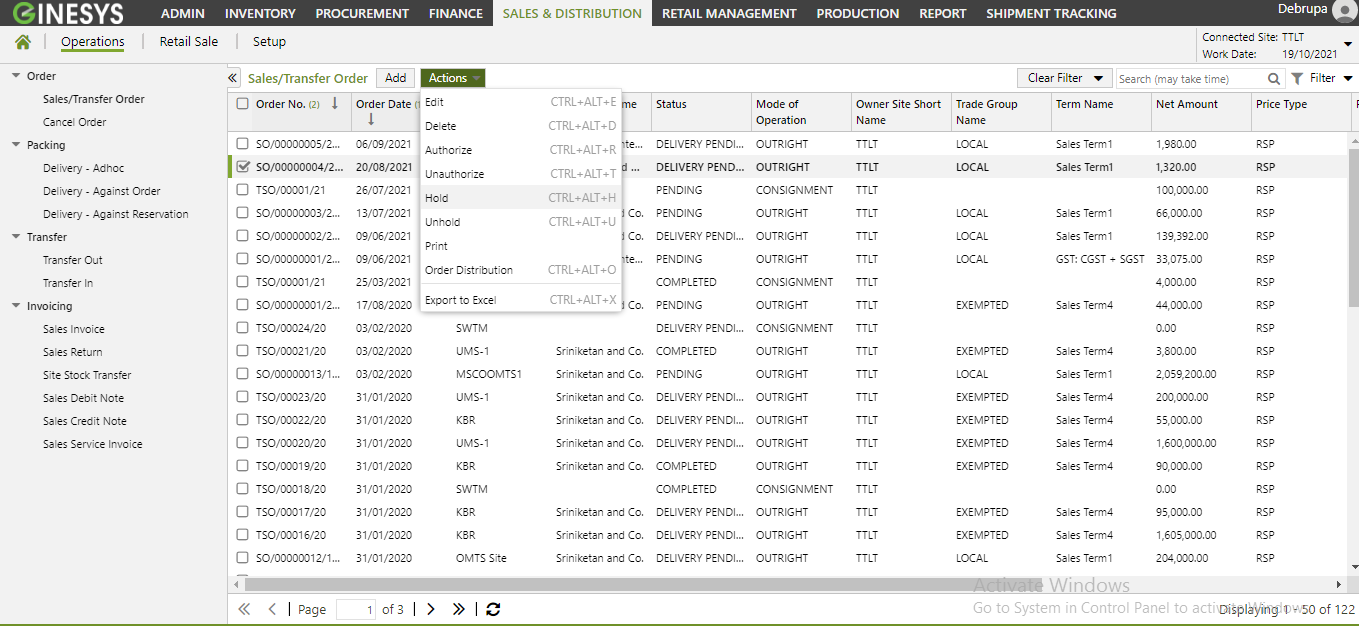
- You will get a confirmation message "Order No <Sales Order No.> - Held Successfully".
Prerequisites
- The users' role must have access to the Unhold app operation in the Sales Order feature in Sales & Distribution - Operation - Order through Roles in Ginesys Web - Admin - Security.
- Sales Order must be created.
- Document must be held.
Step-by-step guide
The steps are as follows:
- Go to Ginesys Web > Sales and Distribution > Operations > Order > Sales Order.
- Sales Order module will open.
- All the previously created SOs will be listed here.
- Select the one Sales Order you want to unhold.
- You can use Filter to search particular Sales Order(s).
- Go to Action > Unhold.
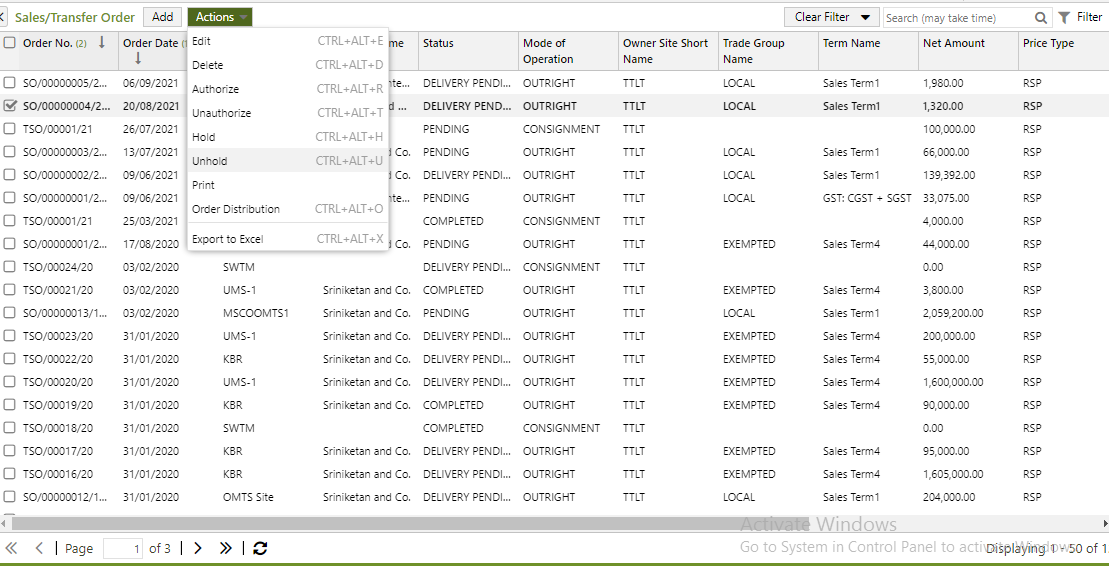
- You will get a confirmation message "Order No <Sales Order No.> - Unheld Successfully".
Prerequisites
- The users' role must have access to the Print app operation in the Sales Order feature in Sales & Distribution - Operation - Order through Roles in Ginesys Web - Admin - Security.
- Sales Order must be created.
- Printer must be connected and installed.
Step-by-step guide
The process is divided into the following steps:
- Go to Ginesys Web > Sales and Distribution > Operations > Order > Sales Order.
- Sales Order module will open.
- All the previously created SOs will be listed here.
- Select the one Sales Order you want to print.
- You can use Filter to search particular Sales Order(s).
- Go to Action > Print.
- You will get previously created template.
- Click on the required template to print.
- A new window will open.
The document will be printed.
Note: You can print using Print Preference.