A sales debit note, or a debit memo, is a document furnished by a seller to a buyer to apprise them of current debt liability. It is common to come across these notes in business-to-business transactions — like, one business may provide another with goods or services prior to an official invoice being sent.
Add Sales Debit Note
Prerequisites
- The users' role must have access to the Add app operation in the Sales Debit Note feature in Sales & Distribution - Operations - Invoicing through Roles in Ginesys Web - Admin - Security.
- Sales Invoice must be created and posted.
- Site must be created.
Step-by-step guide
The process is divided in the following steps:
- Go to Sales & Distribution > Operations > Invoicing > Sales Debit Note.
- Click on Add option.
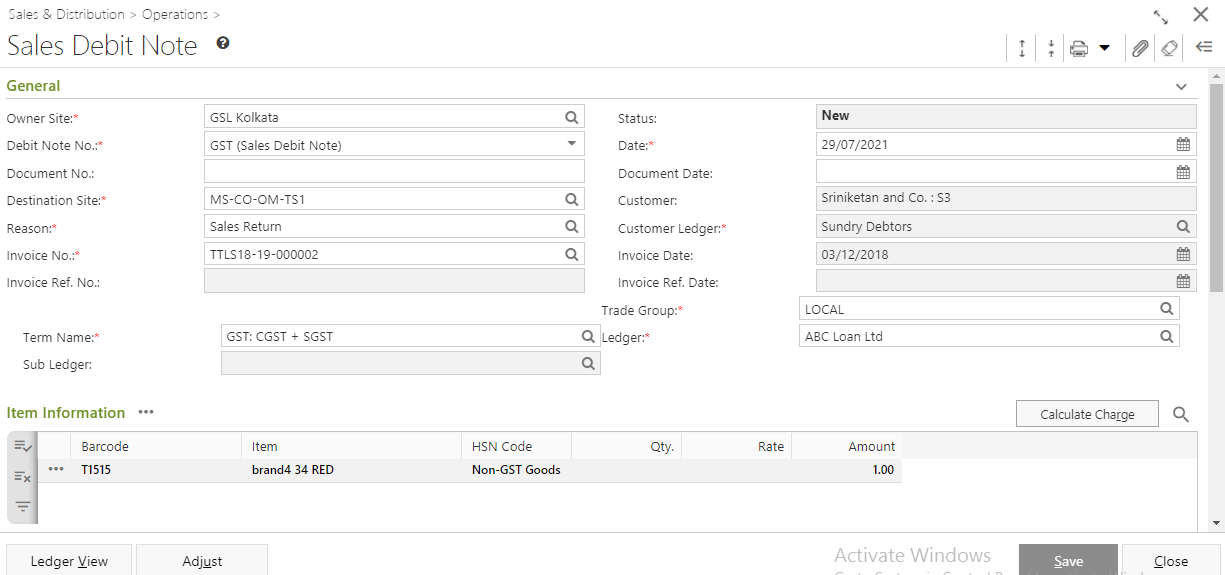
- Sales Debit Note window will open.
- You will get a group of icons at the top right corner of the window.

- Expand All, Collapse All, Delete, Print Document Report, Attachments, Clear Form and Open Side Panel.
Expand All: Clicking on this icon, all the sections will be Expand if they are collapsed.
Collapse All: Clicking on this icon, all the sections will be Closed if they are expanded.
- Print Document Report: Clicking on the Down Arrow beside this icon, you will get Print Preference option with already created Report File Template. This option is used to print document.
- Attachments: You can Upload some required documents from this option.
- Clear Form: Clicking on this icon, you can Clear all the data already entered.
- Open Side Panel: Clicking on this, you will get the details of the current Site Stock Transfer as follows:
- Document Summary: In this section you will get the details of Total Item Count, Transfer Quantity, Transfer Amount etc.
- Source Site Details: In this section you will get the details of Source Address and Source City.
- Destination Site Details: In this section you will get the details of Destination Address and Destination City.
- You will get four sections - General, Item Information and Others.
- General:
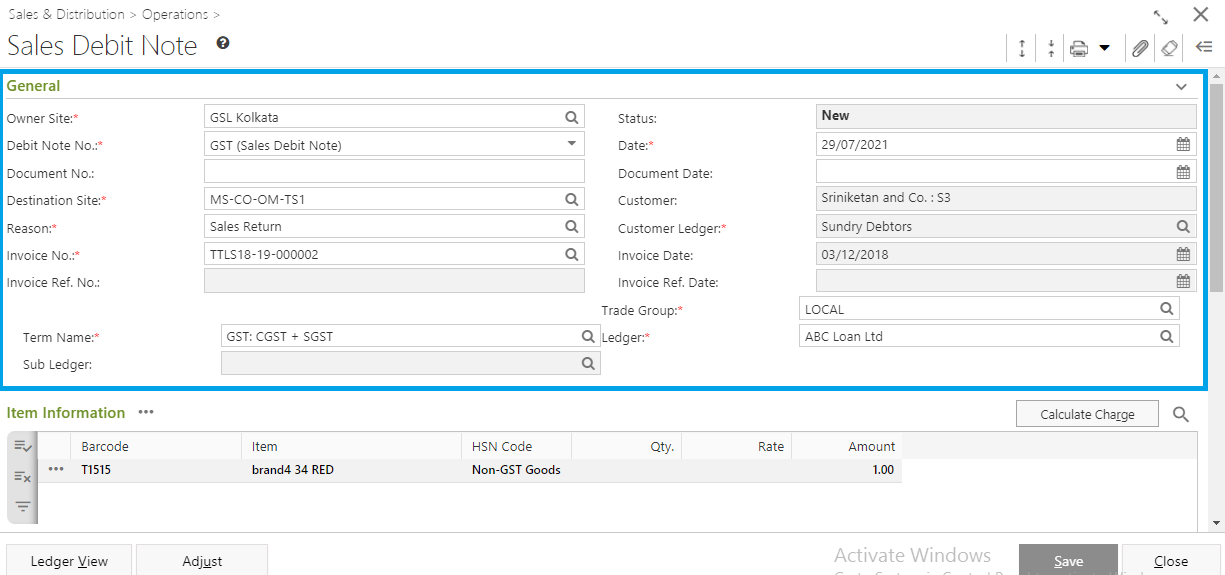
- Owner Site (Mandatory field) will be populated automatically as per connected site.You can also change it from the lookup window.
- Select Debit Note No (Mandatory field) will be populated automatically..You can also change it from the drop down list.
- Select Destination Site (Mandatory field), Reason (Mandatory field), Invoice No. (Mandatory field) by clicking on Search Icon (
 ).
). - System date will be populated in the Date field (Mandatory Field). You can change the date as per your requirement. You can only select the past date from the system date but not any future date.
- Status will be populated automatically.
- Customer (Mandatory field) and Customer Ledger will be populated based on Destination Site.
- Invoice Date, Invoice Ref No, Invoice Ref Date, Trade Group (Mandatory field),Ledger (Mandatory field),Term Name (Mandatory field),Sub Ledger will be populated will be populated according to the selected Invoice No.
- You can put in Document Date and Document No. as reference document.
- Item Information:
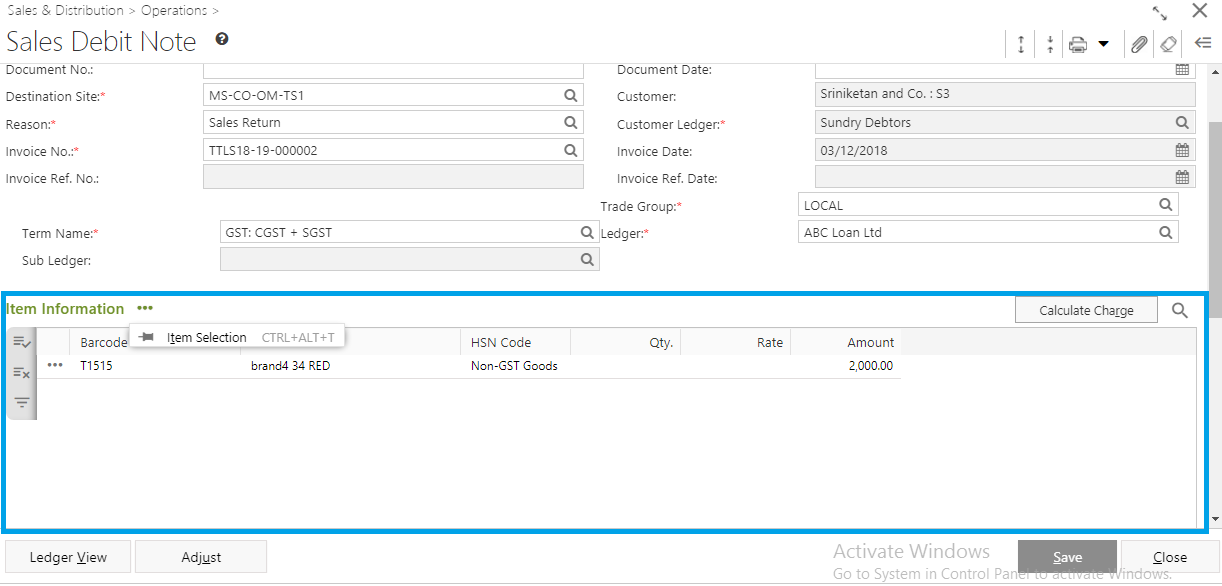
- Select Item from Item Selection option.
- Selected items details will be populated with Barcode, Item, HSN Code, Qty, Rate, and Amount .
- If you click on the
 button left side of the populated item, you will get Delete Record, Item Charge and View Properties in the drop down list.
 - Delete Record: You can delete the item from the item grid.
- Item Charge: You can see the charges applied on that item.
- View Properties: You can check the item details by clicking on this option. It will open the Item Master window but you cannot edit any details.
- Click on Calculate Charge to calculate the Net Amount.
- You can also put in Remarks Of Others section.
- Click on Adjust button to adjust the bill value.
- You will get a ledger view by clicking on Ledger View.
- Once done, click on Save button. You will get a message "Document <Sales Debit Note No> saved successfully".
Edit Sales Debit Note
Prerequisites
- The users' role must have access to the Edit app operation in the Sales Debit Note feature in Sales & Distribution - Operations - Invoicing through Roles in Ginesys Web - Admin - Security.
- Sales Debit Note must be created and un-posted.
Step-by-step guide
The process is divided in the following steps:
- Go to Sales & Distribution > Operations > Invoicing > Sales Debit Note.
- Sales Debit Note module will open.
- All the previously created Sales Debit Note will be listed here.
- Select the Sales Debit Note you want to edit.
- Click on Edit option in Action menu or double click on the selected Sales Debit Note.
- Debit Note No and Site details cannot be modified.
- Once done click on Save button. You will get a message "Document <Sales Debit Note No> saved successfully".
Delete Sales Debit Note
Prerequisites
- The users' role must have access to the Delete app operation in the Sales Debit Note feature in Sales & Distribution - Operations - Invoicing through Roles in Ginesys Web - Admin - Security.
- Sales Debit Note must be created and un-posted.
Step-by-step guide
The process is divided in the following steps:
- Go to Sales & Distribution > Operations > Invoicing > Sales Debit Note.
- Sales Debit Note module will open.
- All the previously created Sales Debit Note will be listed here.
- Select the Sales Debit Note you want to delete.
- Go to Action and click on Delete option.
- You will get a message - "Record once deleted can not be retrieved. Please Confirm."
- If you click on Proceed, you will get a confirmation message "Debit No <> Document deleted successfully.".
Release Sales Debit Note
Prerequisites
- The users' role must have access to the Release app operation in the Sales Debit Note feature in Sales & Distribution - Operations - Invoicing through Roles in Ginesys Web - Admin - Security.
- Sales Debit Note must be created and un-posted.
Step-by-step guide
The process is divided in the following steps:
- Go to Sales & Distribution > Operations > Invoicing > Sales Debit Note.
- Sales Debit Note module will open.
- All the previously created Sales Debit Note will be listed here.
- Select the Sales Debit Note you want to release.
- Go to Action and click on Release option.
- A message will be shown - "Document(s) once released cannot be modified. Do you want to proceed?"
- If you click on Yes, you will get a confirmation message " Debit No<Sales Debit No:> - Released Successfully".
Revert Sales Debit Note
Prerequisites
- The users' role must have access to the Release app operation in the Sales Debit Note feature in Sales & Distribution - Operations - Invoicing through Roles in Ginesys Web - Admin - Security.
- Sales Debit Note must be created and posted.
Step-by-step guide
The process is divided in the following steps:
- Go to Sales & Distribution > Operations > Invoicing > Sales Debit Note.
- Sales Debit Note module will open.
- All the previously created Sales Debit Note will be listed here.
- Select the Sales Debit Note you want to revert.
- Go to Action and click on Release option.
- A message will be shown - "Selected document(s) will be un-posted, and finance postings done will also be reverted. Do you want to proceed?"
- If you click on Yes, you will get a confirmation message " Debit No<Sales Debit No:> : Reverted Successfully".
Print Sales Debit Note
Prerequisites
- The users' role must have access to the Release app operation in the Sales Debit Note feature in Sales & Distribution - Operations - Invoicing through Roles in Ginesys Web - Admin - Security.
- Sales Debit Note must be created and posted.
Step-by-step guide
The process is divided in the following steps:
- Go to Sales & Distribution > Operations > Invoicing > Sales Debit Note.
- Sales Debit Note module will open.
- All the previously created Sales Debit Note will be listed here.
- Select the Sales Debit Note you want to revert.
- Go to Action and click on Print option.
- You will get previously created template.
- Click on the required template to print.
- A new window will open.
Click on the Print to print the Sales Debit Note.