We’re excited to announce that the latest information is now available on our new site, the Ginesys One Wiki!. Visit the site for up-to-date resources and insights. We look forward to continuing to support you there!
We’re excited to announce that the latest information is now available on our new site, the Ginesys One Wiki!. Visit the site for up-to-date resources and insights. We look forward to continuing to support you there!
Adding, Editing, Deleting, Cancelling & Printing DC - Adhoc
Aparajita Basu Roy
Subhasree Banerjee (Unlicensed)
Deepankana Roy (Unlicensed)
Debrupa Datta (Unlicensed)
A DC (Delivery Challan) creates during the transportation of goods from one place to another place. This is sent along with the shipped goods. It contains the details of the items shipped, quantity of those goods, buyer and delivery address.
Sometimes users do not wish to go into the long process of order maintenance, if there is available stock and a willing buyer. In such cases an Adhoc Delivery Challan needs to be created.
This article describes the process of Delivery Challan - Adhoc at Ginesys web.
Prerequisites
- The users' role must have access to the Add app operation in the Delivery-Adhoc feature in Sales & Distribution - Operation - Packing through Roles in Ginesys Web - Admin - Security.
- Document Numbering Scheme must be present for the module.
- The masters must be present - Item, Customer, Agent, etc.
User needs to tick the security - Allow rate change in Delivery Challan, to allows change Basic Rate in Delivery Challan.
User needs to tick the security - Allow Discount in Delivery Challan Adhoc, to allows Discount change.
- subsequent action to be taken and Allow Auto Creation of Sales Invoice and Transfer Out to get the provision of creating Auto Sales Invoice / Transfer Out directly from Delivery Challan.
Step-by-step guide
The process is divided into the following steps:
- Go to Ginesys Web > Sales and Distribution > Operations > Packing > Delivery - Adhoc.
- Delivery Challan (Adhoc) module will open.
- All the previously created DCs will be listed here.
- Click on Add button.
- Delivery Challan (Adhoc) window will open.
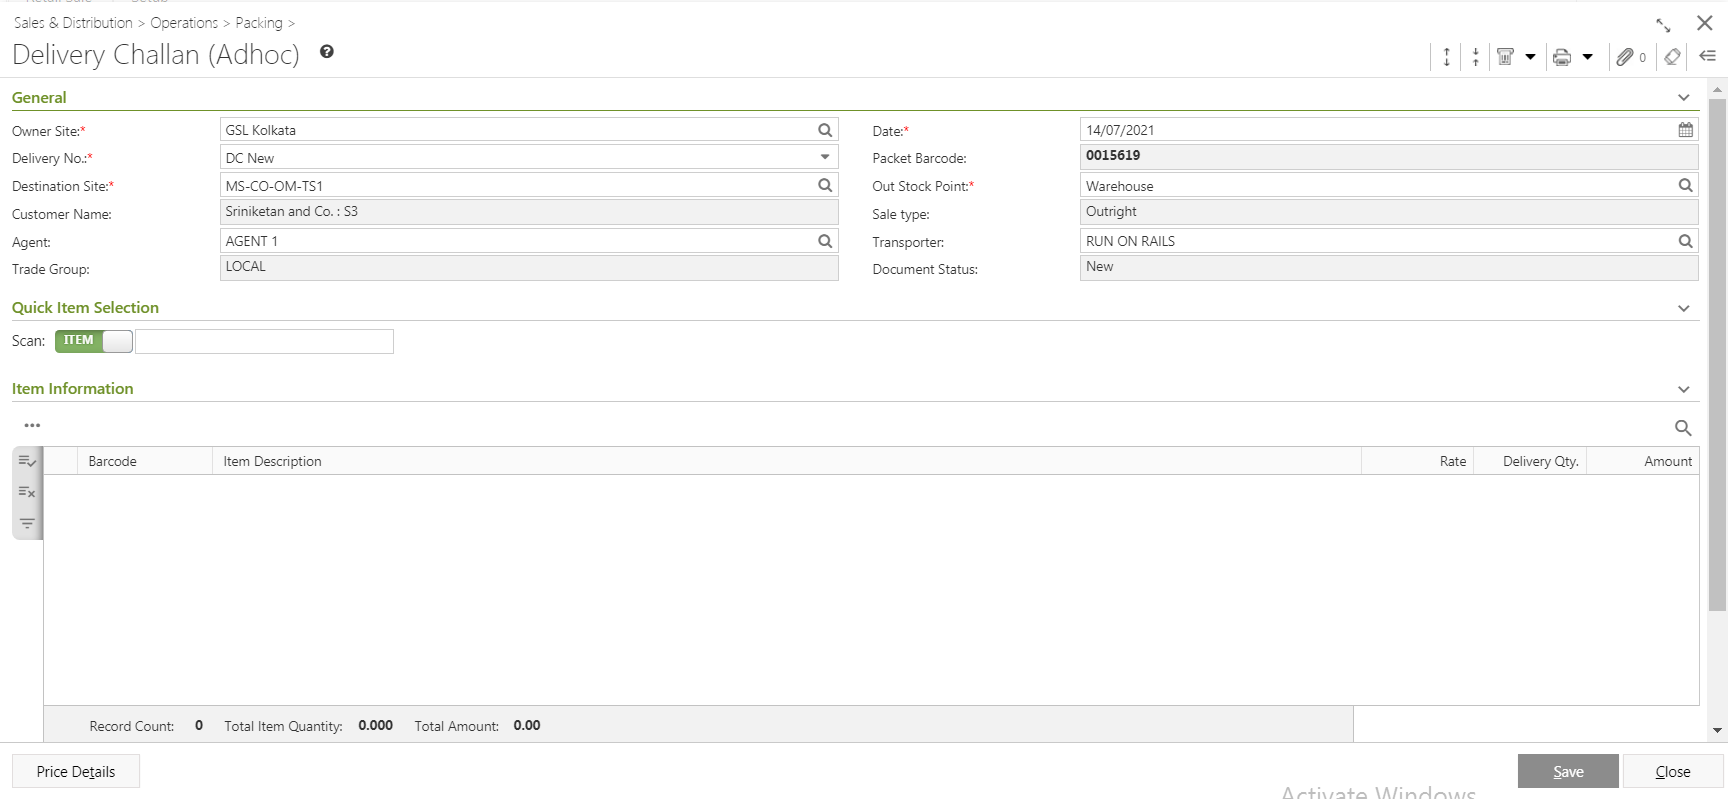
- You will get group of icons at the top right corner of the window.

The icons name from left to right are - Expand All, Collapse All, Print Barcode, Print Document Report, Attachments, Clear Form and Open Side Panel.- Expand All: Clicking on this icon, all the sections will be Expand if they are collapsed.
- Collapse All: Clicking on this icon, all the sections will be Closed if they are expanded.
- Print Barcode: Clicking on the Down Arrow beside this icon, you will get Print Preference option. This option is used to print barcode.:
- Print Document Report: Clicking on the Down Arrow beside this icon, you will get Print Preference option with already created Report File Template. This option is used to print document.
- Attachments: You can Upload some required documents from this option.
- Clear Form: Clicking on this icon, you can Clear all the data already entered.
- Open Side Panel: Clicking on this, you will get the details of the current Delivery Challan as follows:
- Document Summary: In this section you will get the details of Selected Items, Sale Type, Owner Site, Modified by etc.
- Customer Details: You will get the Selected Customer Details like Address, Contact Details, Tax Region, Credit Limit, Overdue Amount etc.
- Customer Statistic: This section describes the Delivered not Invoiced amount, Outstanding Amount, Last Invoice Date etc.
- You will get five sections - General, Quick Item Selection, Item Information, User Defined Fields and Others.
- General:
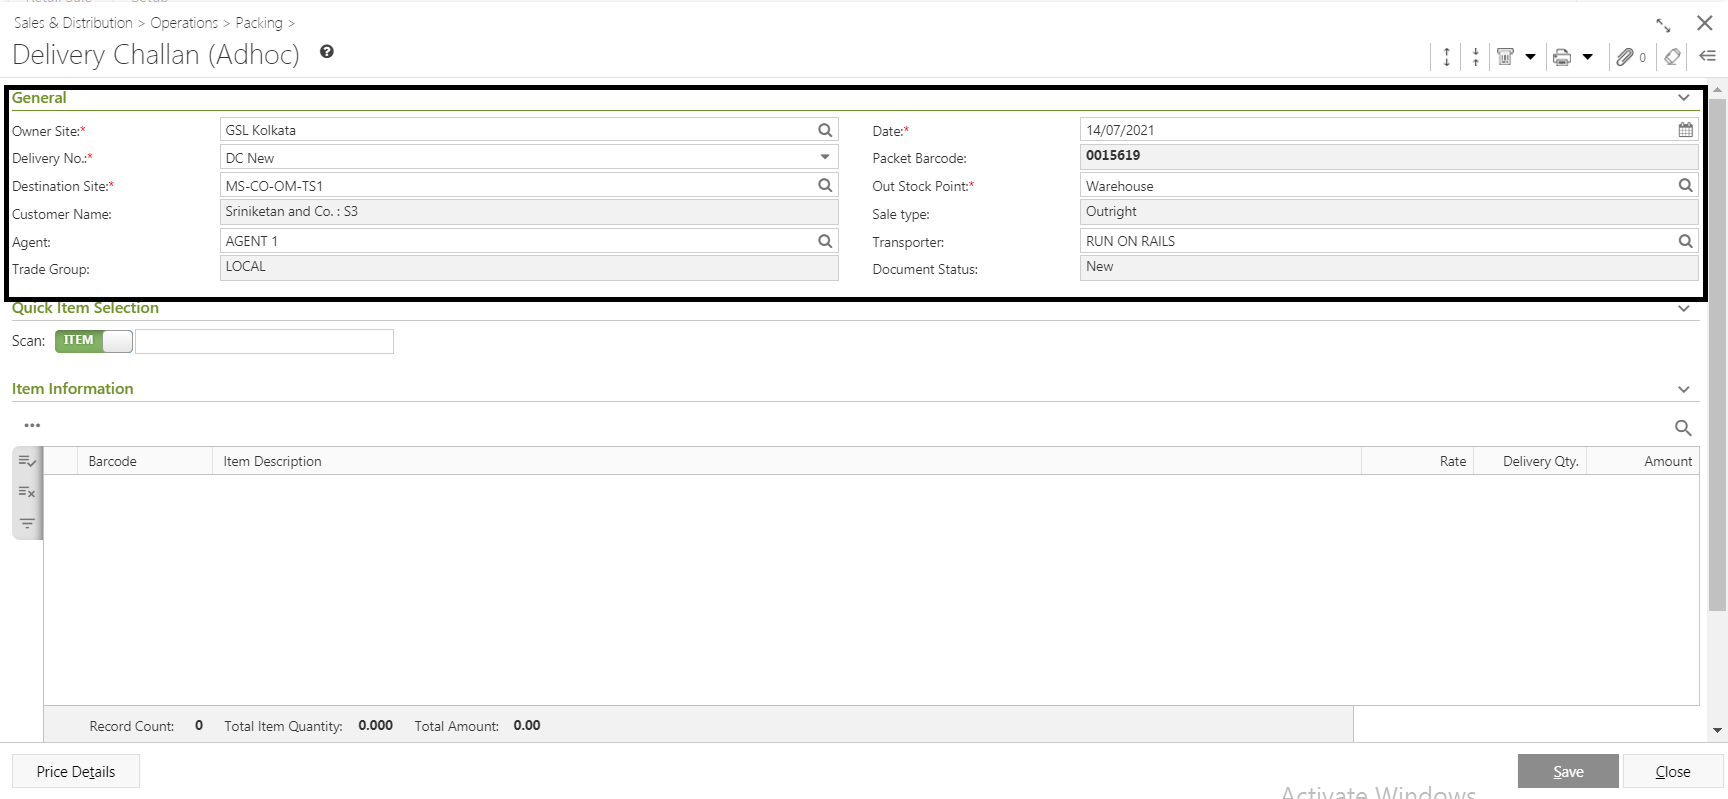
- Select the Owner Site (Mandatory Field) for which you want to create the Delivery Challan.
- Select a Document Numbering Scheme, already created in the master, from the drop down list Delivery No. (Mandatory Field).
Packet Barcode field will be generated automatically at the time of opening the Delivery Challan(Adhoc) window in the Add mode. This is a read only field.
Note: First 3 characters will be company code & last 5 characters will be DCCODE.
- Select the Destination Site (Mandatory Field) from the Destination Site Pop-Up form. Transporter, Trade Group, Agent, Customer Name and Sale Type, Out Stock Point will be populated as per Destination Site selection. You can change the Transporter and Agent from the Transporter and Agent Pop-Up window respectively.
- System date will be populated in the Date field (Mandatory Field). You can change the date as per your requirement. You can only select the past date from the system date but not any future date.
- Document Status will be populated automatically.
- Quick Item Selection:
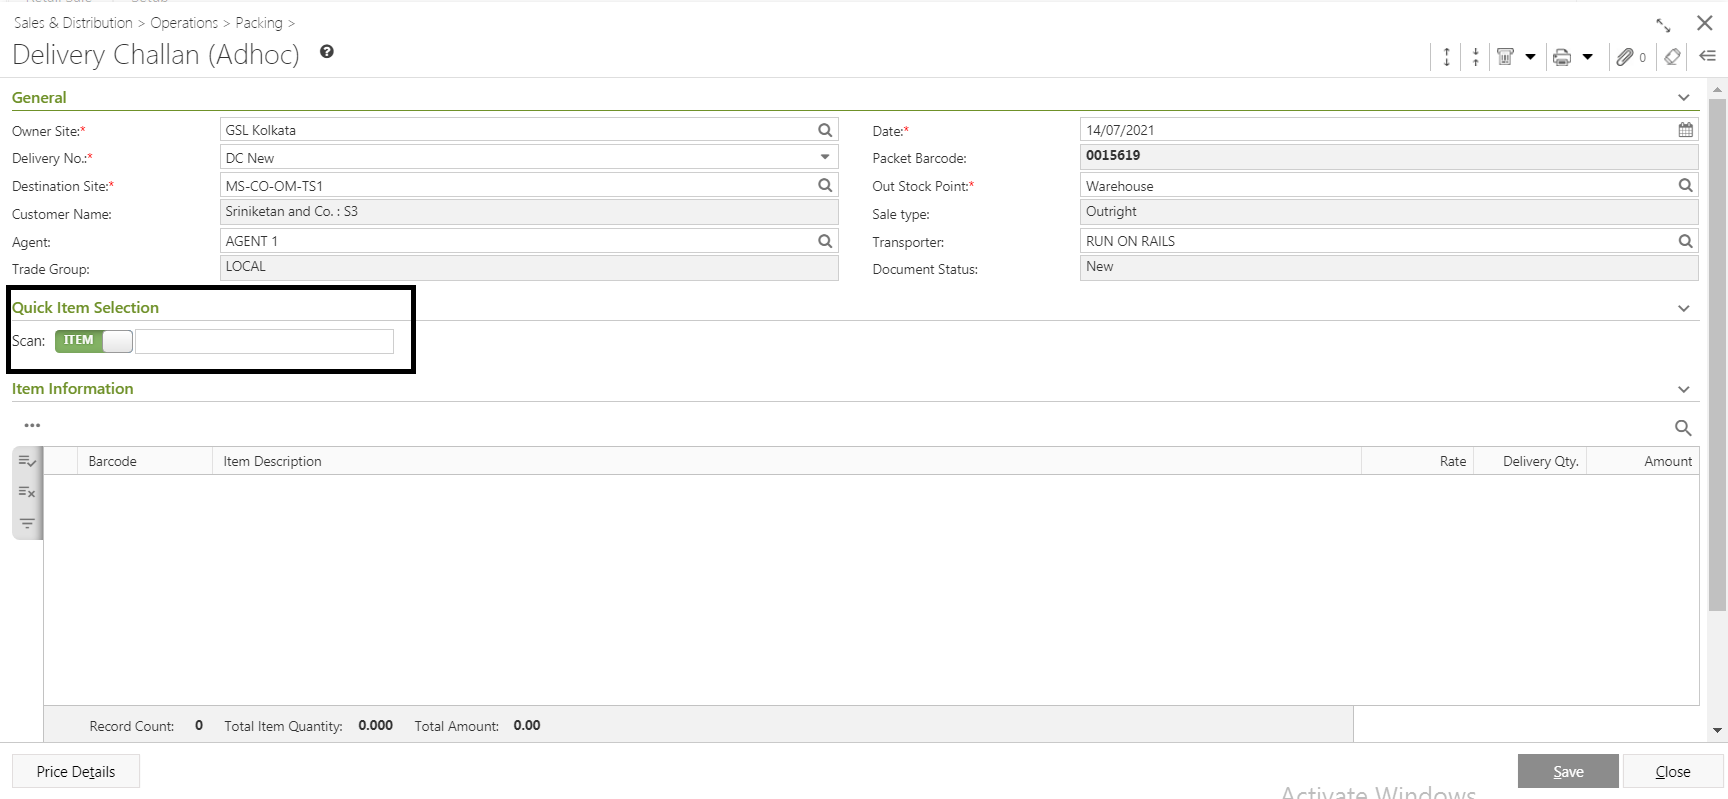
Select the Scan type - Barcode or Set. You can scan item barcode or set barcode directly from this field for Adhoc Delivery Challan. Enter the barcode of the item or set into the text box and press enter. The scanned items or set will be listed in the Item Information section.
Impact of Batch/Serial functionality on Quick Item Scan Mode
- On scanning of Item, open a Batch or Serial selection window respectively. (Only those pending batches/serials will be displayed that exists in the picklist no. provided).
- On scanning of Set, open a multi Batch/Serial selection window. (Only those pending batches/serials will be displayed that exists in the picklist no. provided)
- On scanning of (Item + Batch/Serial), Batch/Serial window will not open for selection instead system will auto setoff the quantity and populate the batch/serial number in the grid.
Pre-requisites for Set selection
- The profile setting - Allow Set item selection in Receipts must be selected.
You need to select whole set items or need to remove all the items from set. You cannot select partial items from set.
- Item Information:
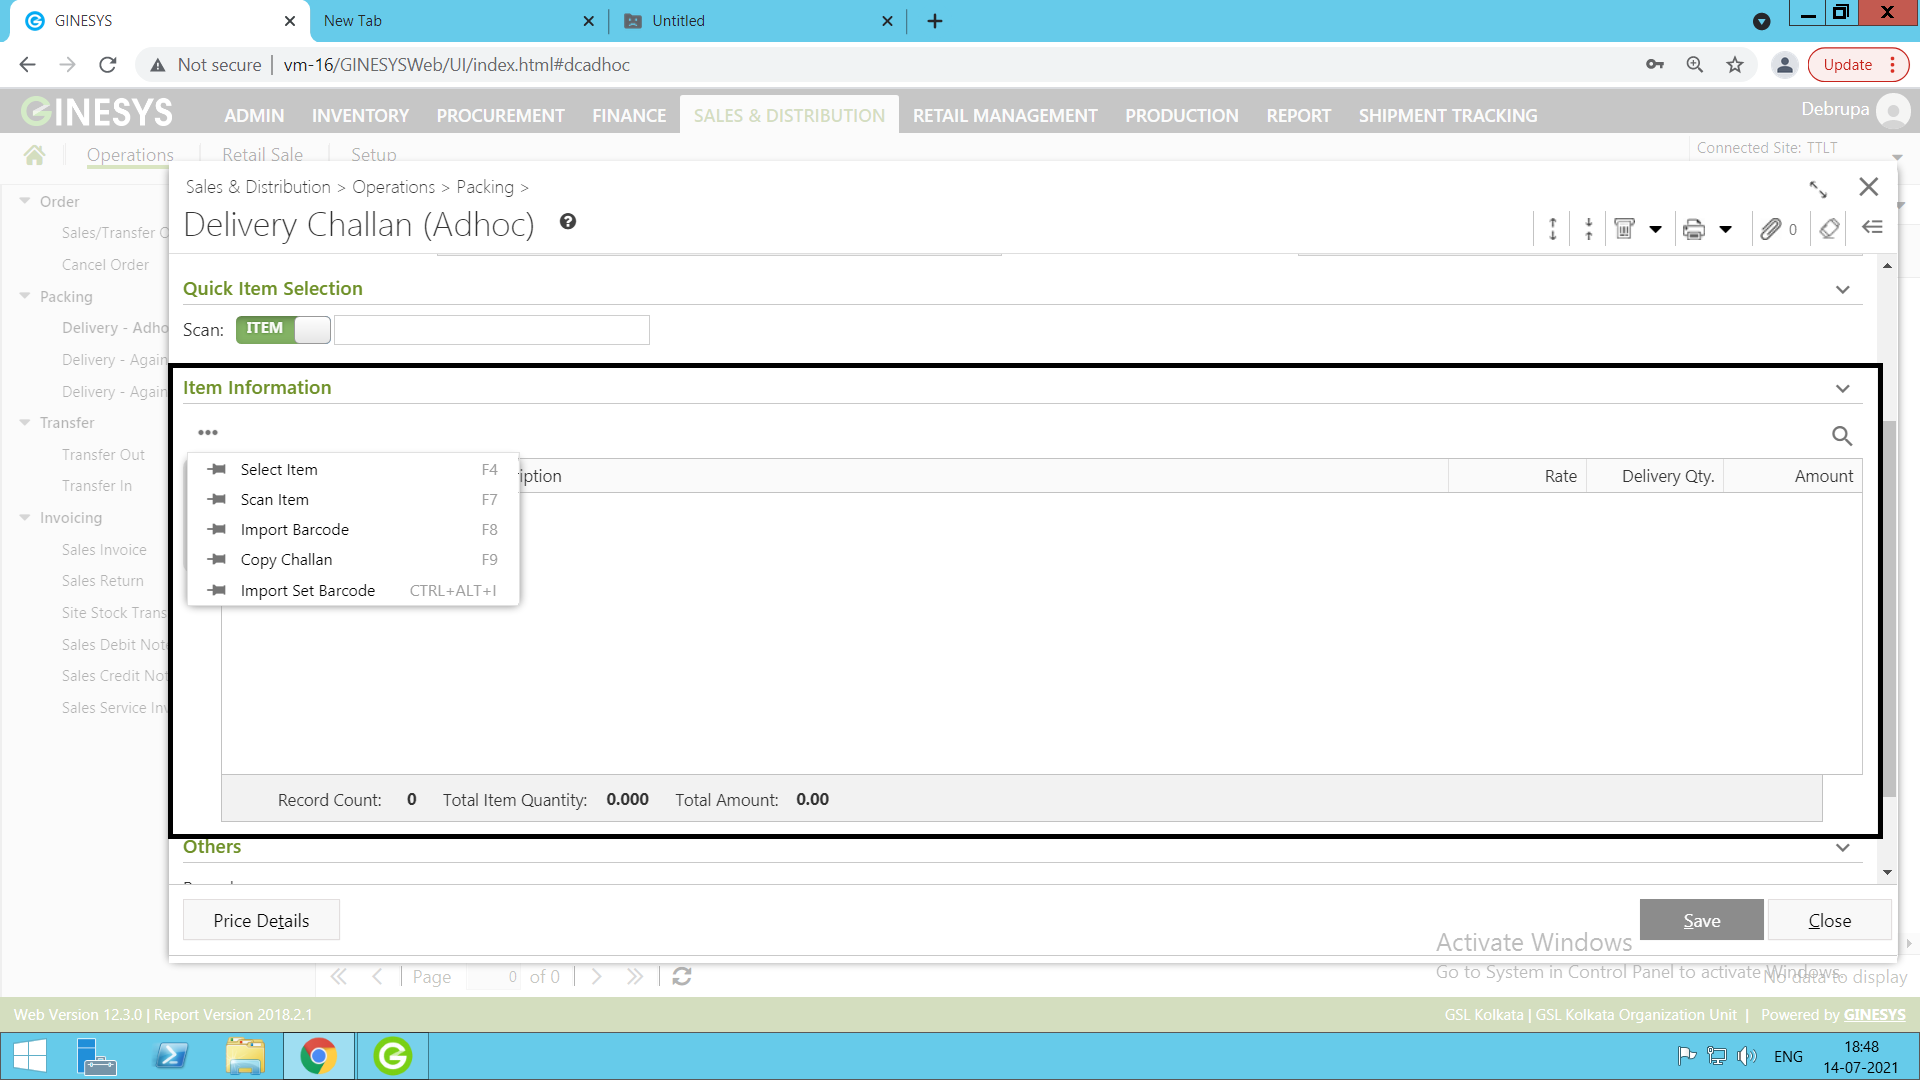
You need to add items in the Delivery Challan by using Scan Item, Search Item, Import Barcode or Copy Challan.
Function Name
ExplanationScan Item 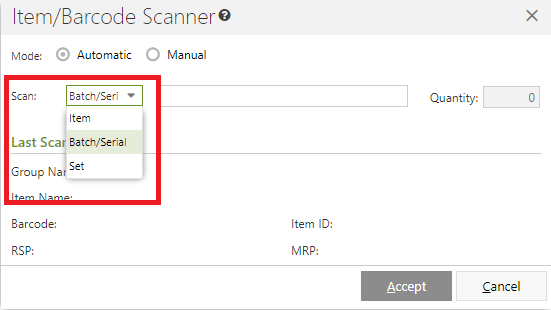
Pop up Details:
New addition in UI highlighted in red
- A new LOV has just been added before Item scan field, with following values - Item, Batch/Serial and Set
On selection of Item - Item Barcode (existing OEM Barcode/ICODE) or Batch/Serial wise Item Barcode (ICODE/OEM Barcode + Batch/Serial Information) will be accepted. - On selection of Batch/Serial - Only Batch/Serial Barcode (Batch/Serial Information) will be accepted.
On selection of Set - Only Set Barcode will be accepted and new window for Batch/Serial selection will open.
User is not allowed to scan (Batch/Serial) as “System batch/serial” in item scan window.
Msg: “System Batch/Serial is restricted.”[OK]Common behaviour on scanning of an item
System is checked for combination of I Code, Batch/Serial no., Rate & Parent document already present in the base form :
If found, then append the quantity on next scan.
Otherwise, a new row will be added in the base form.
Negative stock will be checked while scanning.
If applicable, negative stock alert message will include Batch/serial number also.
Impact of Batch/Serial functionality on last scan details
Two new columns have been added - Batch/Serial No. and Valid Upto
Existing columns present -
- Group Name (Existing),
- Item name (Existing)
- Barcode (Existing)
- Item id (Existing)
RSP Population Logic - For items having price management at batch/serial level RSP will be picked from Batch/Serial, otherwise from item level.
MRP Population Logic - For items having price management at batch/serial level MRP will be picked from Batch/Serial, otherwise from item level.
Note -
- For normal item scan where there is no batch/serial implication, there is no change in existing flow.
- This information would be shown only when single item/batch or item/serial combination is scanned/selected. Where multi item/batch or item/serial combination is scanned/selected, it is kept blank.
Select Item User flow
User selects item(s) from the select item population mode, specify the qty(s) as per validations.
Click on 'Populate', in current scenario all items with qty >0 will get populated in the main item grid.
But now after introduction of batch/serial, a new window (Batch & Serial Selection window) will open for selection of batch/serial with items.
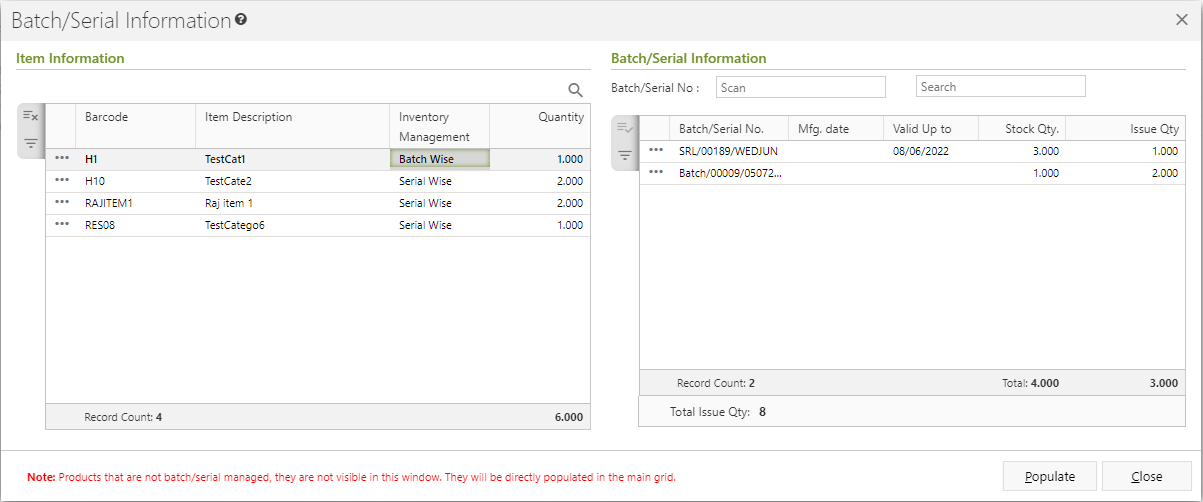
Expected U/X of the window -
On opening the window cursor would be on Item Information section grid - 1st row.
In Batch/Serial Information grid, display respective batch/serial data for selected ICODE
On tabbing from any row in Item Information grid, move the cursor to Batch/Serial Information grid - 1st row - Quantity section and highlight row in Item Information grid against which Batch/serial information is being displayed.
On pressing up/down arrow button, move cursor to above/below row -
Above/below row’s quantity section is case of batch managed items.
Above/below row in case of serial managed items.
On tabbing, move cursor to Populate button → Close
- Shift + TAB would take user back to previous field
- “Products that are not batch/serial managed will not be visible in this window. They will be directly populated in the main grid.”
Show Item User can view the selected item.
In Item Information block, three columns are added - Batch/Serial No., MFG Date and Valid Upto.
Above columns are in display mode, i.e. modification is not allowed.
The column remains hidden by default.
On selection, columns will retained in grid state.
Import Barcode 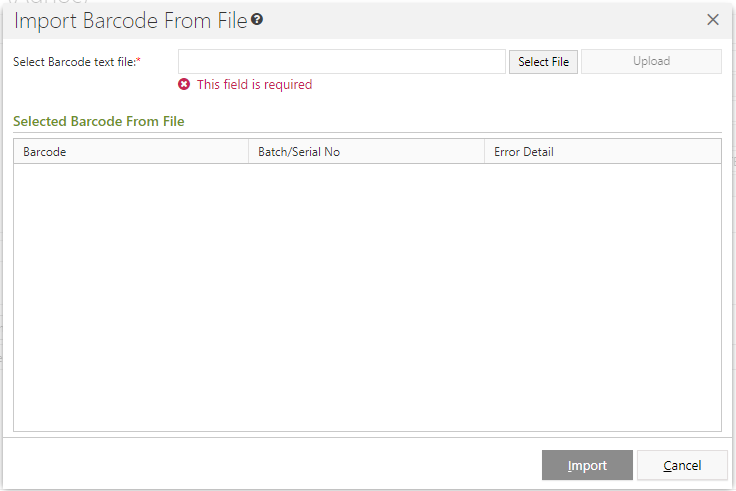
New column has been added in the grid - ”Batch/Serial No.”
Validations:
“Batch/Serial No.” is mandatory if inventory tracking is Batch/Serial wise.
Error Msg: ”Batch/Serial information for item not defined.”If inventory tracking of item is Item wise then, Batch/Serial information if given by user (either in batch/serial column or concatenated in Icode) won’t be accepted by system.
Error Msg: ”Batch/Serial information is not applicable for the item, Please delete batch/serial info and try again.”If Either Icode or Batch/Serial detail is mandatory, then user must provide at least one of the two values.
Error Msg: ”Both Icode and batch/serial fields cannot be blank.”Serial no. cannot be repeated for an item.
Error Msg: “Serial No. can’t be duplicate.”Item quantity for serial managed items must be equal to Scan Unit of that item.
Error Msg: “ITEM_QTY for serial managed items must be equal to scan unit of item.”Combination of Item Code + Batch/Serial no. must exist in system.
Error Msg: “Invalid Batch/Serial information.”If batch/serial number is already added to the icode/barcode, then there should be no value in Batch/serial No column.
Error Msg: ”Please remove value from batch/serial column and try again.”If Item code is not available and serial/batch is provided then system will restrict if multiple combinations for item code and serial/batch exist.
Error Msg: ”Multi combination exist for the given batch/serial. Specify the icode to proceed.”Important Alert
ICode+Batch/Serial barcode (i.e. concat barcode) is allowed to be imported from import barcode functionality.
This behaviour will prevail across whole Ginesys web for import barcode functionality.If ICODE is NULL and value is provided in batch/serial column then check for their correctness and then check if single row exist in the respective search result(s) then auto populate else throw an error. (Error msg given above in validation)
Copy Challan Behaviour:
On selecting the challan from the Copy Challan window, system closes the current window and populates the items in the main item grid.
On introduction of Batch/Serial, similar function i.e; along with all other information copy batch/serial information from the selected challan (if existing challan contains batch/serial information)
Negative check on saving will behave as usual.
Pricing details are not copied in Copy Challan functionality as usual.
Import Set Barcode(CTRL+ALT+I) In current flow user imports the set barcode from the file and system automatically converts and imports the ICODE in the item grid.
But after the batch/serial implementation, once user clicks on Accept action of the import set barcode window, system will open the Select batch/serial window,
If same Batch managed Item(s) are found in multiple Set Barcodes,
Only one record of such Item(s) will be displayed in Batch Details block.
Quantity from all sets to be summed up.
Price Details A few batch/serial related columns have been added in this window
Column Name - Batch/Serial No. and Price Management
Column behaviour - It is hidden by default and can be selected by column chooser.
MRP, RSP, WSP and Std. Rate (All these values would get populated from Batch/Serial master if pricing of the item is managed at batch/serial level).
The validation occurs in the following order - Negative stock check > Delivery of expired items
Duplicate Item Selection
Note: If a duplicate Adhoc Item is entered through any item selection mode except for scan, a confirmation window named Duplicate Item opens. There will be three options in Operation - Append, Overwrite and Discard.
- If you select Append, the quantity of the existing item would be Increased.
- If you select Overwrite, the previous quantity will be Removed and the new quantity will be displayed.
- If you select Discard, there will be no change in the previous quantity.
If you enter duplicate item through scan item mode, the quantity of the existing item will be increased.
Impact of Batch/Serial functionality on Item Selection
Changes in Item Grid
Four new columns have been added in the grid - Batch/Serial No., Mfg. Date, Valid Upto and Inventory Tracking
Above columns are added in all three Delivery Challan forms - Adhoc, Against Order and Against Reservation.
All column types to be “View only”, i.e. modification is not allowed.
The columns are hidden by default but can be visible by the column chooser.
Values are displayed as populated from the various Item selection modes.
Note : Quantity of serial managed items can’t be changed in grid.
”Quantity of serial managed items can’t be changed” [OK].Data displayed are made hyperlink
On clicking on the record(having value), popup window will be displayed.
Batch Detail window on item scan will open in display mode.
Window will display details of Batch/Serial information for the respective batch
Validations :
Quantity for serial managed items must be Scan Unit for that item.
Serial Number can not repeat for an item.
Error Msg - ”Duplicate serial number is not allowed for an item.”
Batch/serial details are not required for items where, inventory tracking = item wise.
Error Msg - ”Batch/Serial details are not applicable for this item”.
Note: batch/Serial details include, batch/serial number, pricing information and expiry information.If Adhoc DC
Item will be calculated as per Pricelist.
Barcode wise-Batch/Serial No. wise unique records will be populated.
- Search Item: This process will search the items from the Item Master according to the search criteria.
- Scan Item: You can directly Scan the Barcode to add items.
- Import Barcode: TheImport Barcodefeature allows to populate items using the.csvor.txtfiles.
Copy Challan: Only item details of existing challans can be copied and the items included to create new challans.
Copy Challan
Note: The given conditions are followed to display the list of Challans to be copied:
- Only receipt made in the current financial year will be displayed.
- Only receipt made from the connected OU name will be displayed.
- Only receipt made from the connected site will be displayed.
- Challan number once selected in a particular Delivery Challan will not be displayed in the list for further selection.
- Only challans which are not made extinct will be displayed.
Note:
You will get Negative Stock Alert, if stock of item in the grid is less than delivery quantity for the selected stock point.
- If items added or removed or quantity is changed then the stock will be checked.
- A new LOV has just been added before Item scan field, with following values - Item, Batch/Serial and Set
Selected items details will be populated with Barcode, Item Description, Rate, Delivery Qty. and Amount.
Note: Rate column will not be populated for Consignment sale type.
- If you click on the
 button left side of the populated item, you will get Delete Record and View Properties in the drop down list.
 - Delete Record: You can delete the item from the item grid.
- View Properties: You can check the item details by clicking on this option. It will open the Item Master window but you cannot edit any details.
- Others:

- You can put in the Remarks for the Delivery Challan.
- If you click on the Price Details button, Price Details window will open.
- You can change the Basic Rate, Factor etc.
- Click on Ok after required changes.
- Now click on the Save button.
If the selected items have Negative or Zero stock, you will get a Warning - Negative Stock Alert! window. There are two options - Ignore and Cancel.
If you click on Ignore, the Delivery Challan will be saved with negative stock.
If you click on Cancel, then you will get back the Item Information section to remove the Item(s) and re-select item(s) without negative stock.
If the customer exceed the credit limit set in the Customer Master and if the Credit Verification Failure Alert Method is set as Warning, then you will get a alert message - "The Customer is either exceeding the Credit limit or the Overdue limit. Do you want to proceed?".
Note: The profile security - Credit Verification Failure Alert Method have following three value:
- Stop: If profile value is set as Stop, then generate alert with options - Alert: "The Customer is either exceeding the Credit limit or the Overdue limit. Cannot Proceed!" and stop execution.
- Warning: If profile value is set as Warning, then generate alert message - "The Customer is either exceeding the Credit limit or the Overdue limit. Do you want to proceed?".
- Ignore: If profile value is set as Ignore, then do not get any message and proceed to save.
If you click on Proceed, the Delivery Challan will be generated and you will get a message - "Document <DC No.> saved successfully. Packet Barcode : <Packet Barcode No>."
After saving the Delivery Challan, you will get a Packet Panel beside the Panel Information. By default, the section to remain hidden before saving of a DC. In this panel, you will get the packet details like Packet No., Packet Barcode, No of Item(s) & Quantity. After opening Add mode, number of packets created without closing the Add mode, to be displayed one after another. Once the Add Mode is closed, this section will be cleared.
Note: After saving one Delivery Challan, the Customer details section in the header part will remain same. You can create more than one Delivery challan for one customer.
Prerequisites
- The users' role must have access to the Edit app operation in the Delivery-Adhoc feature in Sales & Distribution - Operation - Packing through Roles in Ginesys Web - Admin - Security.
Delivery Challan must be created.
Step-by-step guide
The steps are as follows:
- Go to Ginesys Web > Sales & Distribution - Operation - Packing > Delivery - Adhoc.
- Delivery Challan (Adhoc) will open.
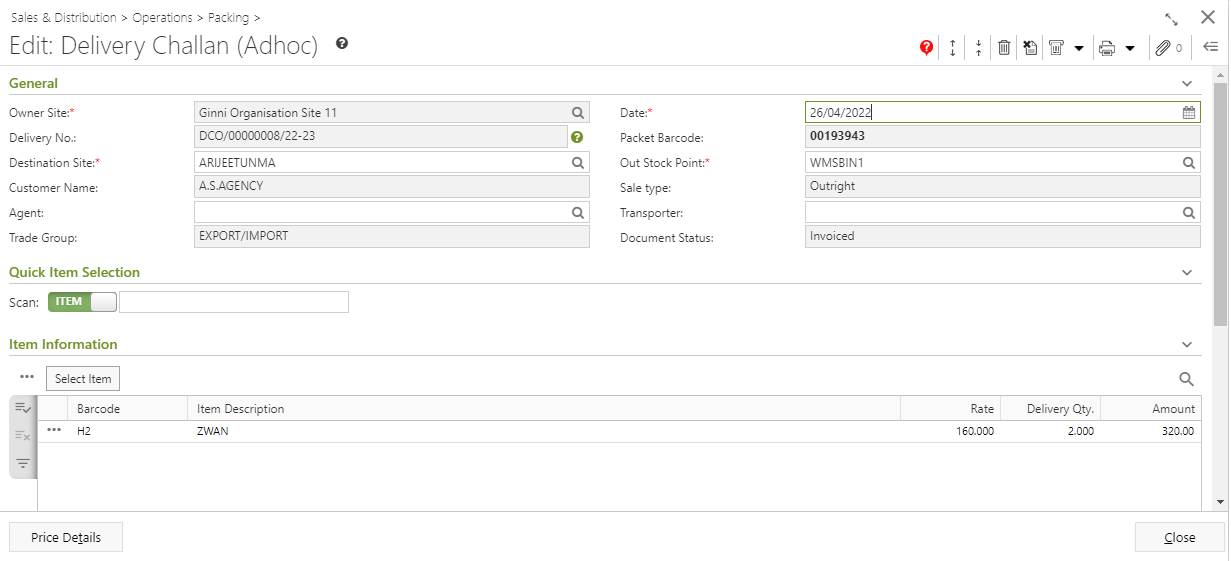
- List of already created Delivery Challan will appear.
Select the one Delivery Challan you want to edit.
You can use Filter to search particular Delivery Challan(s).
Note: If you select multiple Delivery Challan, you will get the Edit option disabled. You cannot edit multiple Delivery Challan at a time.
- Go to Action > Edit.
- Edit Delivery Challan (Adhoc) window will open.
- All the details will be populated.
- If the profile security Allow site change in Delivery Challan Adhoc is ticked, then you can change the Destination Site. According to the Destination Site, others details will also change.
- You can Add new Item and Item Set in the Delivery Challan in Edit Mode same as Add Mode.
- You can Delete Items from Delivery Challan in Edit Mode.
Click on the Save button to save the modified Delivery Challan.
Information

You will get Delete and Cancel icon in the Edit mode with others icons at the top right corner of the window.
Show Message: You will get a message regarding edit of Delivery Challan.
Delete: You can Delete the Delivery Challan from the Edit Mode by clicking on this icon.
Cancel: You can Cancel the Delivery Challan from the Edit Mode by clicking on this icon.
Prerequisites
- The users' role must have access to the Delete app operation in the Delivery-Adhoc feature in Sales & Distribution - Operation - Packing through Roles in Ginesys Web - Admin - Security.
- Delivery Challan must be created.
- Any invoice must not be created against the Delivery Challan.
- Delivery Challan must not be canceled.
Step-by-step guide
The steps are as follows:
- Go to Ginesys Web > Sales & Distribution > Operation > Packing > Delivery - Adhoc
- Delivery Challan (Adhoc) will open.
- List of already created Delivery Challan will appear.
- Select the one Delivery Challan you want to edit.
- You can use Filter to search particular Delivery Challan(s).
- Go to Action > Delete.
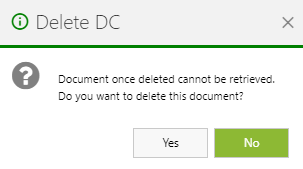
- You will get a message - "Document once deleted cannot be retrieved. Do you want to delete this document?"
- If you click on Yes, you will get a confirmation message "<Delivery Challan No:> - Successfully deleted".
Prerequisites
- The users' role must have access to the Cancel app operation in the Delivery-Adhoc feature in Sales & Distribution - Operation - Packing through Roles in Ginesys Web - Admin - Security.
- Delivery Challan must be created.
- Any invoice must not be created against the Delivery Challan.
Delivery Challan must not be canceled.
If privilege for DC - Cancellation is defined as Level-2, Level-3, Level-4 in the desktop application, the migration in the web application will be done with Cancel app operation as allowed (tick marked).
If privilege for DC - Cancellation is defined as Level-1 in the desktop application, then Cancel app operation will be disallowed (Un-tick marked) in web application.
Step-by-step guide
The steps are as follows:
- Go to Ginesys Web > Sales & Distribution > Operation > Packing > Delivery - Adhoc
- Delivery Challan (Adhoc) will open.
- List of already created Delivery Challan will appear.
- Select the one or more than one Delivery Challan you want to cancel.
- You can use Filter to search particular Delivery Challan(s).
- Go to Action > Cancel.
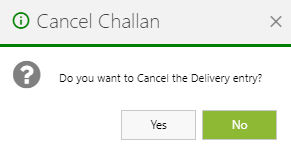
- You will get a warning message - "Do you want to Cancel the Delivery entry?"
- If you click on Yes, the Delivery Challan will be canceled and you will get a message - "<Delivery Challan No:> - Successfully cancelled."
Prerequisites
- The users' role must have access to the Print Packet Barcode app operation in the Delivery-Adhoc feature in Sales & Distribution - Operation - Packing through Roles in Ginesys Web - Admin - Security.
- Delivery Challan must be created.
- Delivery Challan must not be canceled.
- Printer must be installed and attached to the network.
Step-by-step guide
The steps are as follows:
- Go to Ginesys Web > Sales & Distribution > Operation > Packing > Delivery - Adhoc
- Delivery Challan (Adhoc) will open.
- List of already created Delivery Challan will appear.
- Select the one or more than one Delivery Challan you want to print.
- You can use Filter to search particular Delivery Challan(s).
- Go to Action > Print Packet Barcode.
- Barcode Print window will open.
- Select Printer from the drop down list.
- Select the Type of the Printer.
- Put in the Config Name.
- Select the Print Quantity.
- Click on the Print button.
- The Barcode of the selected Delivery Challan items will be printed in the selected printer.
Prerequisites
- The users' role must have access to the Print app operation in the Delivery-Adhoc feature in Sales & Distribution - Operation - Packing through Roles in Ginesys Web - Admin - Security.
- Delivery Challan must be created.
- Delivery Challan must not be canceled.
- Printer must be connected to the device.
Step-by-step guide
The steps are as follows:
- Go to Ginesys Web > Sales & Distribution > Operation > Packing > Delivery - Adhoc
- Delivery Challan (Adhoc) will open.
- List of already created Delivery Challan will appear.
- Select the one or more than one Delivery Challan you want to print.
- You can use Filter to search particular Delivery Challan(s).
- Go to Action > Print.
- The Delivery Challan(s) will be printed.