Creating, Editing, Deleting & Printing Working Plan in Ginesys Web
Working Plan is created to plan the production of a single site and hence all its constraints work at the site level. It is where the actual ground level production plan is created with necessary the job-processes along with the corresponding raw materials. This article describes how to manage Working Plan in Ginesys Web.
Prerequisites
- The users' role must have access to the Working Plan feature by enabling Add app operation for the feature in Admin - Security - User - Role through Production - Operations - Planning - Working Plan.
- Raw Material must be present in the item master.
- BoM must be created.
Step-by-step guide
The process is divided in the following steps:
- Go to Ginesys Web > Production > Operations > Planning > Working Plan.
- Working Plan module window will open.
- Previously create plans will be listed here.
- Click on the Add button.
- Add: Working Plan window will open.
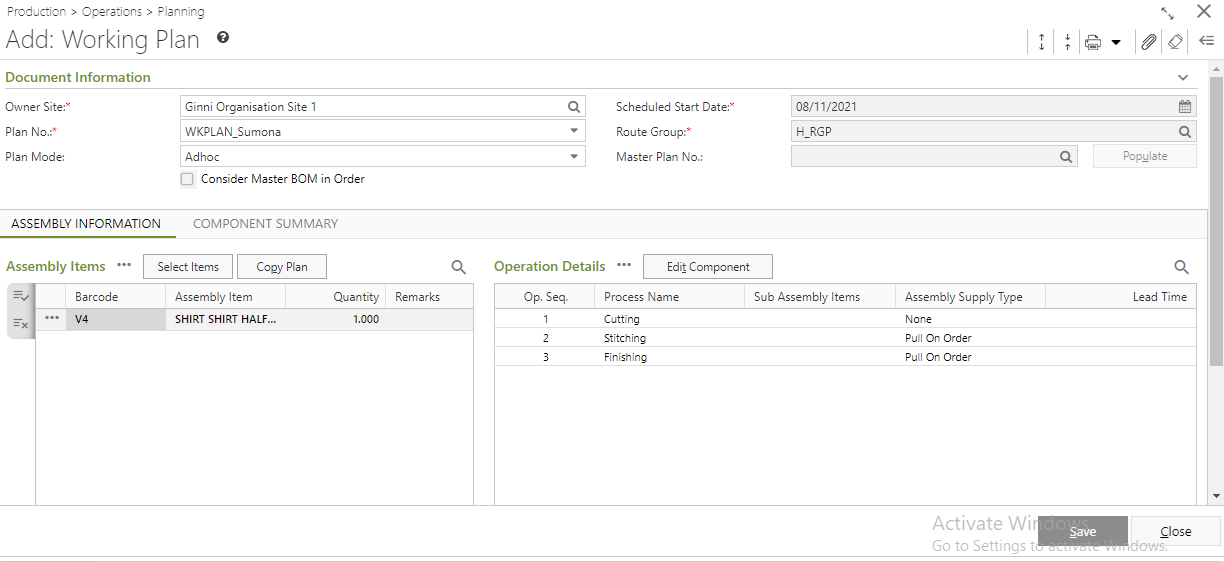
- You will get four sections - Document Information, Assembly Information, Component Summary & Others.
- Document Information:

Note: You can also select an existing plan by clicking on the search icon beside the Master Plan No. field. This field will be available only when you select Master Plan in Plan Mode otherwise it will be disabled.
- Owner Site (Mandatory Field): It will be populated automatically as per the connected site. You can change the site from the lookup window.
- In the Scheduled Start Date field the system date will be populated automatically.
- To select existing Route Group click on the Search Icon of Route Group (Mandatory Field).
Select the plan mode. There are four types of mode - Adhoc, Master Plan, Sales/Transfer Order.
Adhoc: When it is not possible to create a standard manufacturing process, then we select the Adhoc mode. For adhoc mode you need to create a new working plan.
Master Plan:
If you select the Master Plan Mode then you have to select the Master Plan No. and click on Populate button.
All the details of the selected plan will be populated.
- You can edit item and the processes according to your requirement.
- Sales/Transfer Order: It is an order issued by a business to a customer. If you select sales/Transfer Order mode for working plan then you have to create a new plan.
- Assembly information:
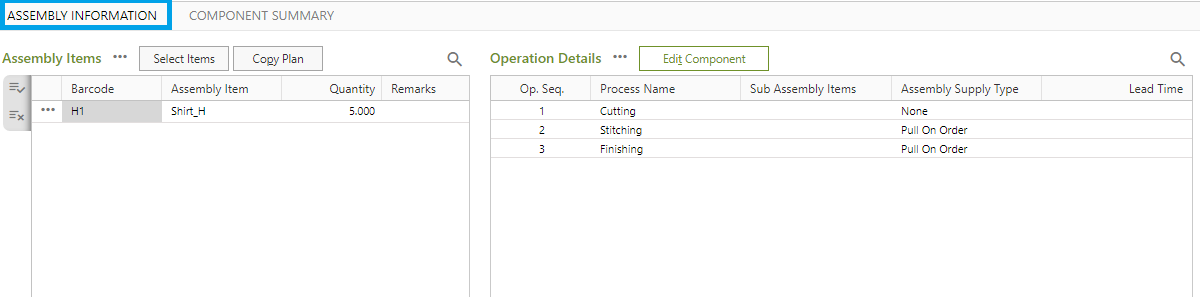
- You need to add items in the Assembly Items by using Select Item & Copy Challan.
- Select Item: This process will search the items from the Item Master according to the search criteria.
- Copy Challan: Only item details of existing challans can be copied and the items included to create new challans.
- After selection of items, click on Populate button.
- Click on the Edit Component button to add/Edit Operation Details & Component Items.
- You need to add items in the Assembly Items by using Select Item & Copy Challan.
- Component Summary:
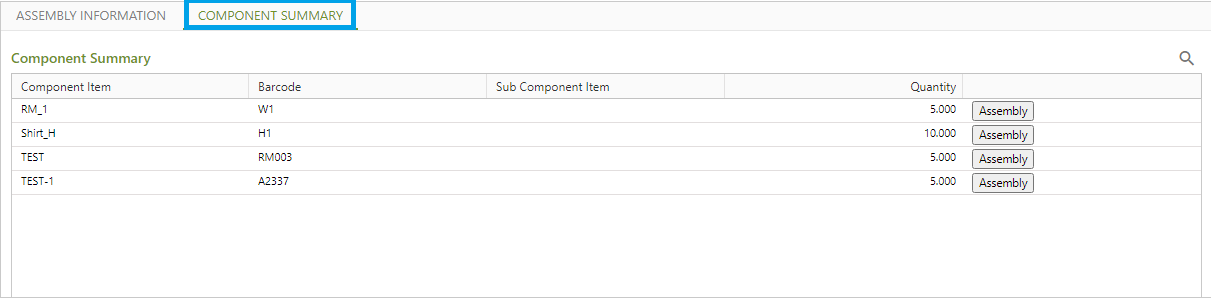
- In the Component Summary tab, the component item will be auto populated according to the BoM with Barcode, Sub Component Item, Quantity etc.
- Others:

- Put in the Remarks.
- Put in the Remarks.
Once done, click on Save button to save the working Plan.
- You will get a message - "Document <Working Plan No.> saved successfully".
Prerequisites
- The users' role must have access to the Working Plan feature by enabling Edit app operation for the feature in Admin - Security - User - Role through Production - Operations - Planning - Working Plan.
Step-by-step guide
The steps are as follows:
- Go to Ginesys Web > Production > Operations > Planning > Working Plan.
- Working Plan module window will open.
- Previously create plans will be listed here.
- Select the Working Plan you want to edit.
You can use Filter to search particular Working Plan(s).
Note: If you select multiple Working Plan, you will get the Edit option disabled. You cannot edit multiple PI at a time.
- Edit: Working Plan window will open.
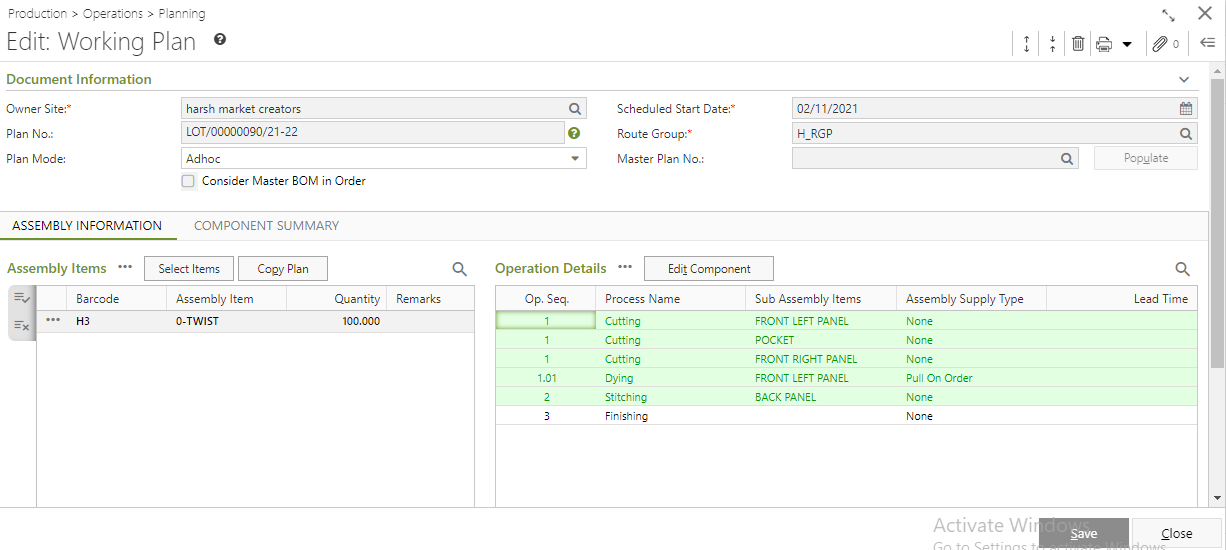
- All the details will be populated.
- Modify the required fields.
- Click on the Save button to save the modified Working Plan.
- You will get a message - "Document <Working Plan No.> saved successfully."
Prerequisites
- The users' role must have access to the Working Plan feature by enabling Delete app operation for the feature in Admin - Security - User - Role through Production - Operations - Planning - Working Plan.
Step-by-step guide
The steps are as follows:
- Go to Ginesys Web > Production > Operations > Planning > Working Plan.
- Working Plan module window will open.
- Previously create plans will be listed here.
- Select the Working Plan you want to delete.
- You can use Filter to search particular Working Plan(s).
- Go to Action > Delete.
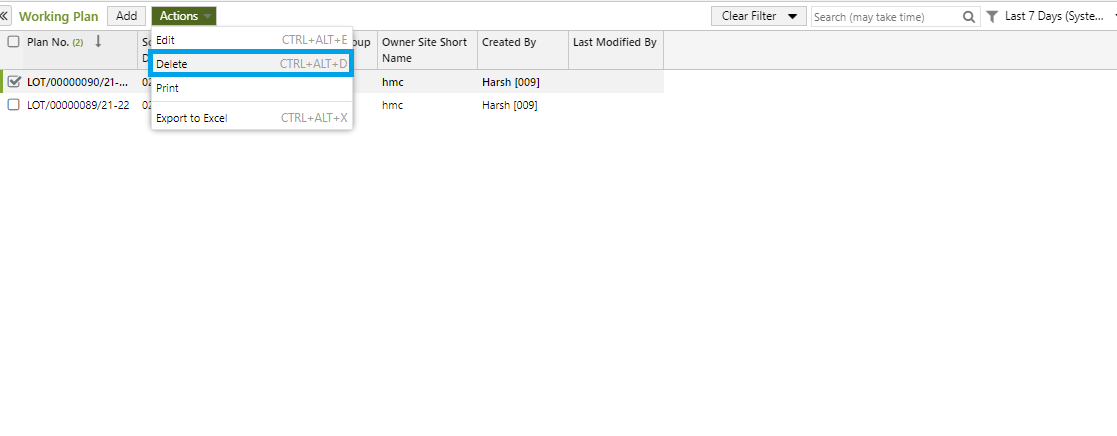
- You will get a message - "Document once deleted cannot be retrieved. Do you want to delete this document?"
- If you click on Yes, you will get a confirmation message "<Working Plan No:> - Successfully deleted".
Prerequisites
- The users' role must have access to the Working Plan feature by enabling Print app operation for the feature in Admin - Security - User - Role through Production - Operations - Planning - Working Plan.
- Working Plan must be created.
- Printer must be connected to the device.
Step-by-step guide
The steps are as follows:
- Go to Ginesys Web > Production > Operations > Planning > Working Plan.
- Working Plan module window will open.
- Previously create plans will be listed here.
- Select the Working Plan you want to print.
- You can use Filter to search particular Working Plan(s).
- Go to Action > Print.
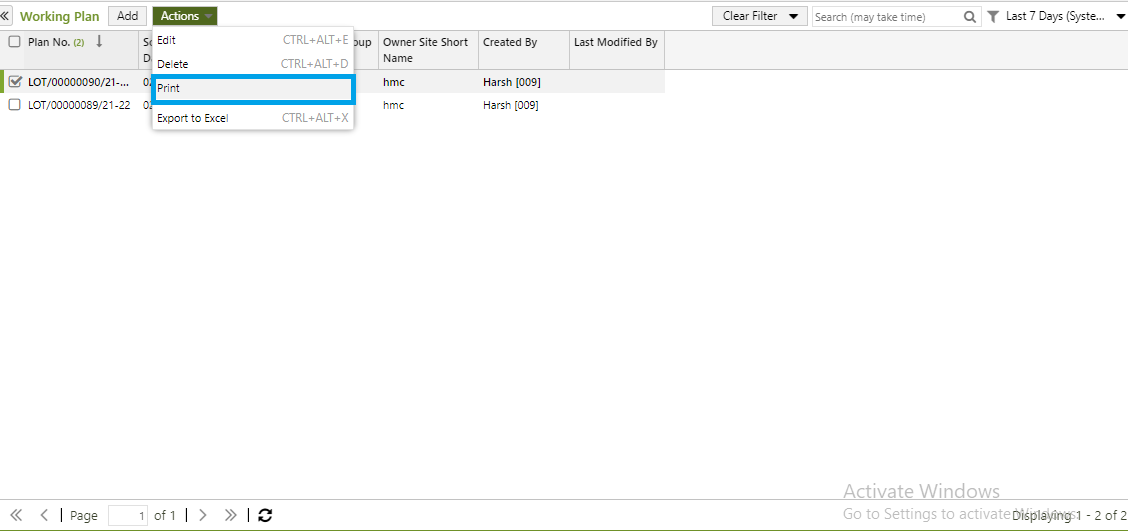
- You will get previously created template.
- Click on the required template to print.
- A new window will open.
Click on the Print to print the Working Plan.