Adding, Editing, Deleting the Job Order
A Job Order is an internal document extensively used by manufacturing businesses. In a manufacturing environment, a job order is used to signal the start of a manufacturing process and will most probably be linked to a bill of material.
Hence, the job order will probably state:
- the quantity of the product to be manufactured
- the amount of raw material to be used
- the rate per unit and amount
Why is a Job Order needed?
In GINESYS, to initiate any kind of manufacturing work, whether standard, non-standard or adhoc, you are required to raise a job order. Job Order has to be mandatorily created according to the Routing Master defined for the item.
Prerequisites
- The users' role must have access to the Job Order feature in Production module by providing the level 4 Role Privilege to it in Admin – Security Settings – Role Privileges.
- Jobber must be created.
- Route group must be created.
- Item (Finished Goods type) must be present in the item master.
- Plan has to be defined for Plan based processes.
- Bill of Materials (BoM) has to be defined for the Assembly Item.
Step-by-step guide
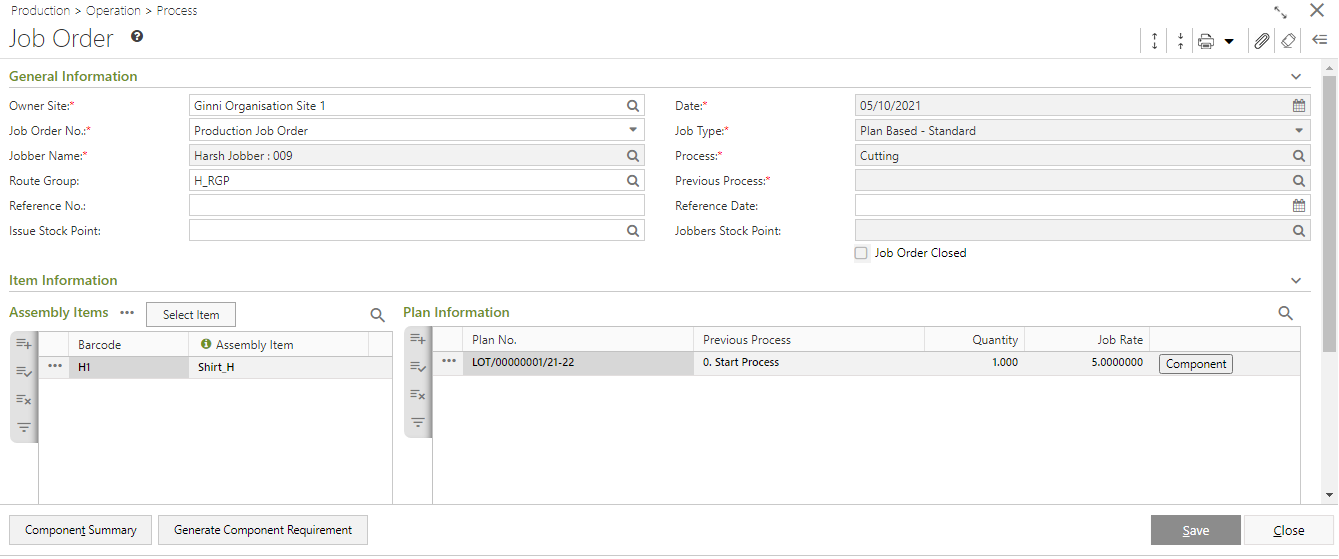
- Go to Ginesys Web > Production > Operations > Process > Job Order.
- Production – Job Order window opens with list view.
- Click on Add button.
- Add Job Order window opens.
- You will get group of icons at the top right corner of the window.

- The icons name from left to right are - Expand All, Collapse All, Print Document Report, Attachments, Clear Form and Open Side Panel.
- Expand All: Clicking on this icon, all the sections will be Expand if they are collapsed.
- Collapse All: Clicking on this icon, all the sections will be Closed if they are expanded.
- Print Document Report: Clicking on the Down Arrow beside this icon, you will get Print Preference option with already created Report File Template. This option is used to print document.
- Attachments: You can Upload some required documents from this option.
- Clear Form: Clicking on this icon, you can Clear all the data already entered.
- Open Side Panel: Clicking on this, you will get the details of the current Planning Master.
- Expand All: Clicking on this icon, all the sections will be Expand if they are collapsed.
- The icons name from left to right are - Expand All, Collapse All, Print Document Report, Attachments, Clear Form and Open Side Panel.
- You will get three sections -General Information, Item Information & Others.
- General Information:

- Owner Site (Mandatory Field): It will be populated automatically as per the connected site. You can change the site from the lookup window.
- The system date will be auto populated in the Date field. However, you can change the date according to your requirement.
- Select a document Numbering Scheme from the drop down list which will be populated in the Job Order No.
- Click on the Search icon beside the Jobber Name field. A lookup window opens. Select a jobber from the list.
- Now select the Job Type from the drop down list. The job types are –
- Plan based - Standard [Follows the defined Working plan exactly]
- Plan based - Non-standard [Does not follow the defined Working plan exactly, there is some modification to it]
- Adhoc [Does not follow the defined Working plan at all]
- Reprocess [When a Finished Goods is required to be processed again]
- Plan based - Standard [Follows the defined Working plan exactly]
- Click on the search icon beside the Process field. A Select Process lookup window will open where you can select a process.
You can also put in Issue Stock Point, Jobbers Stock Point, Reference No, Reference date and Route Group etc.
- Owner Site (Mandatory Field): It will be populated automatically as per the connected site. You can change the site from the lookup window.
- Item Information:

- Now to select Assembly Item press F4. Production Select Item window will open.
Search item, provide quantity (Qty) and click on Populate. The item will be populated in the Assembly Item area.
- Now to select Assembly Item press F4. Production Select Item window will open.
- Others:

- Put in the Remarks field.
- Put in the Remarks field.
- Now press F8 (Generate Component Requirement) to auto-populate the BoM defined for all assembly items. Populating the details of the component items individually for each assembly item, can be done by clicking on the Component button.
Otherwise, just the alternative to the regular components can be provided by clicking the Alter Component button or non-standard component added or the component details already populated can be viewed.- If the component items are individually to be populated; click on Pick Up BoM for the BoM to be populated.
- The components may also be deleted, by clicking Delete.
- Non Standard Components added, clicking Add Non-Standard Component.
- Alternate components added, clicking Alter Component (the button is enabled provided Alternate component is defined in BoM).
- If the component items are individually to be populated; click on Pick Up BoM for the BoM to be populated.
- The Component Summary button provides a comprehensive summary of all components required for the particular process to be performed on all listed assembly items.
- Click on the Save button to save the Job Order. If Job Order Limit has been set in Process master then the system will ask for confirmation to proceed in case the Job Order Limit value is violated.
Prerequisites
- The users' role must have access to the Edit app operation in the Job Order feature in Production - Operations - Process through Roles in Ginesys Web - Admin - Security.
- The Job Order must already be created.
Step-by-step guide
- Go to Ginesys Web > Production > Operations > Process > Job Order.
- Production > Job Order window opens.
- Select the Job Order No. you want to edit.
- Go to Action > Edit or you can double click on it to open the document.
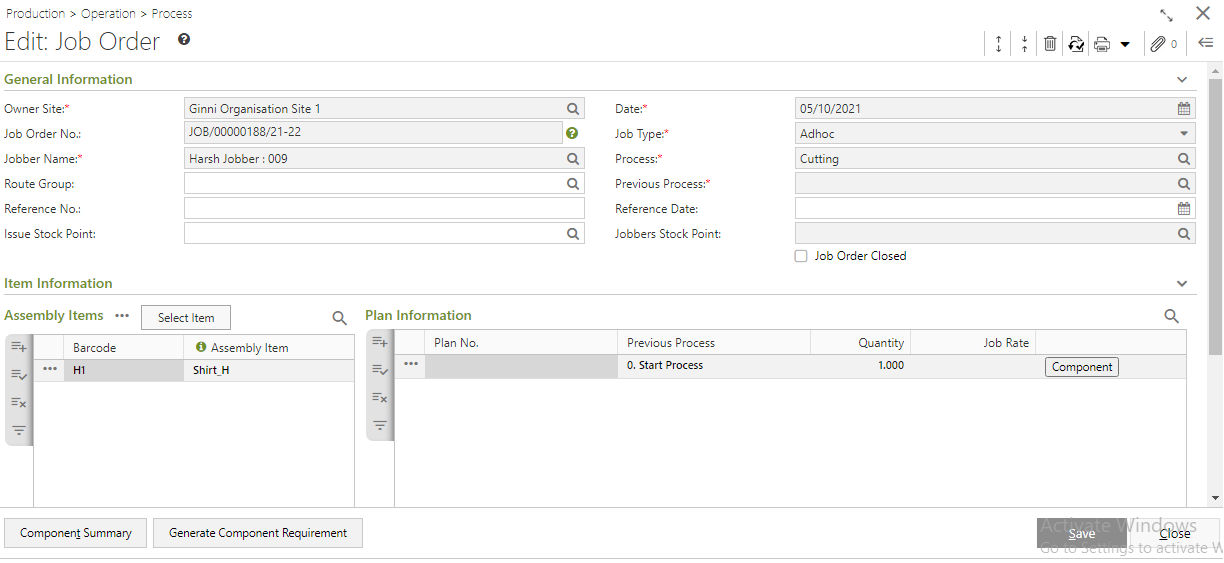
Modify the required fields.
Note: The following fields cannot be modified - Job Order No., Jobber Name, Job Type, Process Name.
- Click on Save Button to save the modified records.
Prerequisites
- The users' role must have access to the Job Order feature by enabling Delete app operation for the feature in Admin - Security - Role.
- The Job Order must already be created.
- Job Order must not be tagged to the Job Receipt.
- Job Order must be Un- Authorized.
Step-by-step guide
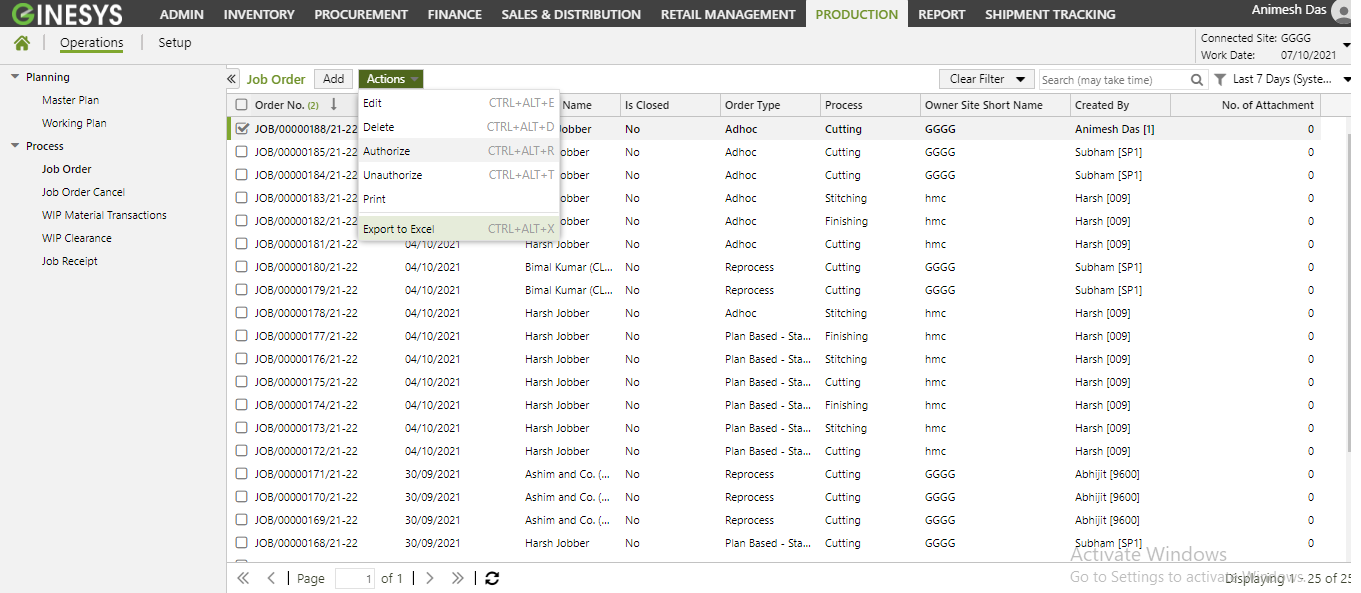
- Go to Ginesys HO > Production > Job Order.
- Production > Job Order window opens.
- Previously created orders will be listed here. Select the Job Order you want to delete.
- You can use Filter to search particular Job Order(s).
- Go to Action > Delete.

- You will get a message - "Document once deleted cannot be retrieved. Do you want to delete this document?"
- If you click on Yes, you will get a confirmation message "Job Order No. <Working Plan No:> - Document deleted successfully".
Prerequisites
- The users' role must have access to the Authorize app operation in the Job Order feature in Production - Operations - Process through Roles in Ginesys Web - Admin - Security.
- The Job Order must already be created.
- Job Order must be Un - Authorized.
Step-by-step guide
- Go to Ginesys Web > Production > Operations > Process > Job Order.
- Job Order module will open.
- All the previously created Job Order will be listed here.
- Select the Purchase Service Order you want to authorized.
- You can use Filter to search.
- Go to Action > Authorized.
- You will get a message - "Selected order(s) will be authorized. Do you want to proceed?"
- If you click on Yes, you will get a confirmation message "Order No.<Job Order No.> - Authorized Successfully".
Prerequisites
- The users' role must have access to the Job Order feature by enabling Un-Authorize app operation for the feature in Admin - Security - Role.
- The Job Order must already be created.
- Job Order must be Authorized.
Step-by-step guide
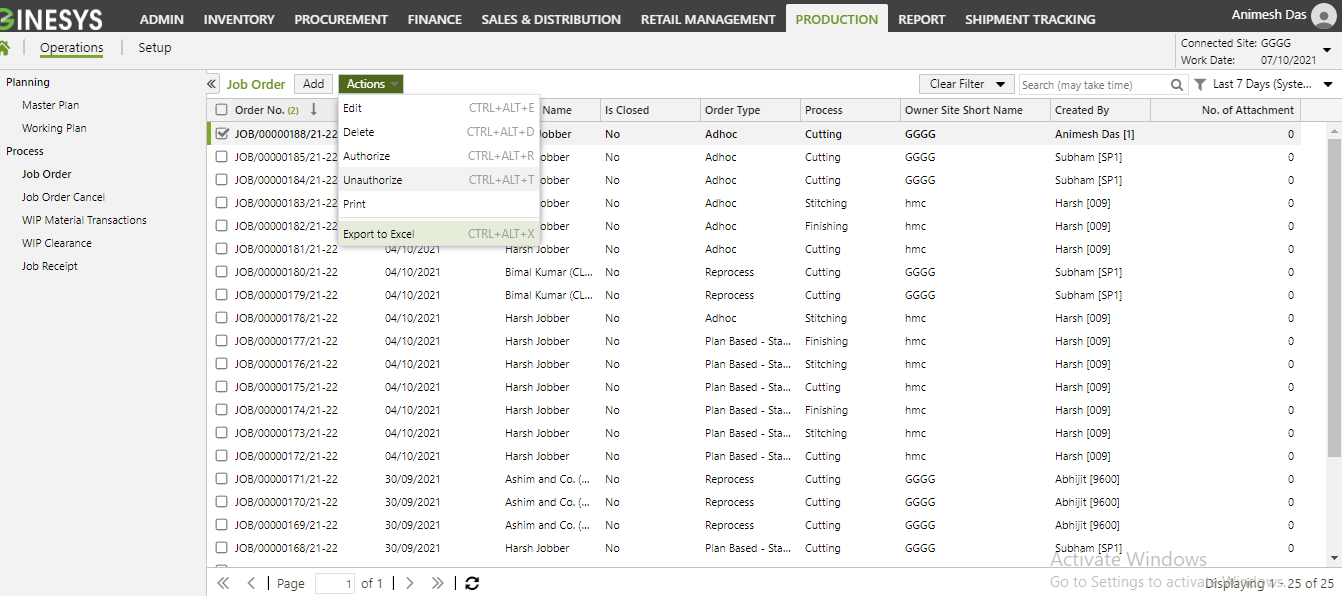
- Go to Ginesys Web > Production > Operations > Process > Job Order.
- Job Order module will open.
- All the previously created Service Order will be listed here.
- Select the Purchase Service Order you want to unauthorized.
- You can use Filter to search.
- Go to Action > Unauthorized.
- You will get a message - "Selected document(s) will be unauthorized. Do you want to proceed?"
- If you click on Yes, you will get a confirmation message "Order No. <Job Order No.> Unauthorized successfully.".
New User Profile named "Allow Component modification in Authorized Job Order" has been added from version 12.6.4 onwards.