Adding, Editing, Deleting & Printing WIP Material Transaction in Ginesys Web
WIP Materials transactions is basically related to the consumption of component items for manufacturing of the finished goods, i.e. assembly items. An entry has to passed in this form, for any consumption needs while manufacturing a product. The consumed items then get deducted from the inventory stock and can be shown as consumption for the assembly item with jobber wise tagging of the job order. This level of this inventory should be kept as low as possible.
Automatic WIP Material Transactions
It is important here to note that these transactions gets entered automatically while making job order/receipt depending on the input provided by you in the Bill of Material for the item and/or according to the non-standard component added.
Prerequisites
- The users' role must have access to the WIP Material Transaction feature by enabling Add app operation for the feature in Admin - Security - User - Role through Production - Operations - Process.
- Process must be created
- Job Order must be created.
- Stock Point group must be created.
Step-by-step guide
The process is divided in the following steps:
- Go to Ginesys Web > Production > Operations > Process > WIP Material Transaction.
- WIP Material Transaction module window will open.
- Previously create transactions will be listed here.
- Click on the Add button.
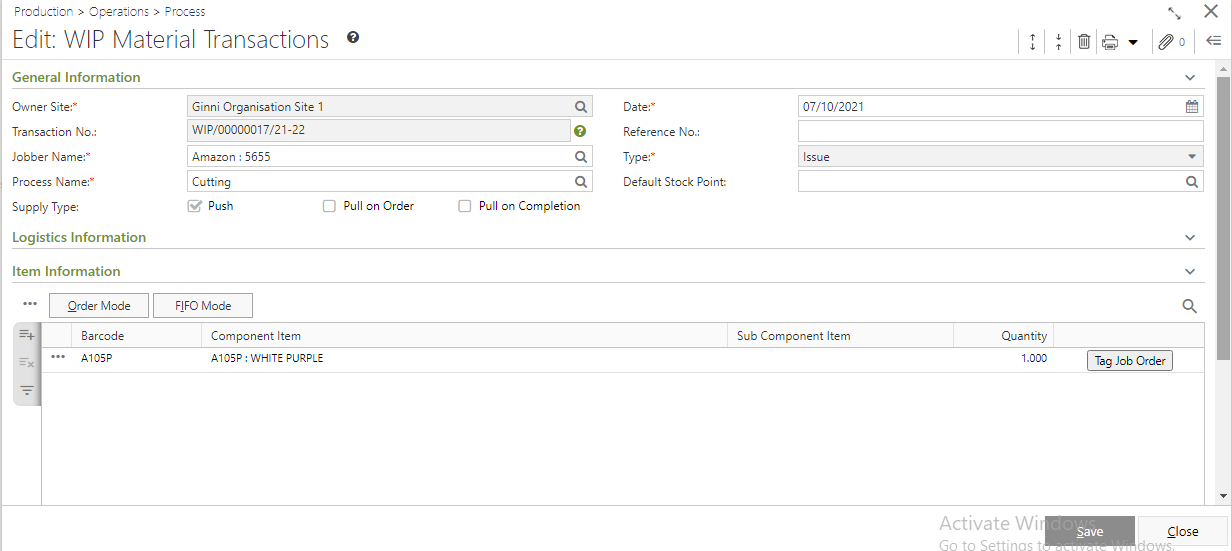
- Add: WIP Material Transaction window will open.
- You will get a group of icons at the top right corner of the window.

- The icons name from left to right are - Expand All, Collapse All, Delete, Cancel, Print Document Report, Clear Form and Open Side Panel.
- Expand All: Clicking on this icon, all the sections (General, Service Details, User Defined Fields and Others) will be Expand if they are collapsed.
- Collapse All: Clicking on this icon, all the sections will be Closed if they are expanded.
- Delete: Clicking on this icon, you can Delete the entry.
- Cancel: Clicking on this icon, you can Cancel the from.
- Print Document Report: Clicking on the Down Arrow beside this icon, you will get Print Preference option with already created Report File Templates. This option is used to print document reports.
- Clear Form: Clicking on this icon, you can Clear all the data already entered.
- Open Side Panel: Clicking on this, you will get the details of the current WIP Material Transaction as follows:
- Document Summary: In this section you will get the summary of Service Count, Ordered Quantity & Amount, Invoiced Quantity & Amount, Created & Modified by etc.
- Jobber Details: You will get the Selected Vendor Details like Address, Contact Details, Tax Region, GST Details etc.
- Jobber Statistic: This section describes the Ledger balance amount, Outstanding Amount, Last Order Date etc.
- You will get five sections - Document Information, Logistic/ Gate Entry, Item Information, User Defined Fields and Others.
- Fill the General Information area:

- Owner Site (Mandatory Field): It will be populated automatically as per the connected site. You can change the site from the lookup window.
- Select Transaction No. (Mandatory Field) from the lookup window.
- In the Date (Mandatory Field) field the system date will be populated automatically.
Select the Type (Mandatory Field) from drop down menu.
- Select the Jobber Name (Mandatory Field) and Process Name (Mandatory Field) from the lookup window by clicking on the Search icon (
 ).
). - Select Default Stock Point.
- Select Supply Type from the available option. You can also select more than one option.
- Logistic/ Gate Entry:

- Logistic details will be populated as per General Information.
Fill the Item Information area:

- You will get two mode for item selection - Order Mode and FIFO Mode.
- Order Mode:
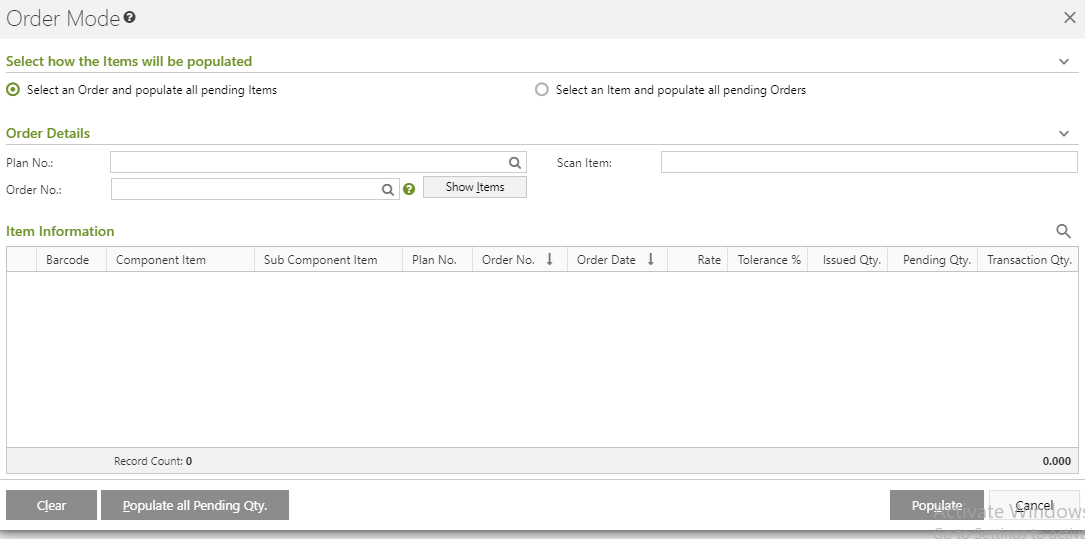
- Click on the Order Mode.
- Order Mode window will open.
- You will get two options - Select an Order and populate all pending items and Select an Item and populate all pending orders.
- Select an Order and populate all pending items:
- You need to put in the Search Criteria.
- Click on the Show Items button.
- Items will be listed in the Item Information section as per selected Plan.
- Select an Item and populate all pending orders:
- You need to put the item barcode.
- The item will be populated
- Select an Order and populate all pending items:
- FIFO Mode:
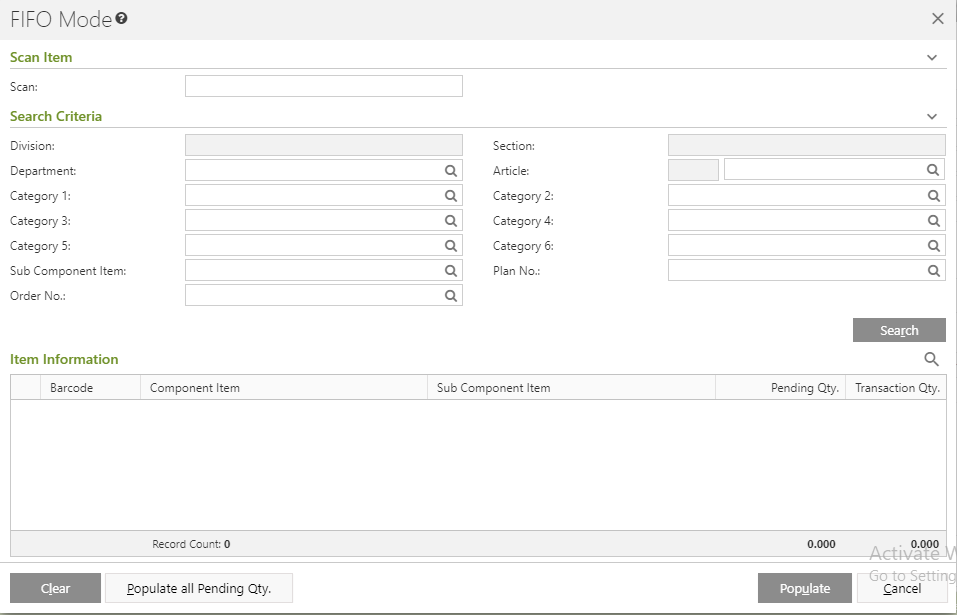
- Click on the FIFO Mode.
- FIFO Mode window will open.
- Put in the Search Criteria.
Items will be populated.
- Others:

- You can put in the Remark in Others section.
- Click on Save Icon in the menu bar to save the WIP transaction.
Prerequisites
- The users' role must have access to the WIP Material Transaction feature by enabling Edit app operation for the feature in Admin - Security - User - Role through Production - Operations - Process - Working Plan.
- WIP Material Transaction must be created.
Step-by-step guide
The steps are as follows:
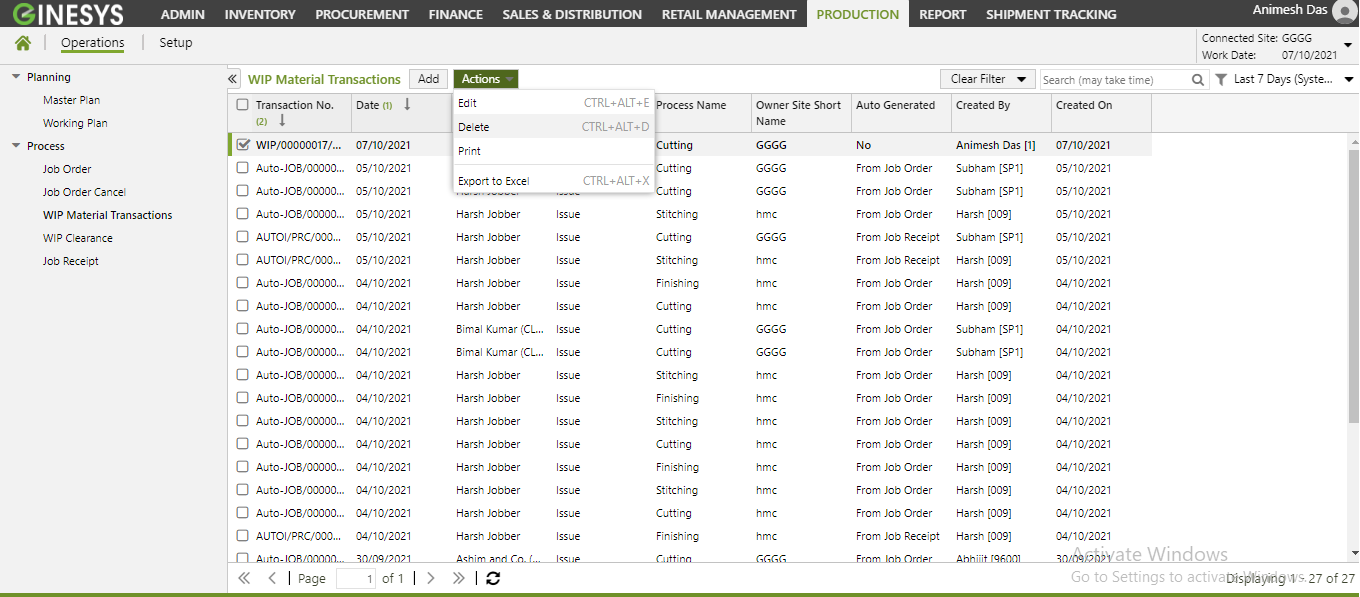
- Go to Ginesys Web > Production > Operations > Process > WIP Material Transaction.
- WIP Material Transaction module window will open.
- Previously create transactions will be listed here.
- Select the WIP Material Transaction you want to edit.
You can use Filter to search particular WIP Material Transaction(s).
Note: If you select multiple WIP Material Transaction, you will get the Edit option disabled. You cannot edit multiple PI at a time.
- Edit: WIP Material Transaction window will open.
- All the details will be populated.
- Modify the required fields.
- Click on the Save button to save the modified WIP Material Transaction.
- You will get a message - "Document <WIP Material Transaction> saved successfully."
Prerequisites
- The users' role must have access to the WIP Material Transaction feature by enabling Delete app operation for the feature in Admin - Security - User - Role through Production - Operations - Process - Working Plan.
- WIP Material Transaction must be created.
Step-by-step guide
The steps are as follows:
- Go to Ginesys Web > Production > Operations > Process > WIP Material Transaction.
- WIP Material Transaction module window will open.
- Previously create transactions will be listed here.
- Select the WIP Material Transaction you want to edit.
- Go to Action > Delete.
- You will get a message - "Document once deleted cannot be retrieved. Do you want to delete this document?"
- If you click on Yes, you will get a confirmation message "<WIP Material Transaction> - Document Deleted Successfully"