We’re excited to announce that the latest information is now available on our new site, the Ginesys One Wiki!. Visit the site for up-to-date resources and insights. We look forward to continuing to support you there!
We’re excited to announce that the latest information is now available on our new site, the Ginesys One Wiki!. Visit the site for up-to-date resources and insights. We look forward to continuing to support you there!
How To: Use Import CSV (Comma Separated Values) or Import Barcode option
Comma-separated values are tabular data (numbers and text) recorded as plain text. Each line of the file is a data record. Each record consists of one or more fields, separated by commas. In Ginesys, the Import CSV or Import Barcode option allows you to add items using CSV format. This button can be found in various modules of Ginesys Web. They are -
| Modules | Forms |
|---|---|
| Inventory |
|
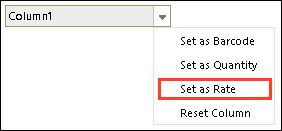
| Procurement | Here the button appears as Import Barcode. The basic functionality of the button is similar to the Import CSV button in the Inventory module with only one exception, i.e., the field which appears as Set as Bin No. is replaced with Set as Rate.
Operations
|
| Sales & Distribution | Here the button appears as Import Barcode. The basic functionality of the button is similar to the Import CSV button in the Inventory module with only one exception, i.e., the field which appears as Set as Bin No. is replaced with Set as Rate.
Retail Sale
|
| Retail Management | Here the button appears as Import Barcode. The basic functionality of the button is similar to the Import CSV button in the Inventory module with only one exception, i.e., the field which appears as Set as Bin No. is replaced with Set as Rate.
Operations
Promotion
|
Pre-requisites
- The file must be made beforehand and its location must be noted.
The file must be created in Notepad.
The values in the file must be separated by commas.
The values are case-sensitive. It means that they should be exactly as they exist in their respective masters.
Example: A bin has been set as BIN A in the Bin Master. An item A1000 (Quantity 10) is to be added to BIN A. But CSV file contains the following value: A1000,10,bin A.
The system will not allow you to import the file, as the bin name does not match.
Step-by-step guide
The steps are as follows:
- Click on the Import CSV button. It opens the Import CSV window.
- Click on the Select File button beside the Select Barcode text file field. It will open the Open window.
- Go to the location of the barcode file, select it and click Open.
- The path of the file is displayed. Now click on the Upload button.
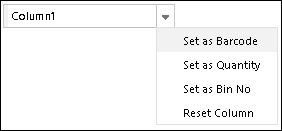
Once the file is successfully uploaded, the values will be displayed in the grid. Click on the arrow beside the Column1 field and select the required option. The available options are - Set as Barcode, Set as Quantity, Set as Bin No and Reset Column.
It is not necessary to set Column1 as barcode. It depends on the mapping made while creating the CSV file.
- Once the file is uploaded, click on the Import button in the Import CSV window.

