We’re excited to announce that the latest information is now available on our new site, the Ginesys One Wiki!. Visit the site for up-to-date resources and insights. We look forward to continuing to support you there!
We’re excited to announce that the latest information is now available on our new site, the Ginesys One Wiki!. Visit the site for up-to-date resources and insights. We look forward to continuing to support you there!
How To: Update the GINESYS ERP License
After the release of Ginesys version 12.10.0, the license update procedure for Ginesys ERP has moved to the web. Every time the license terms are renewed, the valid license has to be updated.
You can update with How To: Update the GINESYS License before Ginesys 12.10.0 if you are below Ginesys version 12.10.0
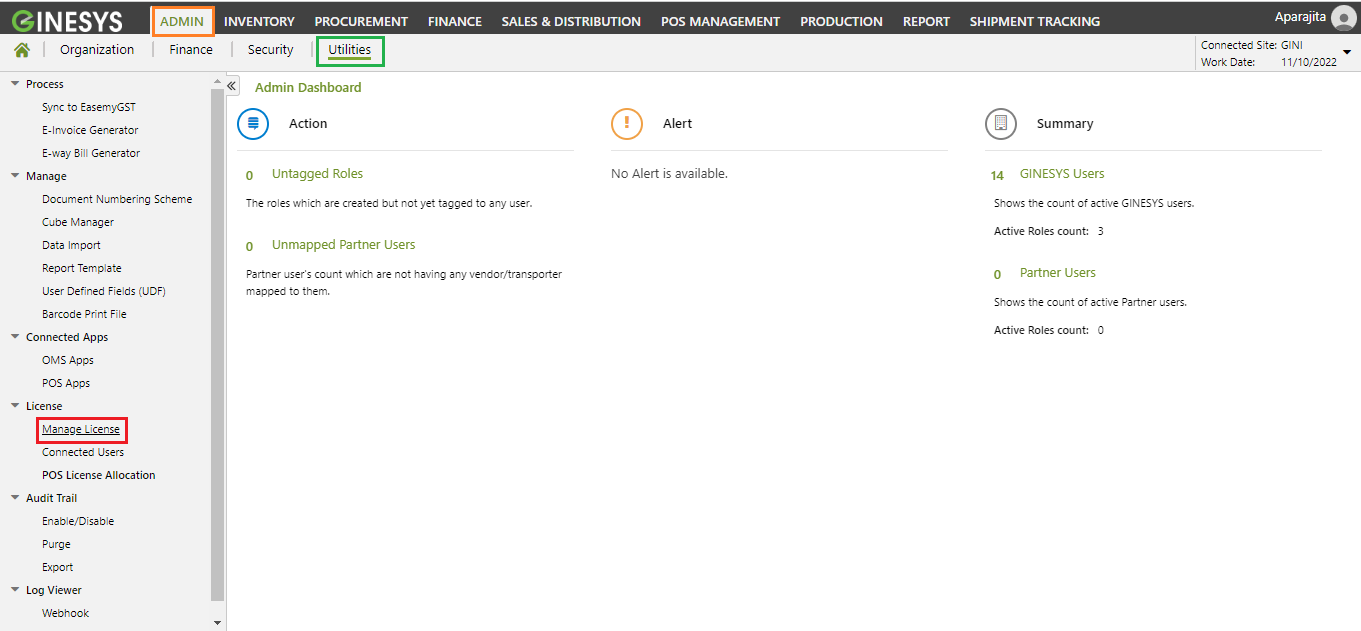
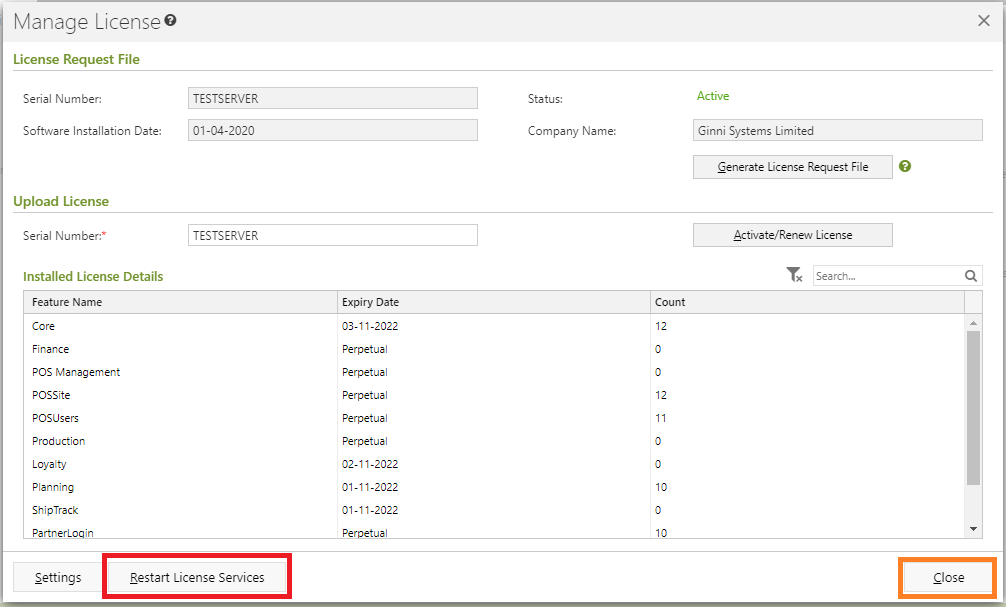
Now it is available under Admin - Utilities - License - Manage License .
We have introduced three menus under this module :
Manage License - License activation/renewal, restarting license service, generating LRF files etc. are managed from this menu.
Connected User - Connected user would be managed from this menu.
POS License Allocation - Allocation of POS (user and Site) license would be managed from this menu.
The following steps will allow you to get the GINESYS License updated correctly.
Step-by-step guide
| Steps | Diagram |
|---|---|
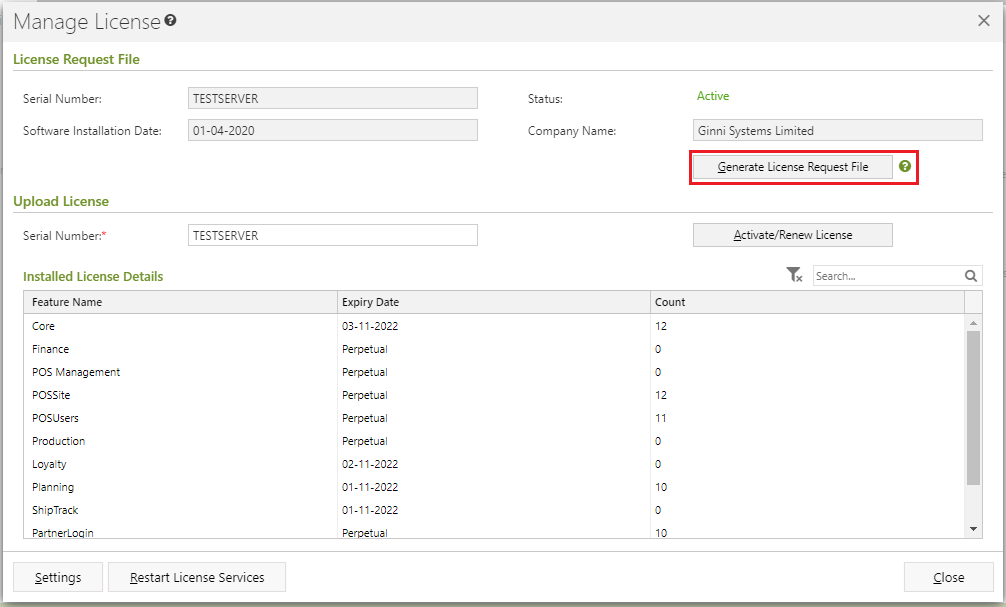
| License Request File | |
Go to Admin - Utilities - License - Manage License, click on Manage License |
|
The following fields appear in view only mode -
User Alert Ginesys Cloud Customers do not need to click on Generate License Request File their license is automatically provided by the License team. | |
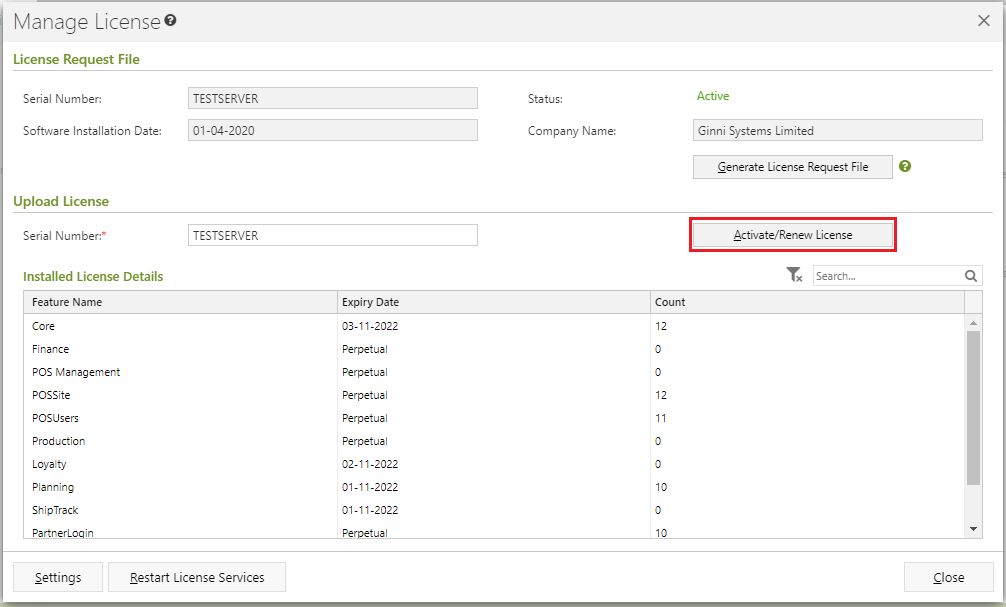
| Upload License | |
Once the new license is received. Click on the Activate / Renew License button, provide the Serial Number of the license. | |
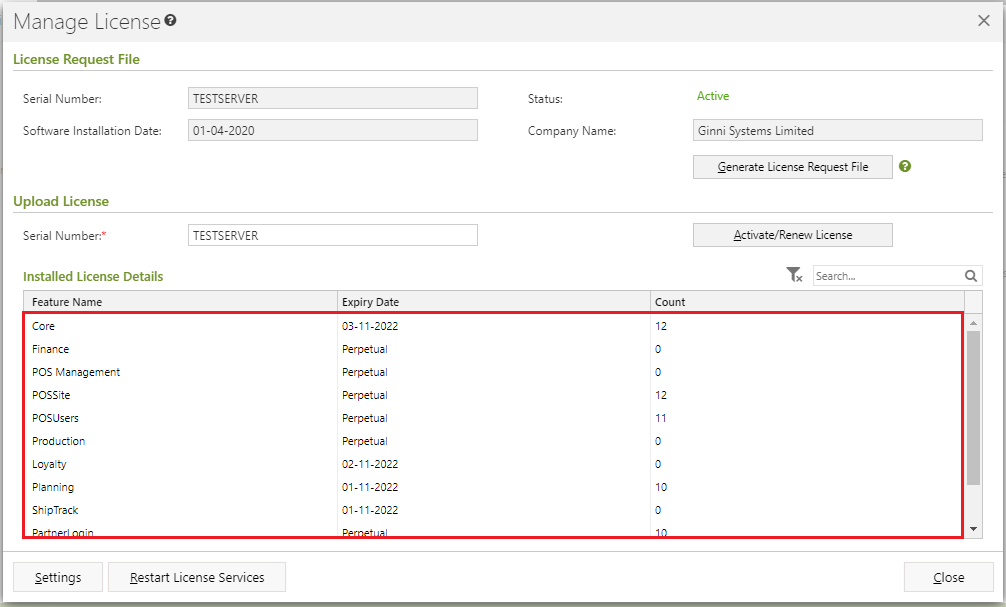
| Installed License Details | |
The details of the new license appears in the pane. | |
Now the click on the Restart License Services button to restart the Ginesys License Service and activate the new license. Then click on Close button to close the form. | |
